
This remarkably simple cake, baked from a recipe born of necessity during the Great Depression, holds a special place in the American culinary canon. Made without the costly and often scarce ingredients of eggs, butter, or milk, this chocolate confection is incredibly moist, tender, and surprisingly rich in flavor. It’s the ideal choice for a quick dessert that requires minimal cleanup and uses pantry staples you likely already have on hand. Whether you’re a seasoned baker looking for a nostalgic treat or a complete novice needing an easy win, the resilient and delicious wacky cake delivers a satisfying, classic crumb that pairs perfectly with a dusting of powdered sugar or a simple glaze. This is kitchen magic at its most accessible.
Table of Contents
The Essential Components for a Simple Dessert
For a nine-by-nine inch square pan.
The Dry Elements
- One and one half cups (180 grams) all-purpose flour
- Three quarters cup (150 grams) granulated sugar
- One third cup (32 grams) unsweetened cocoa powder
- One teaspoon baking soda
- One half teaspoon fine sea salt
The Wet Elements and Flavorings
- One teaspoon white distilled vinegar
- One teaspoon pure vanilla extract
- Five tablespoons neutral vegetable oil (like canola or grapeseed)
- One cup (240 milliliters) cold water
Quick Chronology: Mixing and Baking
- Preparation: Preheat the oven and prepare a nine-inch square pan by lightly greasing and flouring it.
- Dry Mix: In the prepared baking pan, whisk together the flour, sugar, cocoa powder, baking soda, and salt until completely combined and lump-free.
- Wet Additions: Create three shallow depressions (known as “wells”) in the dry mixture—two small and one large. Pour the vinegar into one small well, the vanilla extract into the other small well, and the vegetable oil into the large well.
- Hydration: Pour the cold water directly over the entire mixture.
- Stirring: Immediately stir the ingredients with a fork or whisk until just combined. The batter should be slightly lumpy but uniform in color. Avoid overmixing.
- Baking: Place the pan into the preheated oven and bake until a toothpick inserted into the center comes out clean.
- Cooling: Allow the cake to cool in the pan on a wire rack before cutting and serving.

Detailed Technique: Achieving the Perfect Texture
Setting the Stage for Success
Before you even touch an ingredient, it’s critical to get your oven to the correct temperature. Preheat your oven to three hundred fifty Fahrenheit. If your oven tends to run hot or cold, now is the time to check it with an oven thermometer to ensure accuracy. This cake relies on the chemical reaction of the baking soda and vinegar, and a steady, correct heat is key to a light, airy rise. Once the temperature is set, thoroughly grease your nine-by-nine inch pan and dust it lightly with flour or cocoa powder. A square pan is traditional for this recipe, allowing for neat, uniform pieces.
The Ingenuity of the “In-Pan” Method
The genius of this technique is the ability to mix everything in the pan, minimizing bowls and simplifying the process. When you combine the dry ingredients—flour, sugar, cocoa, soda, and salt—make sure to use a small whisk and ensure there are no pockets of baking soda or cocoa. The baking soda is the main leavening agent here, reacting with the vinegar, so it must be evenly distributed. Next, the process of creating the three wells is not just for show; it’s a measured way to introduce the fats and leaveners separately before hydration. The vinegar and baking soda need a moment to begin their effervescent reaction, which gives the cake its lift.
The Essential Stirring Phase
Once the water is poured over the top, the clock starts. The baking soda and vinegar will begin to fizz immediately. You must mix the batter only until all the dry streaks are incorporated. This is the stage where most bakers make the classic mistake of overmixing. Over-developing the gluten in the flour will result in a tough, chewy cake, which completely defeats the purpose of this tender, simple treat. The finished batter should be homogenous in color but look slightly lumpy and very liquidy. Do not try to smooth it out; those tiny air bubbles are what you are counting on for a light crumb.
Visual Cues for Doneness
Bake the wacky cake for approximately thirty to thirty-five minutes. You will know it is done when the cake begins to pull away slightly from the edges of the pan and the surface has set completely. The true test, however, is the toothpick test. Insert a clean wooden toothpick into the exact center of the cake; it should come out clean, perhaps with a few moist crumbs clinging to it, but no wet batter. If you see wet batter, give it another two to three minutes and test again. This cake can go from perfectly done to dry in a matter of moments, so watch it closely after the thirty-minute mark.

Expert Baker’s Pro-Tips and Insights
Sifting for a Superior Crumb
While the recipe is designed to be ultra-simple, taking an extra sixty seconds to sift the flour, cocoa, and baking soda together before putting them into the baking pan will result in an even finer, more velvety texture. Sifting aerates the dry ingredients and prevents small, dense clumps of cocoa powder from forming.
Utilizing Coffee for Depth
For a richer, deeper chocolate flavor, substitute the cold water with cold, brewed coffee. The bitterness of the coffee won’t be noticeable, but it enhances the natural earthiness of the cocoa, making the chocolate taste “more chocolatey.” Just ensure the coffee is fully cooled before using it to avoid prematurely activating the leavening agents.
The Importance of Cold Water
The water should be cold—straight from the tap or even briefly chilled in the refrigerator. Using cold water helps to slow down the initial reaction between the baking soda and vinegar. This controlled, slower reaction ensures that the bubbles expand more evenly during the baking process, resulting in a taller, better-risen cake.
Temperature is Critical for Cutting
Do not attempt to slice this cake while it is still warm. Because it lacks the structural support of eggs and butter, the cake is extremely delicate when hot. Allow it to cool completely in the pan on a wire rack—about one hour—before cutting it into squares. This ensures clean, defined slices that won’t crumble apart.
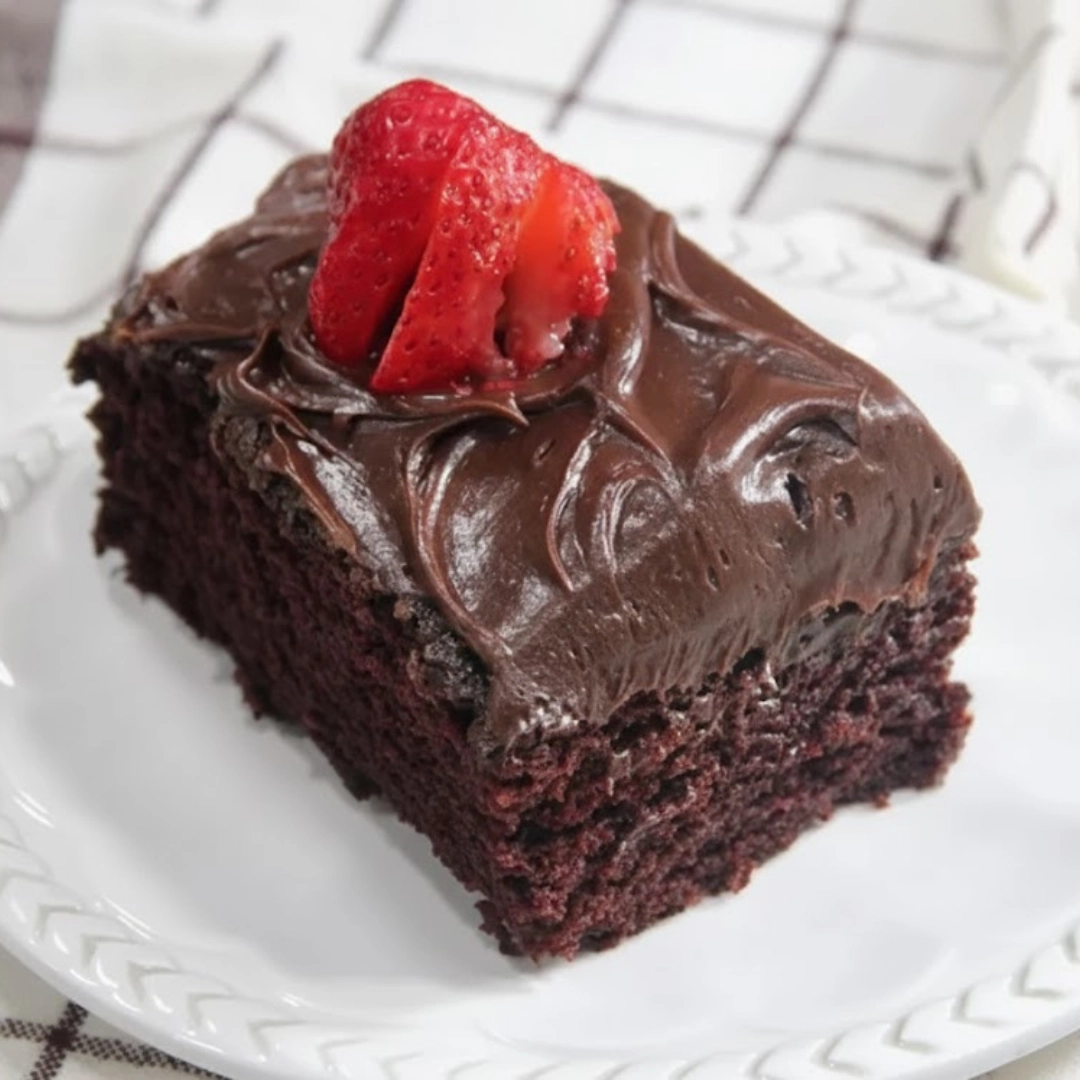
The Best Frosting is Simple
A traditional, no-fuss glaze is the perfect accompaniment. Mix two cups of powdered sugar with two tablespoons of milk or water and one half teaspoon of vanilla extract until smooth. Pour this thin glaze over the cooled cake; it will harden slightly and provide a sweet counterbalance to the cake’s mild chocolate profile.
Realistic Ingredient Substitutions
Alternative Leaveners
While baking soda and white vinegar are the classic pairing, you can substitute the vinegar with an equal amount of lemon juice or apple cider vinegar. Any acid will react with the baking soda to create the necessary carbon dioxide gas for lift. If you find yourself completely out of baking soda, you will need to replace the one teaspoon of baking soda with one tablespoon of baking powder, but you must then eliminate the vinegar, as baking powder already contains the necessary acid.
Flour Variations
This recipe works best with all-purpose flour for a tender, reliable result. However, for a slightly denser crumb, you can use a blend of one half whole wheat flour and one half all-purpose flour. Note that entirely gluten-free flours will require a binding agent like xanthan gum and will change the texture significantly, often resulting in a shorter, more crumbly cake.
Oil Swaps
The five tablespoons of oil can be any mild-flavored cooking oil. Canola and grapeseed are excellent neutral choices. Olive oil is generally too strong for a chocolate cake, but coconut oil can be used successfully if melted and cooled slightly before incorporation.

Elegant and Practical Serving Suggestions
The Classic Dust
The simplest and most elegant way to finish this cake is with a light, even dusting of powdered sugar. Do this just before serving, using a fine mesh sieve to ensure an even, beautiful coating that adds a touch of sweetness without overwhelming the chocolate.
Fresh Fruit Accent
Serve slices alongside a small mound of fresh seasonal berries, such as raspberries or strawberries. The slight tartness of the fruit provides a wonderful contrast to the mild sweetness of the cake. A dollop of dairy-free whipped cream or a plant-based vanilla ice cream is also an excellent addition.
Glazed for Portability
For a cake meant to be transported or served at a gathering, the simple sugar glaze (as described in the Pro Tips) is ideal. It seals in moisture and provides a neat, slightly crackled top layer that prevents the cake from drying out.
Commonly Asked Questions About This Simple Cake
Can I bake this recipe in a different pan size?
Yes, you can. If using an eight-inch round pan, you will need to increase the baking time by about five to ten minutes. If you opt for a standard nine-by-thirteen inch pan, you should double the recipe quantities and expect a longer bake time, closer to forty-five minutes, or until the center is set.
How should I store the leftover cake?
Store the cooled and cut cake in an airtight container at room temperature for up to three days. Because it is naturally egg- and dairy-free, it is very shelf-stable. If you plan to keep it longer, you can wrap individual slices tightly in plastic wrap and freeze them for up to one month. Thaw at room temperature for a quick dessert.
Why do you mix the ingredients right in the pan?
This unique mixing method is the signature of a true wacky cake. It was developed to save on washing dishes during a time when resources were scarce. More importantly, it ensures that the baking soda and vinegar are mixed just before baking, immediately starting the leavening process and maximizing the lift you get from the chemical reaction before the batter hits the heat.
Can I add chocolate chips or nuts?
Absolutely. This basic batter is an excellent canvas for additions. Stir in about a half cup of chocolate chips, walnuts, or pecans just after the batter comes together. Be careful not to stir too much, as you want to avoid overmixing the flour.
Nutritional Breakdown
| Nutrient | Amount per Serving |
| Calories | 245 kcal |
| Protein | 3 g |
| Carbs | 44 g |
| Fat | 7 g |
| Fiber | 2 g |
| Sugar | 27 g |
| Sodium | 195 mg |
Disclaimer
Nutrition information is an estimate and may vary based on preparation and ingredients used.

The Original Depression-Era Wacky Cake
Ingredients
- 1.5 cups all-purpose flour (180 grams)
- 0.75 cup granulated sugar (150 grams)
- 0.33 cup unsweetened cocoa powder (32 grams)
- 1 tsp baking soda
- 0.5 tsp fine sea salt
- 1 tsp white distilled vinegar
- 1 tsp pure vanilla extract
- 5 tbsp neutral vegetable oil (like canola or grapeseed)
- 1 cup cold water (240 milliliters)
Instructions
- Preheat the oven to three hundred fifty Fahrenheit. Lightly grease and flour a nine-by-nine inch square pan.
- In the prepared baking pan, whisk together the flour, sugar, cocoa powder, baking soda, and salt until completely combined and lump-free.
- Create three shallow depressions (wells) in the dry mixture—two small and one large. Pour the vinegar into one small well, the vanilla extract into the other small well, and the vegetable oil into the large well.
- Pour the cold water directly over the entire mixture, ensuring it covers all ingredients.
- Immediately stir the ingredients with a fork or whisk until just combined and uniform in color. The batter should be slightly lumpy and thin. Avoid overmixing.
- Place the pan into the preheated oven and bake for thirty to thirty-five minutes, or until a toothpick inserted into the center comes out clean.
- Allow the cake to cool completely in the pan on a wire rack before cutting and serving, about one hour.
Notes
Equipment
- Nine-by-nine inch square baking pan or similar size
- whisk or fork
- wire cooling rack


