

There is something undeniably comforting about the creamy, frosty swirl of a Vanilla Bean Frappuccino. It is a staple of coffee shop culture, yet it remarkably contains no coffee at all. This velvety beverage has become a favorite for those seeking a sweet, caffeine-free indulgence that feels like a sophisticated milkshake but drinks like a premium frozen treat. While a trip to the local cafe is always a nice luxury, the costs of daily visits can quickly spiral, especially for families.
This comprehensive guide will walk you through the process of recreating this iconic drink in your own kitchen. By using simple, high-quality ingredients you likely already have in your pantry, you can achieve that signature “crème base” texture and rich vanilla aroma for a fraction of the price. Whether you are looking for a weekend treat for the kids or a nostalgic afternoon pick-me-up for yourself, this recipe delivers professional results with home-style ease.
Table of Contents
Ingredients
To achieve the perfect balance of sweetness and a velvety mouthfeel, you will need the following components. Ensure your measurements are precise to maintain the proper consistency.
- 1 cup Ice
- 1 1/2 cup Milk
- 3 scoops Vanilla Bean Ice Cream
- 1 tsp Sugar
- 1/8 tsp Vanilla Extract
- Whipped Cream (optional, for topping)

Instructions
Creating this frozen masterpiece is incredibly straightforward and takes less than five minutes from start to finish.
- Place the ice, milk, vanilla bean ice cream, sugar, and vanilla extract into the jar of a high-powered blender.
- Secure the lid tightly and blend the mixture on high speed until the ice is completely pulverized and the liquid is smooth and frothy.
- Pour the mixture immediately into a chilled serving glass.
- If desired, top with a generous swirl of whipped cream.
- Serve with a straw and enjoy while the consistency is at its peak.
Deep-Dive Step-by-Step Details
Mastering the texture of a blended beverage requires more than just pushing a button; it involves understanding how the ingredients interact under the force of the blades. Here is a closer look at the process.
Prepping the Blender Jar
The order in which you add ingredients to your blender matters more than you might think. Start by pouring in your milk. Having the liquid at the bottom creates a “vortex” that pulls the heavier items down toward the blades. Follow this with the vanilla extract and the teaspoon of sugar. Next, add your three scoops of vanilla bean ice cream. The ice should always be the final addition. By placing the ice on top, you ensure it is crushed efficiently without getting stuck in the bottom corners of the jar.
Achieving the Perfect Emulsion
When you turn the blender on, start at the lowest speed to break up the large chunks of ice and the scoops of ice cream. Gradually increase the speed to high. You are looking for a specific visual cue: a smooth, spinning funnel of cream. If the blender sounds like it is spinning freely without moving the ingredients, you may have an air pocket. Simply stop the blender, give it a quick stir with a long spoon, and start again. You want to blend until you no longer hear the “clinking” sound of ice hitting the sides of the jar. This usually takes between 30 and 45 seconds depending on the motor strength of your appliance.
The Pour and Presentation
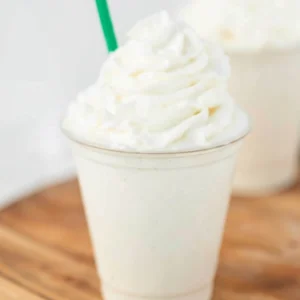
Once the mixture is thick and uniform, the clock starts ticking. Blended drinks begin to separate and melt the moment the blades stop. Pour the Frappuccino into a tall glass, ideally one that has been chilling in the freezer for ten minutes. This keeps the drink frosty for longer. If you are using whipped cream, start at the outer edge of the glass and spiral inward toward the center to create a professional-looking peak.

Achieving the Ultimate Creamy Consistency
The secret to a Frappuccino that doesn’t taste “watery” or “thin” lies in the ratio of solids to liquids. In a professional setting, Starbucks uses a specific xanthan-gum-based syrup to emulsify their drinks. In this home version, we use vanilla bean ice cream to perform that same role. The fats and stabilizers in the ice cream act as a binder, holding the ice crystals in suspension with the milk.
If you find your drink is too runny, the culprit is usually either too much milk or not enough ice cream. Always use a standard measuring cup for the milk and a generous scoop for the ice cream. If the drink is too thick to travel up a straw, add an extra tablespoon of milk and pulse the blender once or twice. The goal is a texture that is thicker than milk but smoother than a traditional hard-scoop milkshake.
Modifications and Substitutions
While the classic recipe is a crowd-pleaser, there are several ways to adapt this drink to suit specific dietary needs or flavor preferences.
Dairy-Free Alternatives
If you are avoiding dairy, you can substitute the cow’s milk with oat milk or coconut milk. Oat milk is particularly effective in blended drinks because of its natural creaminess and neutral flavor profile. For the ice cream, look for a high-quality dairy-free vanilla bean frozen dessert made from an almond or coconut base. Ensure the substitute also contains visible vanilla bean flecks for the best visual appeal.
Flavor Enhancements
While this is a vanilla-focused recipe, it serves as an excellent canvas for other flavors. You can add a drizzle of chocolate or caramel sauce to the inside of the glass before pouring in the blended mixture. For a fruit-forward twist, a few fresh strawberries added to the blender will transform this into a Strawberries and Cream style treat. If you are a fan of “French Vanilla” rather than “Vanilla Bean,” you can simply swap the ice cream variety, though you will lose the aesthetic appeal of the tiny black vanilla specks.
Accompaniments and Serving Ideas
A Vanilla Bean Frappuccino is a dessert in a glass, but it can also be part of a larger spread. If you are serving this for a brunch or a mid-afternoon gathering, it pairs beautifully with light, airy pastries.
Consider serving these alongside:
- Petite Scones: A lemon or blueberry scone provides a tart contrast to the sweet creaminess of the vanilla.
- Fresh Fruit Skewers: To keep the palate refreshed, serve with cold melon or berries.
- Shortbread Cookies: The buttery crunch of a shortbread cookie is the perfect texture companion to the smooth drink.
For a fun family activity, set up a “Frappuccino Bar.” Place the blender in a central location and offer different toppings like sprinkles, crushed cookies, or different flavored syrups so everyone can customize their drink after it has been blended.
Deep-Dive FAQ
Can I make this drink ahead of time for a party?
Blended drinks are best enjoyed immediately because the ice eventually melts and separates from the cream. However, if you must prepare it in advance, you can blend the mixture and store it in a sealed mason jar in the back of the freezer. When you are ready to serve, let it sit on the counter for about 20 minutes to soften, then give it a vigorous shake or a quick 10-second re-blend to restore the frothy texture.
Is there a way to make this without ice cream?
Yes, though the texture will be slightly different. You can use heavy whipping cream and a bit more sugar to mimic the richness of ice cream. If you go this route, I recommend adding a pinch of vanilla bean powder or the scrapings of half a vanilla bean pod to ensure that the deep, authentic vanilla flavor remains the star of the show.
Why does my Frappuccino have large chunks of ice?
This usually happens if the blender isn’t powerful enough or if the ice-to-liquid ratio is off. To fix this, try using smaller ice cubes or “crushed” ice from your freezer’s dispenser rather than large, solid blocks. Blending for a few seconds longer than you think you need to will also help ensure every crystal is finely milled into the cream.
Can I add coffee to this recipe?
While the Vanilla Bean Frappuccino is traditionally a caffeine-free “Crème” drink, you can certainly add a shot of cooled espresso or a tablespoon of instant coffee powder if you want a caffeine kick. Keep in mind that adding liquid coffee will thin out the drink, so you may need to add a few more ice cubes or an extra half-scoop of ice cream to maintain the thickness.
The Joy of Home Coffee Shop Creations
Recreating your favorite cafe drinks at home is a rewarding experience that combines the precision of baking with the creativity of mixology. This Vanilla Bean Frappuccino recipe proves that you don’t need expensive equipment or hard-to-find syrups to produce a world-class treat. By focusing on the quality of your vanilla bean ice cream and mastering the blend, you can serve up a drink that rivals any professional barista’s work. It is a simple luxury that brings a bit of magic to the kitchen, one frosty sip at a time.
Nutrition Table
The following values are estimates based on the specific ingredients listed in this recipe.
| Nutrient | Amount Per Serving |
| Calories | 649 kcal |
| Total Fat | 33 g |
| Saturated Fat | 20 g |
| Cholesterol | 123 mg |
| Sodium | 316 mg |
| Total Carbohydrates | 68 g |
| Dietary Fiber | 1 g |
| Sugars | 64 g |
| Protein | 18 g |
| Vitamin A | 1425 IU |
| Calcium | 667 mg |
Nutritional Disclaimer
Nutritional information provided is an estimate and will vary based on the specific brands of milk and ice cream used. For those with specific dietary requirements, please calculate values using the labels from your chosen ingredients.
Starbucks Vanilla Bean Frappuccino Recipe
Ingredients
- 1 cup Ice
- 1.5 cups Milk
- 3 scoops Vanilla Bean Ice Cream
- 1 tsp Sugar
- 0.125 tsp Vanilla Extract
- Whipped Cream (optional for topping)
Instructions
- Place the ice, milk, vanilla bean ice cream, sugar, and vanilla extract into the blender jar.
- Secure the lid and blend on high speed until the ice is completely smooth and the mixture is frothy, approximately 30 to 45 seconds.
- Transfer the blended mixture immediately into a chilled serving glass.
- Top with a generous swirl of whipped cream if desired and serve immediately with a straw.
Notes
Equipment
- High-powered blender (like Vitamix or Waring)
- Ice cream scoop
- measuring cups and spoons
- Tall serving glass


