
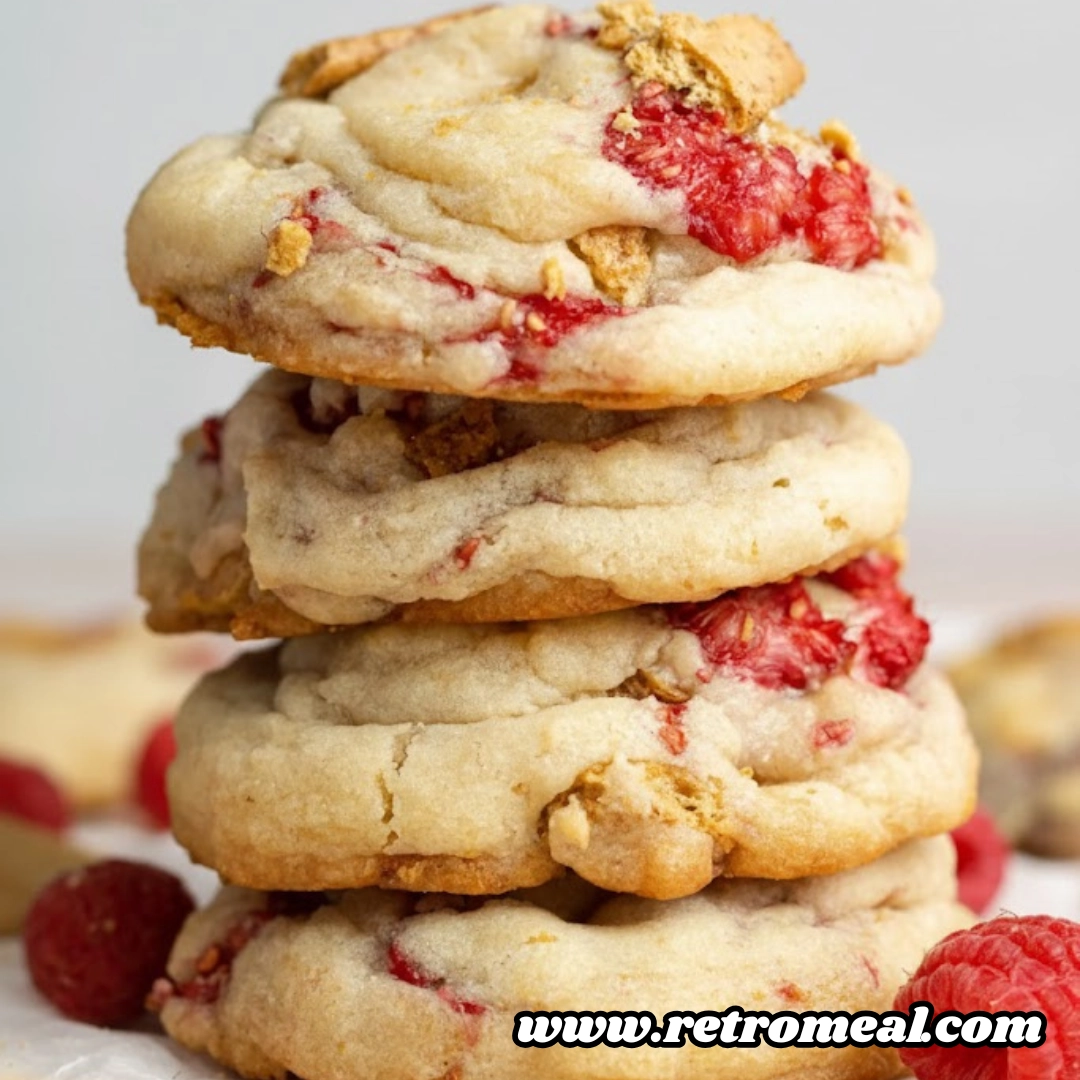
There is something inherently magical about the combination of tart fruit and rich, velvety cream cheese. While many of us grew up loving the classic cookies found at popular sandwich shops, these Raspberry Cheesecake Cookies take that nostalgic flavor profile and elevate it to a gourmet level. Imagine a soft, buttery cookie dough infused with the brightness of fresh berries and the nostalgic crunch of graham cracker crumbs, all hiding a surprise center of sweet, frozen cream cheese. This recipe is not just a snack; it is a full dessert experience that bridges the gap between a handheld treat and a decadent slice of cheesecake.
Whether you are hosting a summer garden party or simply looking for a way to use up a carton of fresh raspberries, these cookies are the perfect solution. They offer a sophisticated balance of textures—the snap of the graham cracker, the softness of the dough, and the lusciousness of the filling—that will leave your kitchen smelling like a professional bakery.
Table of Contents
Ingredients for Your Raspberry Cheesecake Cookies
To achieve the perfect balance of flavor and structure, you will need the following high-quality ingredients. Please pay close attention to the specific measurements to ensure your cookies have the ideal rise and spread.
For the Luscious Cream Cheese Filling
- 3/4 cup cream cheese, softened (approximately 6 ounces)
- 1/3 cup powdered sugar (also known as icing or confectioner sugar)
For the Raspberry Cookie Dough
- 1 cup butter, softened to room temperature
- 3/4 cup granulated sugar
- 1/4 cup light brown sugar, packed
- 1 large egg
- 1 large egg yolk
- 1 1/2 teaspoons vanilla extract
- 1 teaspoon baking soda
- 1/4 teaspoon salt
- 2 1/3 cups plus 3 tablespoons all purpose flour (approximately 320 grams)
- 1/2 cup fresh raspberries, roughly chopped
- 1/2 cup chopped graham crackers (roughly 4 to 5 full sheets), plus extra for the topping

Step by Step Instructions for Baking Success
Follow these precise steps to ensure your cookies are perfectly stuffed and beautifully baked.
Phase One: Preparing the Cheesecake Center
- Begin by lining a small baking sheet or a large plate with a piece of parchment paper.
- In a small mixing bowl, combine your softened cream cheese and the powdered sugar. Use a whisk or a handheld mixer to beat the mixture until it is completely smooth and free of lumps.
- Carefully scoop out 20 individual teaspoons of the sweetened cream cheese mixture onto your prepared sheet.
- Place the sheet in the freezer for at least 45 to 60 minutes. It is vital that these mounds are frozen almost completely solid before you attempt to stuff the dough.
Phase Two: Mixing the Dough
- Once the filling is nearly frozen, line two large baking sheets with parchment paper and set them aside.
- In a separate bowl, whisk together the all purpose flour, salt, and baking soda.
- In the bowl of a stand mixer or using a handheld mixer, cream together the softened butter, granulated sugar, and light brown sugar. Beat on medium-high speed until the mixture is light and fluffy, which usually takes about 2 minutes.
- Add the egg, the additional egg yolk, and the vanilla extract. Mix until well incorporated.
- Turn the mixer to low and add the dry ingredient mixture. Mix only until just combined; do not overwork the dough.
- Using a spatula, gently fold in the crushed graham cracker pieces.
- Finally, fold in the roughly chopped raspberries. Work slowly to avoid crushing the fruit too much, which can cause the dough to become overly wet or turn entirely purple.
Phase Three: Assembly and Chilling
- Scoop out 20 tablespoon-sized balls of dough. You will have two balls of dough for every one finished cookie.
- Take 10 of the dough balls and press a small indentation into the center of each.
- Remove your frozen cream cheese scoops from the freezer and place one into each indentation.
- Cover each cream cheese-topped ball with one of the remaining 10 dough balls. Pinch the sides together firmly to seal the cream cheese inside. You should end up with 10 large, tall balls of dough. Repeat this process for the second tray.
- Sprinkle the tops of the dough balls with additional crushed graham crackers.
- Place the prepared trays in the refrigerator to chill while you preheat your oven to 350 degrees Fahrenheit.
Phase Four: The Bake
- Bake the cookies one tray at a time in the preheated oven for 9 to 12 minutes. Look for the edges to turn a very light golden brown while the tops remain soft.
- Allow the cookies to rest on the hot baking sheet for 10 to 15 minutes. This is a crucial step as it allows the molten cream cheese center to set.
- Transfer the cookies to a wire cooling rack to cool completely before serving.

Achieving the Ultimate Creamy Consistency
The secret to a successful stuffed cookie lies entirely in the temperature and texture of the cream cheese. If the cream cheese is too soft when it enters the oven, it will liquefy and burst through the sides of the cookie dough, leading to a messy baking sheet and an empty cookie. By freezing the filling into solid “pucks,” you give the cookie dough enough time to set its structure around the filling before the center begins to melt.
Furthermore, the ratio of sugar to cream cheese is specifically balanced to prevent the filling from becoming too runny. If you are using a dairy-free or vegan cream cheese alternative, you may find that the consistency is naturally softer. In these instances, reducing the powdered sugar slightly can help maintain a firmer center. The goal is a texture that mimics a baked cheesecake—dense, smooth, and incredibly rich.
Mastering the Art of Fruit Integration
When working with fresh berries in a cookie dough, moisture management is your primary challenge. Raspberries are delicate and have a high water content. If you wash your berries immediately before use, you must pat them completely dry with a paper towel. Excess surface moisture will break down the dough’s structure, resulting in a sticky, unmanageable mess.
When folding the fruit into the dough, use a “cut and fold” motion. This involves slicing through the center of the dough with a spatula and folding the bottom over the top. This technique distributes the raspberries evenly without mashing them. If the berries are crushed, they release their juices, which will turn your dough a vibrant shade of pink or purple. While this doesn’t affect the flavor, keeping the berries in distinct “pockets” creates a beautiful contrast against the golden cookie.
Diversifying Your Ingredients and Substitutions
This recipe is remarkably versatile and can be adapted to various dietary needs or flavor preferences. If you do not have fresh raspberries on hand, freeze-dried raspberries are an excellent alternative. They provide a concentrated burst of flavor and a beautiful color without adding any extra moisture to the dough. Frozen raspberries can also be used, though you should be aware that they will bleed color into the dough much more than fresh ones.
For those following a plant-based diet, this recipe has been successfully tested with vegan butter and vegan cream cheese. We recommend using a high-quality vegan butter stick rather than a tub margarine to ensure the cookies have the proper fat content for a soft crumb. When choosing a vegan cream cheese, look for brands that are known for their firmness when chilled, as some coconut-oil-based versions may melt faster than traditional dairy.
Perfect Pairings and Presentation Styles
While these cookies are a powerhouse on their own, they can be served in several ways to enhance the dessert experience. For a truly indulgent treat, serve them slightly warm with a scoop of premium vanilla bean ice cream. The cold ice cream against the warm, creamy center creates a delightful temperature contrast.
If you are looking to mimic the aesthetic of a high-end bakery, you can drizzle the cooled cookies with a simple glaze made of powdered sugar and a splash of milk, or even a melted white chocolate drizzle. To emphasize the “cheesecake” theme, serve these alongside a small dish of extra raspberry coulis for dipping. They also pair exceptionally well with a sharp espresso or a cold glass of almond milk, which helps cut through the richness of the cream cheese filling.
Deep-Dive Kitchen Wisdom and Common Questions
Why did my cookies spread too much during the baking process?
Excessive spreading is usually caused by the butter being too oily or the dough not being chilled sufficiently. Ensure your butter is softened but still cool to the touch—never melted. Additionally, the time the dough spends in the refrigerator while the oven preheats is vital. This chill time firms up the fats, ensuring the cookie holds its tall, stuffed shape rather than melting into a flat disc.
Can I make these cookies smaller to yield a larger batch?
While you can certainly try, these cookies are designed to be large to accommodate the cream cheese center. If you make the dough balls too small, there won’t be enough “wall” to hold the filling, and it will likely leak out. For the best results, stick to the recommended 20 tablespoons of dough to create 10 large, stuffed masterpieces.
How do I know exactly when the cookies are finished baking?
The “eye test” is key here. You are looking for the very edges of the cookie to turn a light, sandy gold. The centers should still look slightly underdone and soft. Because these cookies have a heavy filling, they will continue to firm up as they cool on the hot baking sheet. Taking them out at the 10-minute mark usually yields that perfect “soft-baked” texture.
Is it possible to prepare the dough in advance?
Yes, you can prepare the cookie dough a day in advance and keep it in the refrigerator. However, we recommend not adding the fresh raspberries until you are ready to assemble and bake, as the salt and sugar in the dough will draw moisture out of the berries over time, making the dough soggy. You can also freeze the un-stuffed dough balls for up to three months.
Ensuring Proper Storage and Freshness
Because these cookies contain a significant amount of cream cheese, they require more care in storage than a standard chocolate chip cookie. To maintain the best texture, store the cooled cookies in an airtight container in the refrigerator. They will remain fresh and delicious for 3 to 4 days. While they are safe at room temperature for a few hours during a party, the refrigerator keeps the cream cheese filling at a safe temperature and maintains the cookie’s structural integrity.
If you find that the cookies have become a bit too firm in the fridge, you can bring them back to life by microwaving them for about 10 seconds. This will soften the dough and make the cheesecake center creamy again. You can also freeze the baked cookies in a heavy-duty freezer bag for up to two months; simply thaw them in the refrigerator overnight before enjoying.
Nutrient Profile and Ingredient Transparency
This recipe yields 20 large cookies. The following values are estimates based on standard ingredients.
| Nutrient | Amount Per Serving |
| Calories | 156 calories |
| Total Fat | 11 grams |
| Saturated Fat | 4 grams |
| Cholesterol | 18 milligrams |
| Sodium | 203 milligrams |
| Total Carbohydrates | 14 grams |
| Dietary Fiber | 1 gram |
| Sugars | 13 grams |
| Protein | 1 gram |
Nutritional Disclaimer
The nutritional information provided here is an estimate intended for educational purposes. Actual nutritional values may vary based on the specific brands of ingredients used, such as the type of butter or cream cheese. For precise dietary tracking, we recommend calculating the values using the specific products in your pantry.
Parting Thoughts on This Berry-Filled Delight
Creating these cookies is an act of culinary love. While they require a few extra steps compared to a basic drop cookie—specifically the freezing of the filling and the careful folding of the fruit—the result is undeniably worth the effort. You end up with a dessert that is bright, tangy, creamy, and crunchy all at once. It is a sophisticated take on a classic flavor profile that appeals to children and adults alike. Once you take your first bite of that hidden cheesecake center, you will understand why these have become a staple in kitchens across the country.

Raspberry Cheesecake Cookies (Stuffed!)
Ingredients
- 0.75 cup cream cheese, softened (6 oz)
- 0.33 cup powdered sugar (use 1/4 cup if using vegan cream cheese)
- 1 cup butter, softened
- 0.75 cup granulated sugar
- 0.25 cup light brown sugar
- 1 large egg
- 1 large egg yolk
- 1.5 tsp vanilla extract
- 1 tsp baking soda
- 0.25 tsp salt
- 2.25 cups all purpose flour (plus 3 tbsp / 320g total)
- 0.5 cup fresh raspberries, roughly chopped
- 0.5 cup chopped graham crackers (4-5 sheets)
Instructions
- Whisk softened cream cheese and powdered sugar until smooth. Scoop 20 individual teaspoons onto a parchment-lined tray.
- Place the cream cheese scoops in the freezer for 45 to 60 minutes until frozen almost solid.
- Beat the softened butter, granulated sugar, and brown sugar together until light and fluffy (about 2 minutes). Mix in the egg, egg yolk, and vanilla.
- Add flour, baking soda, and salt. Mix until just combined. Gently fold in the crushed graham crackers.
- Gently fold in the chopped raspberries by hand to prevent squishing them or turning the dough purple.
- Scoop 20 tablespoon-sized balls. Press a dent into 10 balls, place frozen cream cheese inside, and cover with a second dough ball. Pinch edges to seal.
- Place trays in the fridge to firm up while preheating the oven to 350 Fahrenheit. This prevents over-spreading.
- Bake for 9-12 minutes until edges are lightly golden. Rest on the tray for 15 minutes before moving to a wire rack.
Notes
Equipment
- Electric hand mixer or stand mixer
- Large baking sheets Two required
- parchment paper
- kitchen scale Highly recommended for flour accuracy
- wire cooling rack


