
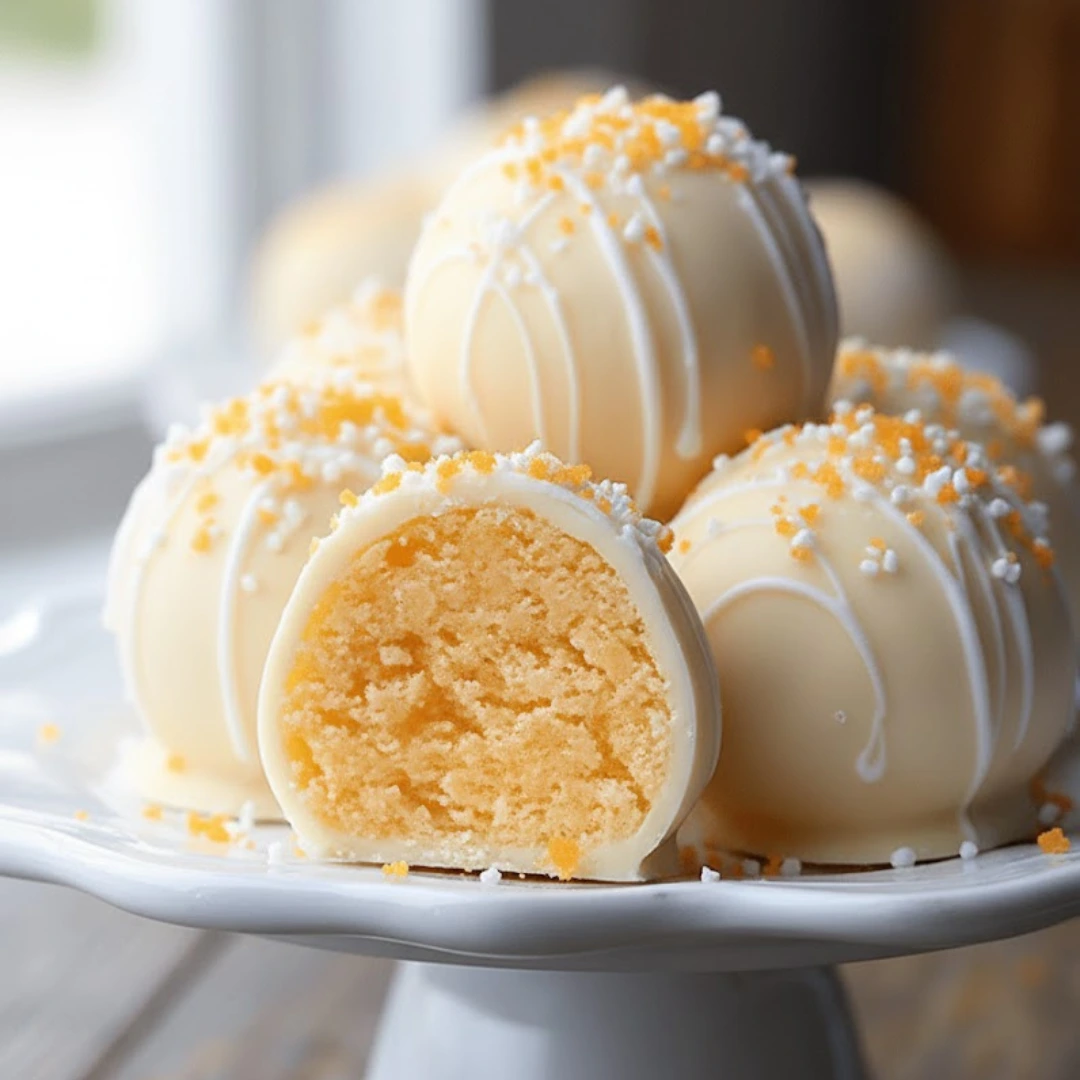
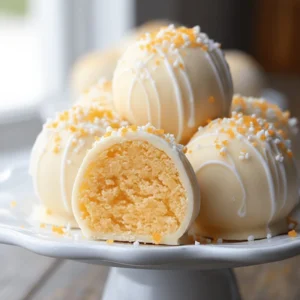
The nostalgia of a summer afternoon spent chasing the ice cream truck is a universal memory for many, and nothing captures that essence quite like the classic orange and cream popsicle. These Orange Creamsicle Truffles take those beloved flavors and transform them into a sophisticated, bite-sized confection that requires zero time in the oven. Whether you are hosting a festive garden party or simply looking for a sweet pick-me-me up to keep in the refrigerator, these truffles offer a bright, citrusy punch balanced by a velvety, decadent finish. They are incredibly easy to assemble, making them a fantastic project for novice bakers and seasoned hosts alike who want maximum flavor with minimal kitchen heat.
Table of Contents
Ingredients
To ensure your Orange Creamsicle Truffles have the perfect structural integrity and flavor profile, gather the following high-quality components.
- 1 cup vanilla wafer crumbs
- 8 oz cream cheese softened
- 1/2 cup powdered sugar
- 1/4 cup orange juice
- 1 tablespoon orange zest
- 1 teaspoon vanilla extract
- 1 cup white chocolate chips
- 1 tablespoon coconut oil optional
- 1/4 cup crushed graham crackers for rolling

Instructions
Follow these precise steps to create a batch of perfectly set, delicious citrus treats.
- In a large mixing bowl, combine the vanilla wafer crumbs, softened cream cheese, powdered sugar, orange juice, orange zest, and vanilla extract.
- Mix the ingredients thoroughly until the texture is well combined and completely smooth.
- Place the bowl in the refrigerator and allow the mixture to chill for approximately 30 minutes. This makes the dough much easier to handle.
- Once the mixture is properly chilled, use a small cookie scoop or your hands to form the dough into 1 inch balls.
- Arrange the formed balls on a baking sheet lined with parchment paper.
- In a microwave-safe bowl, combine the white chocolate chips and the optional coconut oil. Heat in 30 second intervals, stirring well between each session, until the chocolate is smooth and glossy.
- Carefully dip each truffle into the melted white chocolate. Allow any excess to drip back into the bowl before rolling the truffle in the crushed graham crackers.
- Return the coated truffles to the parchment-lined baking sheet and refrigerate for a final 30 minutes to allow the coating to set firmly.
- Serve the truffles chilled.

Achieving the Ultimate Creamy Consistency
The secret to a professional-grade truffle lies almost entirely in the preparation of the base. When you are working with the cream cheese, it is vital that it reaches room temperature before you begin mixing. If the cheese is even slightly cold, you will likely end up with small white lumps that are difficult to smooth out once the dry vanilla wafer crumbs are added. Softened cream cheese integrates seamlessly with the powdered sugar and orange juice, creating a luxurious mouthfeel that mimics the center of a high-end chocolate.
When incorporating the orange zest, try to use a microplane to get the finest possible texture. The zest contains the essential oils that provide that signature “creamsicle” aroma, but you want to avoid any large pieces of peel that could disrupt the smoothness of the truffle. As you mix the crumbs and liquid, you will notice the dough starts out looking a bit loose. Do not be tempted to add more crumbs immediately. The chilling period in the refrigerator allows the vanilla wafer crumbs to hydrate, soaking up the orange juice and vanilla extract, which naturally firms up the mixture into a moldable dough.
Deep Dive Into Citrus Confectionery Science
Understanding why these ingredients work together can help you become a more confident treat maker. The vanilla wafer crumbs act as the “flour” in this no-bake scenario, providing a neutral, sweet base that allows the acidity of the orange to shine. Because vanilla wafers have a high sugar and fat content, they hold together better than standard flour when mixed with moisture.
The white chocolate coating serves two purposes: flavor and protection. White chocolate is technically a mixture of cocoa butter, milk solids, and sugar. When melted with a teaspoon of coconut oil, the fat molecules align to create a thinner, more fluid coating. This ensures that when you dip the chilled truffle centers, the chocolate doesn’t go on too thick, which could overwhelm the delicate orange flavor. Furthermore, the coconut oil lowers the melting point slightly, giving the shell a “snap” that isn’t too hard to bite through. Using fresh orange juice rather than a concentrate is also key; the natural citric acid cuts through the richness of the cream cheese, preventing the dessert from feeling overly heavy on the palate.
Creative Modifications and Alternative Ingredients
While the classic recipe is a crowd-pleaser, there are several ways to tweak these Orange Creamsicle Truffles to suit different dietary needs or flavor preferences. If you find yourself wanting a deeper, more complex profile, you can experiment with the type of chocolate used for the exterior.
- Dark Chocolate Contrast: For those who find white chocolate a bit too sweet, dipping these orange centers in a 60 percent dark chocolate provides a sophisticated “Terry’s Chocolate Orange” vibe.
- Nutty Texture: If you want to move away from the graham cracker coating, finely chopped toasted almonds or macadamia nuts offer a wonderful salty contrast to the sweet citrus.
- Plant-Based Adjustments: To make these truffles vegan-friendly, you can easily swap the traditional cream cheese for a high-quality almond or soy-based cream cheese alternative. Ensure your vanilla wafers are vegan-certified, and use a dairy-free white chocolate or a dark chocolate cocoa butter blend for the shell.
- Spice Infusions: A tiny pinch of ground cardamom or ginger added to the cream cheese mixture can elevate the orange flavor, giving it a warm, artisanal touch that is perfect for the autumn months.
Strategic Accompaniments and Presentation
Presentation is a major part of the culinary experience, especially with small-format desserts like truffles. To make these Orange Creamsicle Truffles look as good as they taste, consider serving them in individual mini paper cupcake liners. This not only looks professional but also makes them easier for guests to pick up at a party without getting chocolate on their fingers.
Regarding pairings, these truffles are naturally bright and sweet, so they pair beautifully with beverages that have a bit of acidity or bitterness. A dry sparkling wine, such as a Brut Champagne or a crisp Prosecco, cuts through the creaminess of the white chocolate brilliantly. For a non-alcoholic option, an iced Earl Grey tea—which already features notes of bergamot citrus—complements the orange zest perfectly. If you are serving these as part of a larger dessert spread, place them alongside darker, richer items like espresso brownies or salted caramel tarts to provide a refreshing palate cleanser.
Extensive Step-by-Step Culinary Breakdown
Preparing the Base Mixture
Start by pulsing your vanilla wafers in a food processor until they reach a fine, sandy consistency. You don’t want any large chunks, as these will cause the truffles to fall apart when you try to roll them. Once the crumbs are ready, cream the softened cream cheese and powdered sugar together first. Only after they are fluffy should you add the liquid elements—the orange juice and vanilla. This sequence prevents the cream cheese from breaking or curdling. Fold in the orange zest last to keep the oils fresh and potent.
The Importance of the Chilling Phase
Do not skip the 30-minute chill. When the mixture is at room temperature, it is quite sticky. Chilling solidifies the fats in the cream cheese and the cocoa butter within the wafer crumbs. If you try to roll them too early, the heat from your palms will melt the dough, making it impossible to get a perfect sphere. If your kitchen is particularly warm, you may even want to chill the dough for a full hour.
Mastering the Coating Technique
Melt your white chocolate in a narrow, deep bowl rather than a wide, shallow one. This depth makes it much easier to fully submerge the truffle balls. Use a fork or a specialized dipping tool to lift the truffle out of the chocolate. Tap the fork gently against the side of the bowl to shake off the excess. This prevents a “foot” of chocolate from forming at the bottom of your truffle once it sets on the parchment paper.
The Final Set and Storage
The second chilling phase is where the magic happens. This sets the chocolate shell and allows the graham cracker crumbs to adhere firmly. Once the truffles are hard to the touch, they are ready. If you aren’t serving them immediately, move them to an airtight container. Because of the high cream cheese content, these must be stored in the refrigerator. They can stay fresh for up to seven days, though they are usually devoured much faster than that.
Frequently Asked Questions
Can I prepare these truffles several days before an event?
Yes, these are an excellent make-ahead dessert. You can prepare the entire recipe up to three days in advance and keep them in the refrigerator. In fact, many people find that the orange flavor becomes even more pronounced after the ingredients have had 24 hours to meld together. Just ensure they are kept in a sealed container so they don’t absorb any other odors from the fridge.
What is the best way to prevent the white chocolate from seizing?
White chocolate is notoriously finicky because it has a lower burning point than dark chocolate. The key is to avoid any contact with water—even a single drop can cause the chocolate to turn into a clumpy mess. Always use a bone-dry bowl and spatula. Additionally, heating in short 30 second bursts at 50 percent power is much safer than using full power, as it prevents the milk solids from scorching.
Is it possible to freeze these for long-term storage?
Certainly! These truffles freeze remarkably well. To freeze, place the set truffles on a tray in the freezer for one hour until they are flash-frozen, then transfer them to a heavy-duty freezer bag. They will maintain their quality for about one month. When you are ready to eat them, thaw them slowly in the refrigerator overnight to prevent condensation from forming on the chocolate shells.
My mixture is too sticky to roll even after chilling; what should I do?
If your mixture remains too tacky to handle, it may be due to the moisture content of your specific brand of cream cheese or the size of the orange you zested. Simply stir in an additional two to three tablespoons of vanilla wafer crumbs. This will absorb the excess moisture without significantly altering the flavor profile. Give it another ten minutes in the fridge, and you should be good to go.
A Bright Conclusion to Your Culinary Journey
Bringing a bit of sunshine into your kitchen doesn’t require a complex list of ingredients or hours over a hot stove. These Orange Creamsicle Truffles are a testament to the power of simple, high-quality ingredients used effectively. The combination of the zesty orange, the tang of the cream cheese, and the buttery crunch of the vanilla wafers creates a multi-dimensional treat that feels far more industrious than it actually is. By following the chilling and dipping tips provided, you can produce a batch of confections that look like they came straight from a high-end candy shop. Enjoy the process of rolling and decorating, and most importantly, enjoy the sweet, nostalgic reward of that first citrusy bite.
Nutrition Information
| Nutrient | Amount Per Serving |
| Calories | 130 calories |
| Total Fat | 8 grams |
| Saturated Fat | 5 grams |
| Polyunsaturated Fat | 3 grams |
| Cholesterol | 20 milligrams |
| Sodium | 50 milligrams |
| Total Carbohydrates | 12 grams |
| Sugars | 6 grams |
| Protein | 2 grams |
Nutritional Disclaimer
The nutritional values provided are estimates based on standard ingredient measurements. Actual nutritional content may vary depending on specific brands used or slight variations in portion sizes. For individuals with specific dietary restrictions or medical needs, please consult with a certified nutrition professional.
No-Bake Orange Creamsicle Truffles
Ingredients
- 1 cup vanilla wafer crumbs
- 8 oz cream cheese, softened
- 0.5 cup powdered sugar
- 0.25 cup orange juice
- 1 tbsp orange zest
- 1 tsp vanilla extract
- 1 cup white chocolate chips
- 1 tbsp coconut oil (optional)
- 0.25 cup crushed graham crackers for rolling
Instructions
- In a large mixing bowl, combine the vanilla wafer crumbs, softened cream cheese, powdered sugar, orange juice, orange zest, and vanilla extract.
- Blend the mixture until smooth and creamy, then refrigerate for about 30 minutes to make it easier to handle.
- Using a small cookie scoop or your hands, form the chilled mixture into 1-inch balls and place them on a parchment-lined baking sheet.
- Melt white chocolate chips and coconut oil in a microwave-safe bowl in 30-second intervals until smooth and glossy.
- Dip each truffle into the melted white chocolate, allow excess to drip off, then roll immediately in crushed graham crackers.
- Return the truffles to the baking sheet and refrigerate for at least 30 minutes until the coating is firm. Serve chilled.
Notes
Equipment
- large mixing bowl
- Hand mixer or spatula
- Small cookie scoop
- parchment paper
- baking sheet
- microwave-safe bowl


