
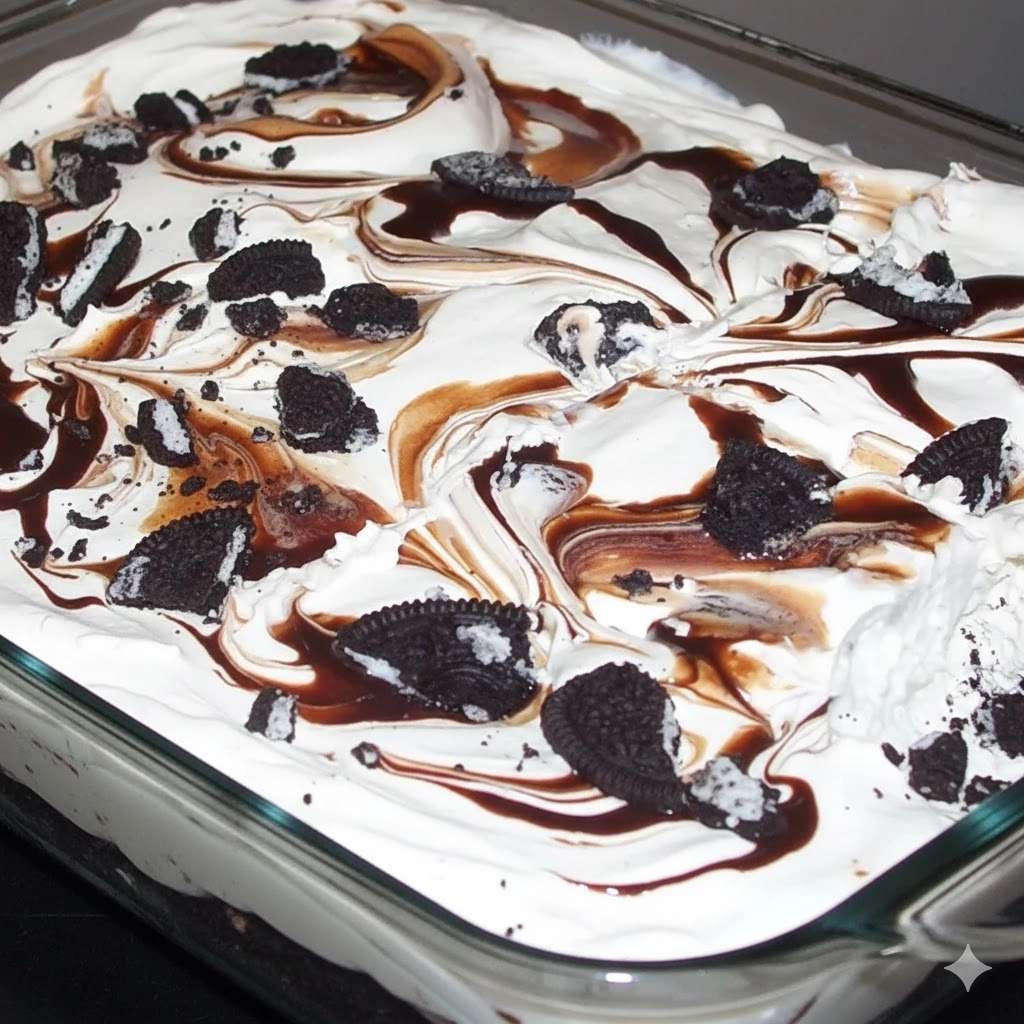
When a craving for a decadent, chilled treat strikes, few options satisfy quite as effectively as this No Bake Double Good Dessert. This layered creation relies on a clever combination of a crisp, dark cocoa base and a billowy, velvet-textured filling that balances the saltiness of roasted peanuts with the sweetness of confectioners’ sugar. It is an ideal choice for large gatherings, potlucks, or outdoor celebrations where kitchen space and oven time are at a premium. Because it requires several hours in the freezer to set properly, it serves as a reliable make-ahead option that maintains its structural integrity even in warmer environments.
Table of Contents
Components for the Layered Treat
The Foundation
- 20 chocolate sandwich cookies with cream filling (standard size)
- 2 tablespoons unsalted butter, melted (optional, for a firmer set)
The Aerated Filling
- 8 ounces full-fat cream cheese, completely softened to room temperature
- 2 cups confectioners’ sugar, sifted to remove lumps
- 3/4 cup creamy peanut butter (traditional shelf-stable variety works best)
- 12 ounces frozen whipped topping, fully thawed in the refrigerator

Primary Assembly Instructions
- Prepare the chocolate sandwich cookies by crushing them into a coarse, gravel-like consistency using a heavy rolling pin or food processor.
- Press the majority of the crumbs into the bottom of a 9 by 13 inch rectangular glass or ceramic baking dish.
- In a large mixing bowl, combine the softened cream cheese and the sifted confectioners’ sugar using an electric hand mixer.
- Integrate the peanut butter into the cream cheese mixture, beating on medium speed until no streaks remain.
- Gently incorporate the thawed whipped topping by hand using a wide rubber spatula.
- Transfer the peanut butter cloud over the cookie base and smooth the surface with an offset spatula.
- Distribute the remaining cookie crumbs over the top for texture and visual contrast.
- Freeze the assembly for a minimum of two hours until firm.
- Remove from the freezer fifteen minutes prior to slicing to allow the base to soften slightly.

Detailed Preparation and Sensory Milestones
Preparing the Base
Achieving the right texture for the cookie foundation is a matter of balance. You do not want a fine flour-like powder; instead, aim for small, crunchy bits that provide a textural counterpoint to the soft filling. When pressing the crumbs into the pan, use the flat bottom of a measuring cup to ensure even distribution. If you prefer a base that doesn’t crumble as much when sliced, adding a small amount of melted butter helps the cocoa fats bind together once chilled.
Mastering the Filling
The most critical factor in the success of this No Bake Double Good Dessert is the temperature of the cream cheese. If the cheese is even slightly cold, it will create small, unappealing white lumps that are impossible to smooth out later. Once the sugar and cheese are whipped into a frosting-like consistency, the peanut butter adds density. The final step—folding in the whipped topping—must be done with a light touch. Use a “cut and fold” motion: slice down through the center with your spatula, scrape along the bottom, and lift over. This preserves the air bubbles, ensuring the final result is light rather than gummy.
Freezing and Slicing
As the dessert sits in the freezer, the moisture from the filling slightly softens the cookies, creating a cohesive bite. You will know it is ready when the center no longer wobbles when the pan is gently shaken. For clean, professional-looking squares, dip a sharp knife into hot water and wipe it dry between every single cut. This prevents the sticky peanut butter filling from dragging through the dark cookie layer.
Expert Success Strategies
- The Sifting Secret: Always sift your confectioners’ sugar through a fine-mesh strainer. Even small clumps of sugar can survive the mixing process and leave gritty pockets in your finished dessert.
- Peanut Butter Choice: While natural peanut butters (the kind with oil on top) are delicious, they can be too runny for this specific recipe. Use a standard homogenized brand to ensure the filling sets up with the correct density.
- Thawing Technique: Never thaw your whipped topping in the microwave. It will break the emulsion and turn into a liquid. Always move it from the freezer to the fridge the night before you plan to assemble the dish.
- Bowl Temperature: If your kitchen is particularly warm, chill your mixing bowl for ten minutes before starting the filling. This keeps the fats in the cream cheese stable while you work.
- Cookie Consistency: For a more rustic look, keep five of the cookies in larger chunks for the top layer, while pulsing the rest into a finer crumb for the bottom.
- Even Layers: When spreading the peanut butter mixture, drop large dollops across the whole surface of the crumbs first, then join them together. This prevents the spatula from pulling the loose crumbs up into the white filling.
Recipe Variations
- The Salty Pretzel Swap: Replace the chocolate cookie base with two cups of crushed pretzels mixed with a half cup of melted butter and two tablespoons of sugar for a sweet-and-salty profile.
- Chocolate Chip Enhancement: Stir a half cup of mini semi-sweet chocolate chips into the filling along with the whipped topping for extra crunch.
- Double Chocolate Version: Use chocolate-flavored whipped topping instead of the standard vanilla version to deepen the cocoa notes.
- Nutty Crunch: Sprinkle a quarter cup of chopped roasted salted peanuts over the top of the dessert before freezing.

Practical Serving Suggestions
This dessert is best served as a refreshing conclusion to a heavy meal, such as a barbecue or a winter roast. To elevate the presentation, drizzle a small amount of warmed chocolate ganache or thin peanut butter over each individual square just before serving.
For a more casual setting, such as a children’s party, you can assemble the layers in clear plastic cups to create individual parfaits. This eliminates the need for slicing and makes it easier for guests to enjoy while standing. If you find the dessert is too firm directly from the freezer, let it sit on the counter for twenty minutes; the texture will transition into something resembling a dense, rich mousse.
Frequently Asked Questions
Can I use homemade whipped cream instead of whipped topping?
While real whipped cream offers a superior flavor, it is less stable than frozen whipped topping. If you choose to use it, you must stabilize it with unflavored gelatin or a commercial stabilizer to prevent the dessert from weeping or collapsing as it thaws.
How long will this dessert stay fresh in the freezer?
When tightly wrapped in a double layer of plastic wrap or aluminum foil to prevent freezer burn, this treat will maintain its quality for up to two weeks. For the best flavor, consume it within the first five days.
Is it possible to make this recipe gluten-free?
Yes, simply substitute the standard chocolate sandwich cookies with a certified gluten-free brand. Most other ingredients, like cream cheese and peanut butter, are naturally gluten-free, but always check the labels on your specific brands.
What should I do if my filling is too soft?
If the mixture seems runny after folding, it may be because the cream cheese was too warm or the whipped topping was over-mixed. To fix this, simply increase the freezing time by an extra hour to allow the fats to fully solidify.
Nutrition Information
| Nutrient | Amount per Serving |
| Calories | 135 kcal |
| Protein | 2 g |
| Carbs | 14 g |
| Fat | 8 g |
| Fiber | 1 g |
| Sugar | 11 g |
| Sodium | 72 mg |
Disclaimer
Nutrition information is an estimate and may vary based on preparation and ingredients used.
No Bake Double Good Dessert
Ingredients
- 20 chocolate sandwich cookies (like Oreos), crushed
- 8 ounces cream cheese, softened to room temperature
- 2 cups confectioners’ sugar, sifted
- 0.75 cup creamy peanut butter
- 12 ounces frozen whipped topping, thawed
Instructions
- Crush the chocolate sandwich cookies into a coarse crumb consistency using a food processor or rolling pin.
- Reserve a handful of crumbs for the topping. Press the remaining crumbs firmly into the bottom of a 9×13 inch baking dish.
- In a medium mixing bowl, beat the softened cream cheese and sifted confectioners’ sugar together until completely smooth.
- Add the peanut butter to the cream cheese mixture and blend until fully incorporated and no streaks remain.
- Using a rubber spatula, gently fold in the thawed whipped topping until the mixture is light and uniform.
- Spread the filling evenly over the cookie base, smoothing the top with a spatula.
- Sprinkle the reserved cookie crumbs over the top of the filling for garnish.
- Place in the freezer for at least 2 hours. Thaw for 10-15 minutes at room temperature before slicing and serving.
Notes
Equipment
- 9×13-inch baking dish
- Electric hand mixer
- large mixing bowl
- rubber spatula
- Food processor or rolling pin For crushing cookies


