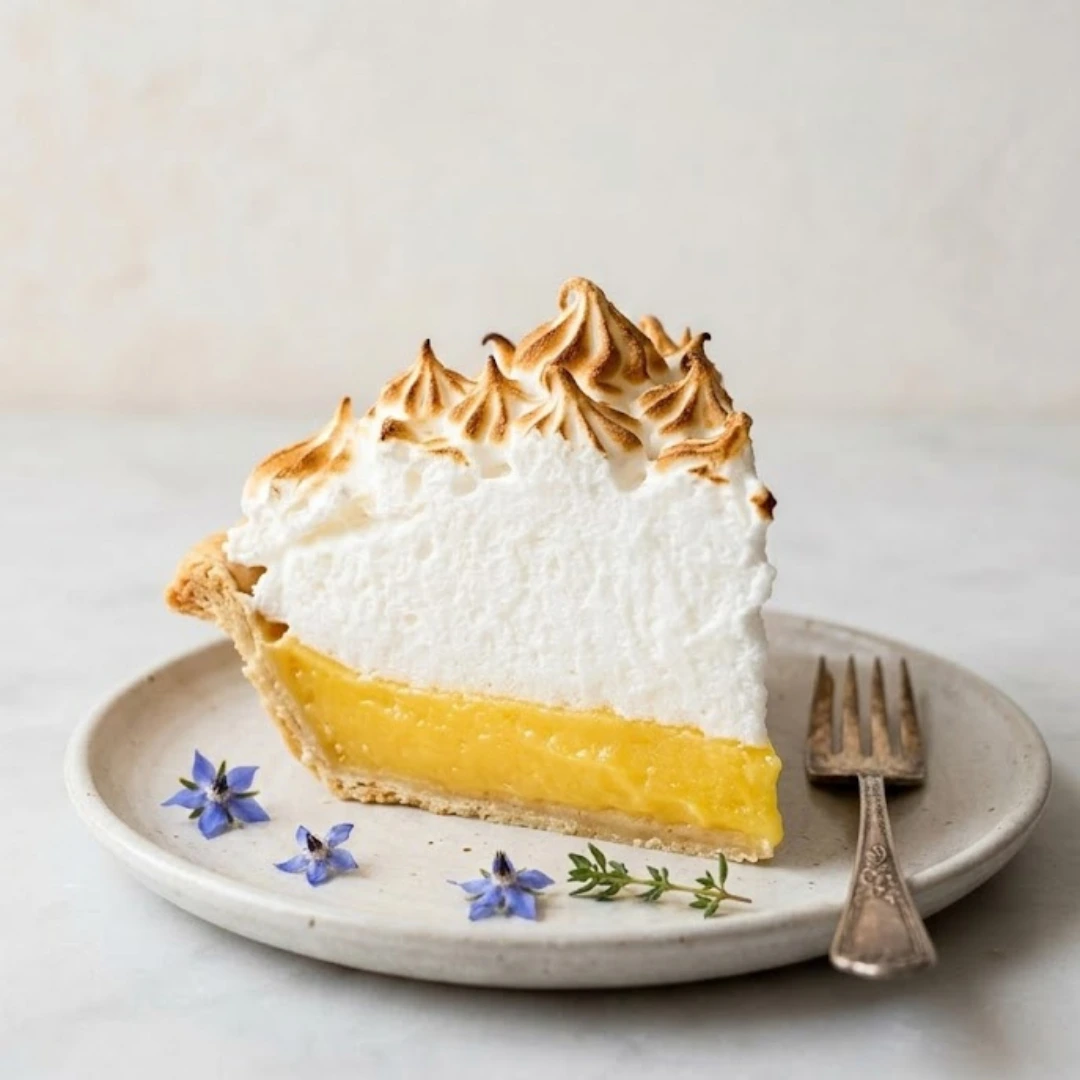
There is a singular magic that occurs when the bracing, sharp tang of sun-ripened lemons meets the ethereal, cloud-like sweetness of a toasted marshmallow topping. For many home bakers, the classic lemon meringue pie represents a culinary peak—a dessert that requires precision, patience, and a bit of kitchen science to master. This particular version, inspired by the high standards of professional pastry work, delivers a filling so bright it practically glows, anchored by a flaky crust and crowned with a billowing meringue that holds its shape long after the first slice is served.
Whether you are preparing this for a festive spring gathering, a summer garden party, or a cozy Sunday dinner, the contrast of textures and temperatures makes it a perennial favorite. Achieving that perfect balance where the tartness makes your mouth water without being overwhelming, and the meringue remains stable without weeping, is the goal of every baker. In this comprehensive guide, we will walk through every nuance of the process, ensuring your result is nothing short of spectacular.
Table of Contents
Essential Ingredients for the Perfect Pie
To create a pie of this caliber, the quality of your ingredients is paramount. We do not use shortcuts here; fresh citrus and high-quality fats are the backbone of the flavor profile.
The Foundation: Homemade Pie Crust
- 1 Homemade Pie Crust (prepared and chilled)
The Vibrant Citrus Filling
- 5 large egg yolks (ensure these are completely free of whites)
- 1 and 1/3 cups water
- 1 cup granulated sugar
- 1/3 cup cornstarch
- 1/4 teaspoon salt
- 1/2 cup fresh lemon juice (strained for smoothness)
- 1 tablespoon lemon zest (finely grated)
- 2 tablespoons unsalted butter (softened to room temperature)
The Ethereal Meringue Topping
- 5 large egg whites (must be at room temperature for maximum volume)
- 1/2 teaspoon cream of tartar
- 1/2 cup granulated sugar
- 1/8 teaspoon salt

Comprehensive Preparation Instructions
Follow these steps with care, paying close attention to the temperatures of your components, as this is a highly technical bake.
1. Preparing the Pastry Shell
Preheat your oven to 375 Fahrenheit and adjust the oven rack to the lowest position to ensure the bottom of the crust bakes thoroughly. Take your chilled homemade pie dough and roll it out to fit a 9-inch pie dish. Line the dough with parchment paper and fill it with pie weights, dried beans, or rice. Partially blind bake the crust for 7 to 8 minutes or until the edges begin to show the slightest hint of golden brown. Once this initial bake is complete, remove the weights and reduce the oven temperature to 350 Fahrenheit.
2. Engineering the Lemon Filling
In a medium heat-proof bowl, whisk the five egg yolks together until they are smooth and uniform in color. Set this aside. In a medium saucepan over medium heat, combine the water, granulated sugar, cornstarch, salt, lemon juice, and lemon zest. Whisk constantly as the mixture heats. Initially, it will look thin and cloudy. After approximately 6 minutes of heating and whisking, the cornstarch will activate, and the mixture will begin to thicken and bubble. Once it reaches a thick consistency, reduce the heat to low.
3. The Critical Tempering Step
To prevent the eggs from scrambling, you must temper them. Very slowly stream a few large spoonfuls of the hot, thickened lemon mixture into the beaten egg yolks while whisking the yolks vigorously. Once the yolks are warmed through, whisk the yolk mixture back into the saucepan in a slow, steady stream. Increase the heat back to medium. Continue to cook, whisking constantly, until the mixture is thick and large bubbles begin to burst at the surface. Remove the pan from the heat and whisk in the softened butter until fully incorporated.
4. Assembling the Core
Immediately spread the hot lemon filling into the warm, partially baked crust. It is vital that the filling is still hot when you add the meringue later, as this heat helps cook the bottom of the meringue and creates a seal that prevents the layers from sliding apart.
5. Whipping the Meringue
Using a stand mixer fitted with a whisk attachment or a handheld electric mixer, beat the room-temperature egg whites and cream of tartar together on medium speed for about 1 minute. Once the mixture is foamy, increase the speed to high and beat until soft peaks form, which usually takes about 4 more minutes. Gradually add the granulated sugar and salt, continuing to beat on high speed for another 2 minutes until the peaks are glossy, white, and stiff.
6. Final Assembly and Baking
Spread the meringue over the hot lemon filling. Use a spatula to push the meringue all the way to the edges of the crust, ensuring it “anchors” to the pastry. This is a crucial step to prevent the meringue from shrinking during cooling. Use the back of a spoon to create decorative peaks and swirls. Bake the pie on the lowest rack for 20 to 25 minutes. If you notice the meringue browning too quickly, you may loosely tent it with aluminum foil, being careful not to let the foil touch the delicate peaks.
7. The Cooling Process
Remove the pie from the oven and place it on a wire rack. Allow it to cool at room temperature for at least 1 hour. This slow cooling prevents the “shock” that can lead to weeping. After 1 hour, transfer the pie to the refrigerator to chill for at least 4 hours before slicing.

Achieving the Ultimate Creamy Consistency
The texture of a lemon meringue pie is what separates an amateur effort from a professional masterpiece. To reach that silk-like consistency in the curd, you must respect the chemistry of the cornstarch and egg yolks.
The primary thickening agent in this recipe is cornstarch, which requires a specific temperature to “gel.” When you see those large bubbles bursting on the surface of your lemon mixture, that is the signal that the starch molecules have fully expanded and trapped the liquid. However, cornstarch alone can be somewhat stiff. The addition of five large egg yolks introduces lecithin and fats, which provide a luxurious mouthfeel and a rich, golden hue.
The butter added at the very end is the final touch of decadence. By whisking it in after the pan is removed from the heat, you create an emulsion that remains stable, giving the filling a glossy finish that looks beautiful when sliced. If your filling seems too thin, it likely hasn’t reached the necessary temperature on the stove. Be patient; the transition from “cloudy water” to “thick custard” happens quickly once the heat is right.
Strategic Timing and Temperature Management
Baking a lemon meringue pie is a choreographed dance of temperatures. Many bakers make the mistake of letting their lemon filling cool completely before adding the meringue. This is a recipe for disaster—or at least for a soggy pie.
When you spread the room-temperature meringue onto a steaming-hot filling, the residual heat begins to cook the bottom of the meringue immediately. This creates a functional “glue” between the two layers. If the filling is cold, the meringue will simply sit on top, and as it bakes, moisture will collect at the interface, causing the meringue to slide off the slice like a slipped gear.
Furthermore, managing the oven rack position is vital. By placing the pie on the lowest rack, you ensure that the bottom crust receives enough heat to stay crisp, even with a moist filling on top. If the top of your meringue is browning too fast while the base remains soft, that’s a sign your oven heat is too concentrated at the top.
Modifications and Creative Substitutions
While we strictly adhere to the fundamental ratios that make this pie successful, there are minor ways to adjust the profile to suit your pantry or preferences.
- Citrus Variations: While this is a lemon-focused recipe, you can replace a portion of the lemon juice with Meyer lemon juice for a sweeter, more floral note. However, do not use bottled juice; the preservatives and pasteurization process strip away the bright acidity needed to cut through the sugar.
- Crust Alternatives: If you do not have time for a traditional flaky pastry, a thick graham cracker crust can be used. If using graham crackers, ensure the crust is pre-baked and still warm when the filling is added, just as you would with a flour-based crust.
- Sugar Types: Granulated white sugar is necessary for the meringue to maintain its structure and white color. Using brown sugar or alternative sweeteners will result in a heavy, weeping topping that lacks the iconic “cloud” appearance.
Perfect Accompaniments and Serving Suggestions
This pie is a centerpiece on its own, but the way you serve it can elevate the experience. Because the pie is very sweet and tart, it pairs exceptionally well with a beverage that offers a bit of bitterness or neutralizes the palate.
A cup of strong, black Earl Grey tea is a classic pairing, as the bergamot in the tea complements the lemon zest in the pie. For an evening dessert, a dry sparkling wine or a Prosecco provides a refreshing effervescence that cleanses the palate between bites of the rich lemon curd.
When it comes to the plate, keep it simple. A few fresh raspberries or a sprig of mint can add a pop of color, but the towering peaks of the toasted meringue are usually enough to garner gasps of admiration from your guests. To get those perfect, clean slices you see in magazines, use a long, thin knife dipped in hot water and wiped dry between every single cut. This prevents the meringue from sticking to the blade and tearing.
Detailed Step-by-Step Expansion
Developing the Zest and Juice
Before you even turn on the stove, prepare your citrus. Zesting the lemon should be done with a microplane, taking only the yellow outer layer. The white pith underneath is incredibly bitter and can ruin the delicate balance of the filling. You will need about one large tablespoon, which usually requires two medium lemons. Once zested, juice the lemons until you have exactly one-half cup.
Managing the Egg Whites
Separating eggs is easiest when they are cold, as the yolks are firmer and less likely to break. However, egg whites whip into a much larger volume when they are at room temperature. The best strategy is to separate the five eggs immediately after taking them out of the fridge, then let the bowls sit on the counter for thirty minutes. This ensures no yolk contaminates your whites (which would prevent them from foaming) while still getting that room-temperature advantage.
The Art of the Peak
When whipping the meringue, look for “stiff peaks.” This means that when you lift the whisk out of the bowl, the meringue stands straight up without the tip drooping over. If the tip curls back down like a wave, you have “soft peaks” and need to continue beating. The addition of cream of tartar is non-negotiable; it is an acid that stabilizes the tiny air bubbles you are creating, ensuring the meringue doesn’t collapse in the oven.
Deep-Dive FAQ
Why does my meringue always have little amber droplets on top?
This phenomenon is known as “beading.” It usually happens when the pie is overbaked or when the sugar hasn’t fully dissolved into the egg whites. To prevent this, ensure you add the sugar slowly, one tablespoon at a time, while the mixer is running, and keep a close eye on the pie during those final minutes in the oven.
How can I prevent the “gap” between the crust and the meringue?
The “gap” or shrinkage happens when the meringue isn’t properly anchored. When you are spreading the topping, don’t just put it in the middle. Use your spatula to physically touch the meringue to the edge of the baked pie crust all the way around the circumference. This “seals” the pie and holds the meringue in place as it expands and contracts.
Can I make this pie a day in advance?
While you can prepare the crust and even the lemon curd (separately) ahead of time, a fully assembled lemon meringue pie is best eaten within 24 hours. The meringue is a delicate foam that naturally begins to break down over time, especially in the humid environment of a refrigerator. For the best texture, bake and serve on the same day.
Is there a way to make the lemon flavor even more intense?
The intensity of the lemon comes from the zest, not just the juice. If you want a “punchier” pie, you can increase the zest to one and a half tablespoons. Avoid adding more juice, as the liquid-to-cornstarch ratio is very specific; adding more liquid will result in a soup-like filling that won’t hold its shape when sliced.
The Secret to a Show-Stopping Finish
The final beauty of this dessert lies in the contrast between the snowy white interior of the meringue and the toasted, golden-brown highlights on the peaks. This browning is the result of the Maillard reaction, where the sugar and proteins in the egg whites caramelize under the heat. If you prefer a more rustic look, you can use a kitchen torch to toast the peaks manually after baking, but the oven method described here provides a more even, “bakery-style” finish.
Remember, baking is as much about the environment as it is the recipe. On a very humid or rainy day, your meringue may absorb moisture from the air, making it more prone to weeping. If possible, try to bake this on a dry day, or ensure your kitchen is well-ventilated. With these professional tips and a commitment to the process, you are ready to create a lemon meringue pie that is truly world-class.
Nutrition Information and Facts
| Serving Size: 1 Slice (1/8th of pie) | Amount Per Serving |
| Calories | 340 |
| Total Fat | 12 grams |
| Saturated Fat | 7 grams |
| Cholesterol | 135 milligrams |
| Sodium | 210 milligrams |
| Total Carbohydrates | 54 grams |
| Dietary Fiber | 1 gram |
| Sugars | 38 grams |
| Protein | 5 grams |
Safety and Content Disclaimer
The nutritional values provided are estimates based on standard ingredient measurements. Actual nutritional content may vary depending on specific brands used and individual preparation techniques. Consuming raw or undercooked eggs may increase your risk of foodborne illness, particularly if you have certain medical conditions. Always ensure your lemon filling reaches the appropriate temperature to cook the tempered egg yolks thoroughly.

Classic Golden Lemon Meringue Pie
Ingredients
- 1 homemade pie crust, prepared and chilled
- 5 large egg yolks
- 1.33 cups water
- 1 cup granulated sugar
- 0.33 cup cornstarch
- 0.25 tsp salt
- 0.5 cup fresh lemon juice, strained
- 1 tbsp lemon zest, finely grated
- 2 tbsp unsalted butter, softened
- 5 large egg whites, room temperature
- 0.5 tsp cream of tartar
- 0.5 cup granulated sugar (for meringue)
- 0.125 tsp salt (for meringue)
Instructions
- Preheat oven to 375 Fahrenheit. Roll out pie dough into a 9-inch dish, line with parchment and weights, and blind bake for 7 to 8 minutes. Remove weights and reduce oven to 350 Fahrenheit.
- Whisk egg yolks in a medium bowl and set aside. In a saucepan, whisk water, sugar, cornstarch, salt, lemon juice, and zest over medium heat for about 6 minutes until thick and bubbling.
- Temper the yolks by slowly streaming a few spoonfuls of the hot lemon mixture into them while whisking. Return the yolk mixture to the pan and cook until large bubbles burst at the surface.
- Remove from heat, whisk in butter, and immediately pour the hot filling into the warm, partially baked crust.
- Beat egg whites and cream of tartar on medium for 1 minute, then high for 4 minutes until soft peaks form. Gradually add sugar and salt, beating for 2 more minutes until stiff and glossy.
- Spread meringue over the hot filling, pushing it all the way to the edges of the crust to anchor it. Create decorative peaks with a spoon.
- Bake on the lowest rack for 20 to 25 minutes until the meringue is golden brown.
- Cool on a wire rack at room temperature for 1 hour, then refrigerate for at least 4 hours before serving.
Notes
Equipment
- 9-inch pie dish
- medium saucepan
- stand mixer or hand mixer
- whisk
- wire cooling rack