
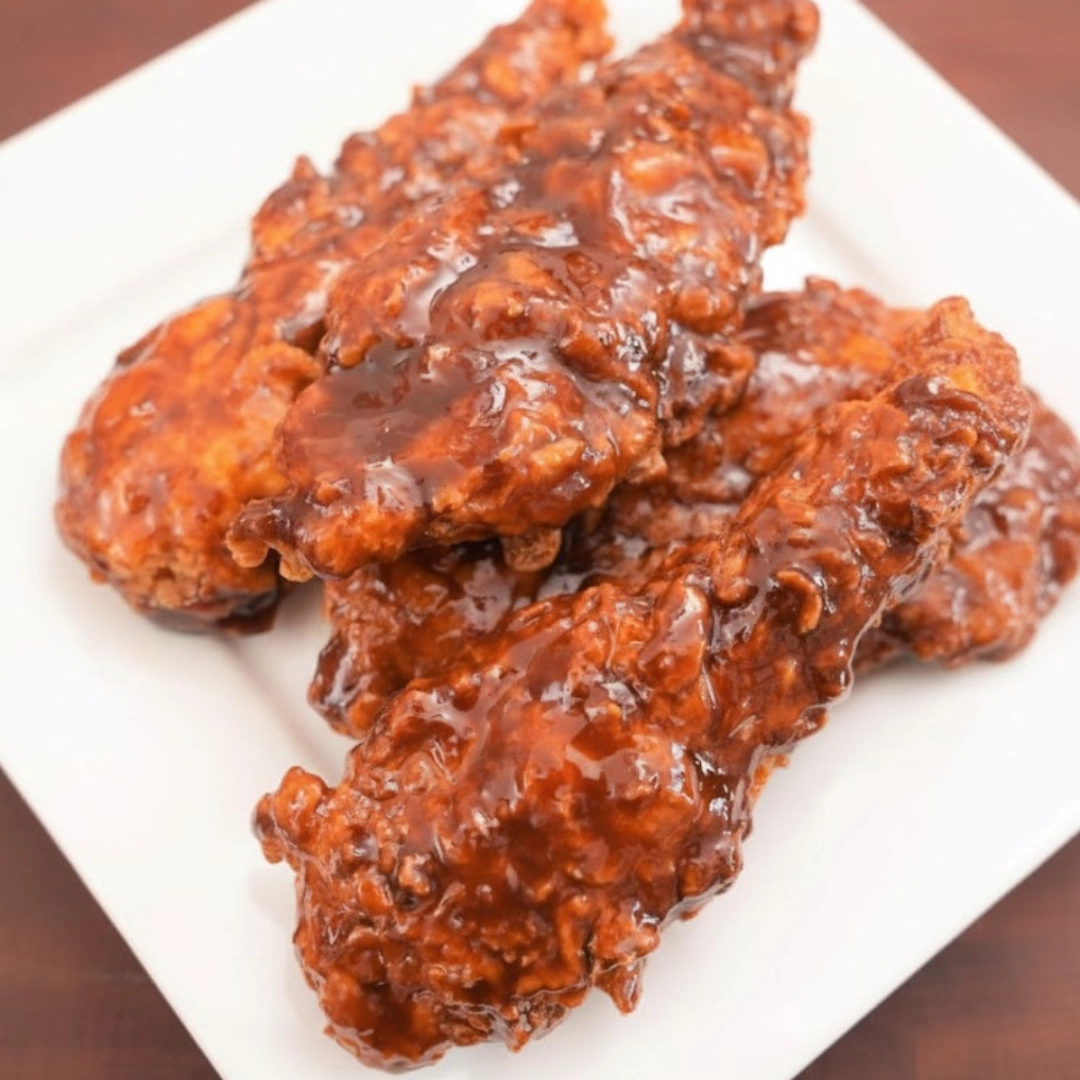
The marriage of intensely crispy fried chicken and a glossy, addictive glaze is the essence of a perfect bite, and nowhere is that harmony more apparent than in Hot Honey Butter Fried Chicken. This dish is a culinary crescendo—a delicate dance between savory, salty, sweet, and, crucially, a lingering undercurrent of heat that elevates it beyond standard fare. Inspired by Asian double-fry techniques that guarantee shattering crispness, then finished with a thick, emulsified sauce, this chicken is engineered for maximum flavor and textural pleasure. It transforms any meal, from a casual weeknight gathering to a game day spread, into an event worth savoring.
Table of Contents
The Essential Gear: Setting Up for Deep Frying Success
Before a single ingredient is mixed, the dedicated home cook must establish a safe and efficient frying environment. Deep frying, while sometimes intimidating, relies entirely on control and consistency, making the right equipment essential.
A Vessel for Stability: You require a heavy-bottomed pot, ideally a cast-iron Dutch oven or a deep, straight-sided skillet. These materials excel at heat retention, which is the single most critical factor in successful frying. When cold chicken enters hot oil, the temperature inevitably dips; a heavy vessel minimizes this drop and allows the oil to recover quickly, ensuring the chicken cooks evenly without absorbing excess grease.
The Thermometer Mandate: Relying on visual cues or the classic “test piece of bread” is gambling with your dinner. You must use a high-quality deep-fry or candy thermometer. The temperature sweet spot for frying poultry is critical—between three hundred twenty-five and three hundred seventy-five Fahrenheit. Staying within this window guarantees the crust sets properly and the internal moisture is locked in. For this recipe, we target an initial temperature of three hundred fifty Fahrenheit.
The Rack and Rest: Never place freshly fried chicken directly onto paper towels. Paper towels wick away a small amount of oil, but more importantly, they trap steam beneath the chicken, instantly compromising the hard-won crisp exterior. Instead, set a wire cooling rack over a sheet pan. This allows air to circulate entirely around the chicken pieces, maintaining maximum crunch as the pieces drain and rest.
Provisions Checklist: What You’ll Need
Gathering all components ensures a smooth assembly line, crucial for achieving uniform breading.
For the Chicken and Marinade
- 2 pounds boneless, skinless chicken tenders (or chicken thighs, cut into 1.5-inch pieces)
- 2 teaspoons Kosher salt
- 1 teaspoon black pepper, freshly ground
- 1 teaspoon white pepper
- 1 teaspoon garlic powder
- 1 teaspoon onion powder
- 1/2 teaspoon ginger powder
- 1 teaspoon cayenne pepper
For the Breading Station
- Plain Flour Dredge: 1 cup all-purpose flour
- Wet Batter:
- 1 cup all-purpose flour
- 2 large eggs
- 1 and a half cups sparkling water, ice-cold
- Seasoned Flour Dredge:
- 2 cups all-purpose flour
- 1 tablespoon Kosher salt
- 1 tablespoon garlic powder
- 1 tablespoon onion powder
- 1 teaspoon black pepper
For the Hot Honey Butter Glaze
- One half cup (1 stick) unsalted butter
- One half cup honey
- 1 tablespoon granulated sugar
- 2 tablespoons light soy sauce
- 2 teaspoons quality hot sauce (e.g., a vinegar-based pepper sauce or a chili garlic paste)
For Frying
- 8–10 cups neutral frying oil (peanut, canola, or vegetable oil)

The Preparation Sequence: From Marinade to Dredge
The preparatory steps are as crucial as the frying itself. Attention here is what separates standard fried chicken from one that is truly exceptional.
1. Initial Marination and Flavor Infusion
In a large bowl, combine the chicken pieces with the Kosher salt, black pepper, white pepper, garlic powder, onion powder, ginger powder, and cayenne pepper. Toss thoroughly until every piece is coated.
- Expert Insight: Allow this seasoned chicken to rest for a minimum of twenty minutes, or up to an hour, refrigerated. This period acts as a quick “dry brine.” The salt dissolves into the chicken’s surface moisture and is then reabsorbed, tenderizing the meat and ensuring flavor permeates beyond the crust. Pat the chicken pieces completely dry with paper towels before proceeding to the next step; any surface moisture will weaken the batter adhesion.
2. Crafting the Three-Part Assembly Line
Set up three wide, shallow bowls and a baking sheet fitted with a wire rack in the following sequence:
- Bowl One (Plain Flour): Add the 1 cup of all-purpose flour.
- Bowl Two (Wet Batter): Whisk together the 1 cup of all-purpose flour, eggs, and the ice-cold sparkling water until just combined. A few lumps are acceptable; overmixing develops gluten and results in a tough batter. The sparkling water’s carbonation is key, as those small carbon dioxide bubbles expand rapidly in the hot oil, creating a lighter, more textured final crust.
- Bowl Three (Seasoned Flour): Combine the 2 cups of all-purpose flour with the remaining dry seasonings (salt, garlic powder, onion powder, black pepper).
3. The Dredging Technique for Texture
Take a small amount of the sparkling water (perhaps 1–2 tablespoons) and drizzle it into the seasoned flour bowl (Bowl Three). Use your fingertips to gently rub the mixture together, creating small, irregular clumps or “craggily bits.” These clumps are what provide that distinctive, highly textured, uneven crust characteristic of high-quality fried chicken.
4. Breading and Setting the Crust
Systematically dredge each piece of chicken:
- Dust: Lightly coat the piece in Bowl One (Plain Flour), shaking off all excess.
- Dip: Submerge completely in Bowl Two (Wet Batter), allowing excess to drip back into the bowl for a few seconds.
- Dredge & Press: Place the wet chicken into Bowl Three (Seasoned Flour). Use firm, deliberate pressure to pack the seasoned flour onto the chicken. Ensure the entire surface, especially the irregular craggily bits, adheres securely.
- Place the fully breaded chicken onto the wire rack. Crucially, allow the breaded chicken to rest for fifteen to twenty minutes before frying. This rest period gives the moist batter time to fully hydrate the flour coating, binding the dredge to the chicken and preventing the crust from flaking off in the hot oil.

Achieving the Ultimate Crunch: The Double Fry Method
The secret to a truly jaw-shattering crust lies in frying the chicken twice. The first fry cooks the chicken through, and the second fry expels residual moisture, providing the perfect golden-brown crispness.
1. First Pass for Initial Cooking
Pour the neutral oil into your Dutch oven to a depth of about two inches. Heat the oil slowly until your thermometer registers three hundred fifty Fahrenheit.
- The Batch Rule: Working in small batches is mandatory. Overcrowding the pot causes the oil temperature to plummet too far, leading to greasy, under-crisped chicken. Fry only three or four pieces at a time.
- Gently lower the first batch into the hot oil. Fry the chicken for approximately four to five minutes. During this phase, the chicken will cook completely and the crust will turn a light golden color.
- Remove the chicken and place it on a clean wire rack. Allow the oil temperature to return to three hundred fifty Fahrenheit before beginning the next batch.
2. Second Pass for Texture and Color
Once all batches have completed the first fry, and the oil has stabilized again at three hundred fifty Fahrenheit:
- Return the chicken pieces to the oil for the second pass. Fry for an additional sixty to ninety seconds. This brief, high-heat burst serves two purposes: it drives out any lingering surface moisture from the first rest, and it deepens the crust to a rich, attractive mahogany hue.
- Immediately remove the chicken and return it to the clean wire rack. Sprinkle lightly with a pinch of extra Kosher salt while it is still steaming hot.
- Doneness Check: The safe internal temperature for chicken is one hundred sixty-five Fahrenheit. A double-fry ensures this temperature is met, but you can always check the thickest piece with an instant-read thermometer to confirm. The second fry is purely for aesthetic and textural perfection.
The Sweet Heat Finish: Crafting the Hot Honey Butter Glaze
The Hot Honey Butter Glaze must be made immediately before serving, as it thickens quickly upon cooling. It is designed to be a thick, velvety layer that clings tightly to the rugged fried chicken surface.
- In a small saucepan, melt the one half cup of butter over medium heat. Allow it to melt completely until it just begins to foam.
- Add the honey, granulated sugar, light soy sauce, and the specified amount of hot sauce.
- Bring the mixture to a gentle simmer, stirring constantly with a whisk. Continue to stir for one to two minutes until the sugar is fully dissolved and the sauce begins to thicken slightly and develop a silky sheen. You will notice a distinct, rich, sweet-spicy aroma filling your kitchen.
- Remove the pan from the heat immediately. The sauce is ready when it coats the back of a spoon. Do not overcook, or it will become too syrupy or even grainy.
- Working quickly, transfer the Hot Honey Butter Glaze to a large, clean bowl. Add the piping hot, double-fried chicken pieces. Gently toss the chicken to ensure every piece is thoroughly coated in the luxurious sauce. Serve immediately to maximize the texture contrast between the molten glaze and the crisp exterior.

Troubleshooting the Process: Key Mistakes to Sidestep
Even experienced cooks can stumble when deep-frying. Avoiding these common pitfalls ensures a flawless result.
Mistake: Letting the oil temperature fluctuate wildly.
Fix: Use a reliable thermometer and work in extremely small batches. If the temperature drops below three hundred twenty-five Fahrenheit, stop frying, remove the chicken, and wait for the oil to fully recover its heat before continuing. The oil should be agitated but not violently smoking.
Mistake: Overmixing the wet batter.
Fix: The goal is a light, airy crust. Mix the wet batter ingredients just until the dry flour pockets disappear. Overmixing develops gluten, which results in a dense, tough crust instead of a light, shatter-crisp one. The clumps created in the seasoned flour should be separate from the wet batter process.
Mistake: Skipping the resting periods.
Fix: The two rests are non-negotiable. Resting the marinated chicken (the dry brine) improves juiciness and flavor. Resting the breaded chicken for fifteen minutes ensures the coating adheres and won’t fall off during frying, a phenomenon known as “blow-off.”
Mistake: Making the glaze too early.
Fix: The Hot Honey Butter Glaze sets quickly as it cools, transforming from a pourable liquid to a firm candy-like shell. Prepare the glaze only when the final batch of chicken is completing its second fry. Toss the chicken in the glaze immediately and serve right away.
Mistake: Storing leftovers in an airtight container immediately.
Fix: If you must store leftovers, allow them to cool completely on a wire rack first. Sealing warm fried food traps steam, leading to immediate sogginess. Reheat leftovers on a wire rack in an oven set to three hundred seventy-five Fahrenheit for about ten minutes, or in an air fryer, to recapture some of the crispness.
Flavor Architect: Creative Ways to Shift the Recipe
While the original recipe for Hot Honey Butter Fried Chicken is superb, the components are flexible enough to accommodate shifts in flavor profile or preparation method.
Regional Spice Swap: Lean into different global influences by changing the heat element. Substitute the hot sauce in the glaze with gochujang (Korean chili paste) for a complex, fermented heat, or use finely minced Calabrian chili oil for an Italian-American twist. Adjust the amount based on the heat tolerance of your diners.
Dark Meat Preference: For an inherently juicier result, use bone-in, skin-on chicken thighs. You will need to increase the initial fry time to approximately six to seven minutes to ensure doneness, but the double-fry principle remains the same. The rich, higher-fat content of the thigh meat stands up beautifully to the sweet-spicy glaze.
Herbal Infusion: To add an aromatic layer, melt a sprig of fresh rosemary or thyme into the butter before adding the honey and sugar for the glaze. Strain the herbs out before tossing the chicken. This provides a subtle, earthy balance to the intense sweetness and heat.
Gluten-Free Coating: Use a one-to-one gluten-free flour blend in both the plain dredge and the seasoned flour. For the wet batter, you can use rice flour, which naturally promotes an incredibly light and crisp crust, often seen in Asian-style fried foods.
Less Frying, More Baking: If deep frying is simply not an option, you can achieve a respectable crunch using a high-heat oven. After breading, spray the chicken heavily with cooking oil and bake on a wire rack at four hundred Fahrenheit for twenty to twenty-five minutes, flipping halfway, until golden and crisp. Toss with the glaze immediately. While it won’t replicate the double-fry texture perfectly, the flavor profile remains intact.
Expert Pairings: Serving Ideas to Complete the Meal
The intensity of the Hot Honey Butter Fried Chicken requires side dishes that offer either a refreshing contrast or a complementary texture.
The Cooling Counterpoint: A vinegary, crunchy slaw is the ideal companion. Look for a recipe that uses apple cider vinegar, a touch of mustard, and plenty of shredded cabbage and carrots. The cool acidity cuts through the richness of the fried chicken and the butter glaze, resetting the palate between bites.
Starch as a Sponge: Serve alongside steaming bowls of seasoned, short-grain rice. The gentle, neutral flavor of the rice perfectly absorbs any excess glaze that drips off the chicken, capturing all the sweet, spicy, and savory notes. Consider adding a dash of toasted sesame oil to the rice for an authentic Asian aroma.
Green and Clean: A simple side salad dressed with a light lemon vinaigrette and finely chopped chives provides necessary freshness. Avoid heavy, creamy dressings that compete with the glaze; the aim is light hydration and brightness. The citrus from the dressing enhances the perceived spiciness of the cayenne.
Sweet and Earthy: Balance the heat with a slightly sweet vegetable. Maple-glazed roasted carrots or sweet potatoes offer a soft texture and an earthy sweetness that marries well with the honey component of the main dish.
Common Questions Answered
Can I prepare the chicken ahead of time?
You can prepare the chicken up to the point of breading. Marinate the chicken in the refrigerator for up to twelve hours. Once the chicken is fully breaded and rested on the wire rack, you can cover it and refrigerate it for a maximum of four hours before frying. Do not attempt to make the glaze ahead of time, as it will solidify and become difficult to work with.
What is the purpose of white pepper in the marinade?
White pepper has a slightly different, more earthy and less pungent flavor profile than black pepper. In many Asian culinary traditions, it is used to add a quiet, deep background warmth without introducing the speckling color or sharp aroma of black pepper. Using both enhances the overall complexity of the spice blend.
My breading is falling off in the fryer, what went wrong?
The breading falls off due to a lack of adhesion, which is usually caused by one of two factors: the chicken was not patted dry before starting the dredging process, or the crucial fifteen-minute rest period after breading was skipped. The rest allows the wet batter to glue the seasoned flour firmly to the protein, ensuring the coating holds its integrity when it hits the hot oil.
Can I reuse the frying oil?
Yes, you can reuse neutral frying oil several times, provided it hasn’t reached its smoke point or been heavily burned. After the oil cools, strain it through a fine-mesh sieve lined with cheesecloth to remove any batter scraps. Store the strained oil in a dark, cool place. Discard the oil if it looks cloudy, develops a persistent unpleasant smell, or foams excessively when heated.
Why use sparkling water instead of plain water in the wet batter?
The effervescence of sparkling water creates a lighter, airier batter. When the carbonated water hits the hot oil, the dissolved carbon dioxide rapidly expands, creating minute pockets within the batter structure. This results in a crispier, more textured crust that absorbs less oil than a batter made with plain water.
Nutritional Snapshot
| Nutrient | Amount per Serving |
| Calories | 895 kcal |
| Protein | 52 g |
| Carbs | 98 g |
| Fat | 33 g |
| Fiber | 4 g |
| Sugar | 22 g |
| Sodium | 1,250 mg |
Nutrition Information Disclaimer
Nutrition information is an estimate and may vary based on preparation and ingredients used.

The Ultimate Hot Honey Butter Fried Chicken
Ingredients
- 2 pounds boneless, skinless chicken tenders
- 2 tsp Kosher salt (for marinade)
- 1 tsp black pepper, freshly ground (for marinade)
- 1 tsp white pepper (for marinade)
- 1 tsp garlic powder (for marinade)
- 1 tsp onion powder (for marinade)
- 0.5 tsp ginger powder (for marinade)
- 1 tsp cayenne pepper (for marinade)
- 1 cup all-purpose flour (Plain Flour Dredge)
- 1 cup all-purpose flour (Wet Batter)
- 2 large eggs
- 1.5 cups sparkling water, ice-cold
- 2 cups all-purpose flour (Seasoned Flour Dredge)
- 1 tbsp Kosher salt (for seasoned dredge)
- 1 tbsp garlic powder (for seasoned dredge)
- 1 tbsp onion powder (for seasoned dredge)
- 1 tsp black pepper (for seasoned dredge)
- 0.5 cup unsalted butter (1 stick)
- 0.5 cup honey
- 1 tbsp granulated sugar
- 2 tbsp light soy sauce
- 2 tsp quality hot sauce (e.g., vinegar-based)
- 8-10 cups neutral frying oil
Instructions
- Toss the chicken with all the marinade spices. Let rest for 20 minutes to 1 hour (dry brine). Pat chicken completely dry with paper towels before proceeding.
- Prepare three bowls: Plain Flour, Wet Batter (flour, eggs, ice-cold sparkling water), and Seasoned Flour. Drizzle a small amount of sparkling water into the Seasoned Flour and rub to create craggily bits for texture.
- Dust chicken in Plain Flour, dip in Wet Batter, then firmly press into the Seasoned Flour. Place on a wire rack and rest for 15 minutes to allow the coating to adhere securely.
- Heat oil in a heavy pot to three hundred fifty Fahrenheit. Fry chicken in small batches for 4–5 minutes until lightly golden. Remove and drain on a clean wire rack. Let oil recover heat between batches.
- Return the chicken to the oil (still at three hundred fifty Fahrenheit) for an additional 60–90 seconds. This step achieves maximum crispness and golden color. Remove and lightly sprinkle with salt.
- In a small saucepan, melt butter. Add honey, sugar, soy sauce, and hot sauce. Simmer for 1–2 minutes until glossy and slightly thickened. Immediately toss the hot, double-fried chicken in the glaze until fully coated and serve.
Notes
Equipment
- Cast-iron Dutch oven or deep pot
- Deep-fry thermometer
- Wire cooling rack and sheet pan
- small saucepan


