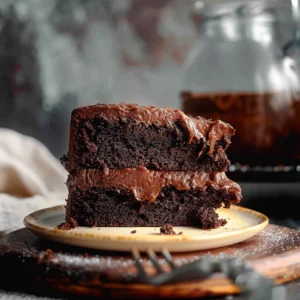
I still remember the first time I baked a gluten free chocolate cake for my sister’s birthday. She had recently gone gluten free, and I wanted to surprise her with something rich, tender, and full of flavor not the dry, crumbly kind we had tried before. After several tests (and plenty of taste-testing volunteers), I discovered that using real butter instead of oil transformed the entire cake. It brought a deep, luxurious flavor that made every bite taste like a bakery classic.
This recipe is the result of that journey: a moist, decadent chocolate cake that just happens to be gluten free. You’d never guess it lacks wheat the crumb is soft and sponge-like, the chocolate flavor bold and smooth, and the texture perfectly balanced between light and fudgy. The best part? It’s a one-bowl recipe that comes together in under 15 minutes before baking.
Whether you’re celebrating a special occasion or simply craving a slice of something indulgent on a weeknight, this gluten free chocolate cake made with butter delivers every time. You can frost it with a silky chocolate buttercream (dairy or dairy-free), layer it with ganache, or simply dust it with cocoa for an elegant finish.
After testing this recipe multiple times, I can say with confidence: this is the kind of chocolate cake that makes you forget it’s gluten free.
Table of Contents
Why You’ll Love This Gluten Free Chocolate Cake
There’s no shortage of gluten free cake recipes online, but this one stands out for a few simple reasons. Every element from the ingredients to the technique was carefully tested to deliver the same tenderness and flavor you’d expect from a classic bakery-style chocolate cake. Here’s what makes it special:
- Made with real butter – Butter adds a rich, full-bodied flavor that oil simply can’t match. It creates a soft crumb, helps the cake stay moist for days, and gives every bite that “real cake” texture.
- Undetectably gluten free – Thanks to a high-quality 1:1 flour blend, this cake bakes up fluffy, never gritty or dense. Even gluten lovers will ask for seconds.
- Perfect for any occasion – Whether you’re making a birthday layer cake or a simple weeknight dessert, this recipe works beautifully in round or sheet pans.
- One-bowl simplicity – Minimal mess, maximum payoff. You can have it ready for the oven in less than 15 minutes.
- Rich chocolate depth – The combination of cocoa powder and hot coffee brings out the deepest notes of chocolate no melted chocolate required.
- Customizable – Keep it simple with a chocolate buttercream, or switch things up with a mocha or peppermint version for the holidays.
If you’re a chocolate fan, this cake pairs perfectly with creamy desserts like the Piñon Ice Cream Recipe or other chocolate favorites such as the Dubai Chocolate Bar Recipe.
This isn’t just a good gluten free chocolate cake it’s one you’ll bake again and again because it delivers on both taste and texture every single time.
Key Ingredients for the Perfect Texture
Every great gluten free chocolate cake begins with balance the right mix of structure, moisture, and flavor. Each ingredient in this recipe plays a role in creating a tender crumb that’s rich but never heavy. Here’s how they work together:
Gluten-Free Flour That Works
The foundation of this cake is a high-quality gluten free 1:1 baking blend, ideally Bob’s Red Mill Gluten Free 1:1 Baking Flour. It already contains xanthan gum, which mimics gluten’s binding ability, keeping the cake soft and cohesive.
If you prefer to experiment, King Arthur’s Gluten-Free Measure for Measure Flour is another reliable option, but results may vary slightly. For consistent texture and rise, always measure flour by weight and sift it before adding this step prevents dense spots and ensures an even crumb.

Butter Instead of Oil
Unlike many gluten free cakes that rely on oil, this recipe uses real butter for richness and flavor. When creamed with sugar, butter traps air, giving the cake its signature lift and light texture.
- Softened butter makes the cake fluffy and tender.
- Melted butter creates a denser, almost brownie-like crumb.
If you’re dairy-free, feel free to substitute a high-quality plant-based butter stick (not a soft tub spread), and you’ll still get great results.
Cocoa Powder for Deep Chocolate Flavor
Choose Dutch-process cocoa powder for the richest flavor and darkest color. Its smooth, mellow profile pairs beautifully with butter and sugar.
Natural cocoa can also be used but will yield a slightly lighter, tangier cake.
Pro tip: Pouring in hot brewed coffee activates the cocoa, enhancing the chocolate aroma and deepening its flavor. Don’t worry the cake won’t taste like coffee.
Eggs, Sugar, and Milk
- Three large eggs help the cake rise and stay moist without crumbling.
- A mix of white and light brown sugar creates sweetness and depth, thanks to the molasses in brown sugar.
- Whole milk or almond milk both work; choose according to your dietary needs. For extra richness, use buttermilk and reduce vinegar slightly.
Coffee (The Secret Ingredient)
Adding hot coffee doesn’t just intensify chocolate flavor it also reacts with cocoa powder to bloom its natural oils, making the cake smoother and more aromatic. If caffeine isn’t your thing, substitute hot water instead; you’ll still get excellent results.
Each of these ingredients plays its part in creating a cake that’s indulgent, balanced, and full of character. When they come together, you get that elusive bakery-style texture tender, moist, and rich without being heavy.
Step-by-Step: How to Make Gluten Free Chocolate Cake
This gluten free chocolate cake may taste like it came from a bakery, but it’s surprisingly easy to make at home. With just one bowl and a few simple steps, you’ll have a rich, moist chocolate cake ready to frost in under an hour.
Step 1 – Prepare the Pans
Grease either two 8-inch round cake pans or one 9×13-inch sheet pan with butter or oil spray.
Line the bottoms with parchment paper rounds this guarantees a clean release after baking and prevents the cake from sticking or tearing.
Tip: For even baking, place both pans on the center rack of your oven.
Step 2 – Cream the Butter and Sugars
In a large mixing bowl (or stand mixer), beat softened butter, white sugar, and brown sugar until the mixture is pale and fluffy about 2–3 minutes.
This step builds air into the batter, giving your cake that light, velvety crumb. Don’t skip it!
If you’re using a hand whisk, cream vigorously for at least 4–5 minutes for similar results.
Step 3 – Add the Eggs, Vanilla, and Milk
Whisk in the eggs one at a time, mixing well after each addition. Then pour in vanilla extract and milk (dairy or almond). The batter should look smooth and glossy.
This stage helps bind all wet ingredients before introducing the dry mix key for a stable cake structure.
Step 4 – Combine the Dry Ingredients
In a separate bowl, sift together your gluten free flour blend, cocoa powder, baking powder, baking soda, and salt.
Add this dry mix to the wet ingredients in two stages, whisking gently until just combined.
Avoid overmixing too much stirring can cause the cake to sink or become dense.
Step 5 – Add the Hot Coffee
Finally, pour in 1 cup of hot brewed coffee (or boiling water). Whisk until the batter is smooth and slightly thin that’s exactly what you want.
This step “blooms” the cocoa, enhancing the chocolate flavor while keeping the cake moist and spongey.
Step 6 – Bake the Cake
- Bake time: 32–37 minutes for two 8-inch pans, or 35–45 minutes for a 9×13-inch pan.
- The cake is done when a toothpick inserted in the center comes out clean or with a few moist crumbs.
Let the cakes cool in the pans for 10–15 minutes before turning them onto a wire rack. Peel off the parchment paper, flip upright, and let cool completely before frosting.
Step 7 – Frost and Decorate
Once cooled, spread on a generous layer of chocolate buttercream (see next section). For an elegant finish, top with shaved chocolate, cocoa dusting, or fresh berries.
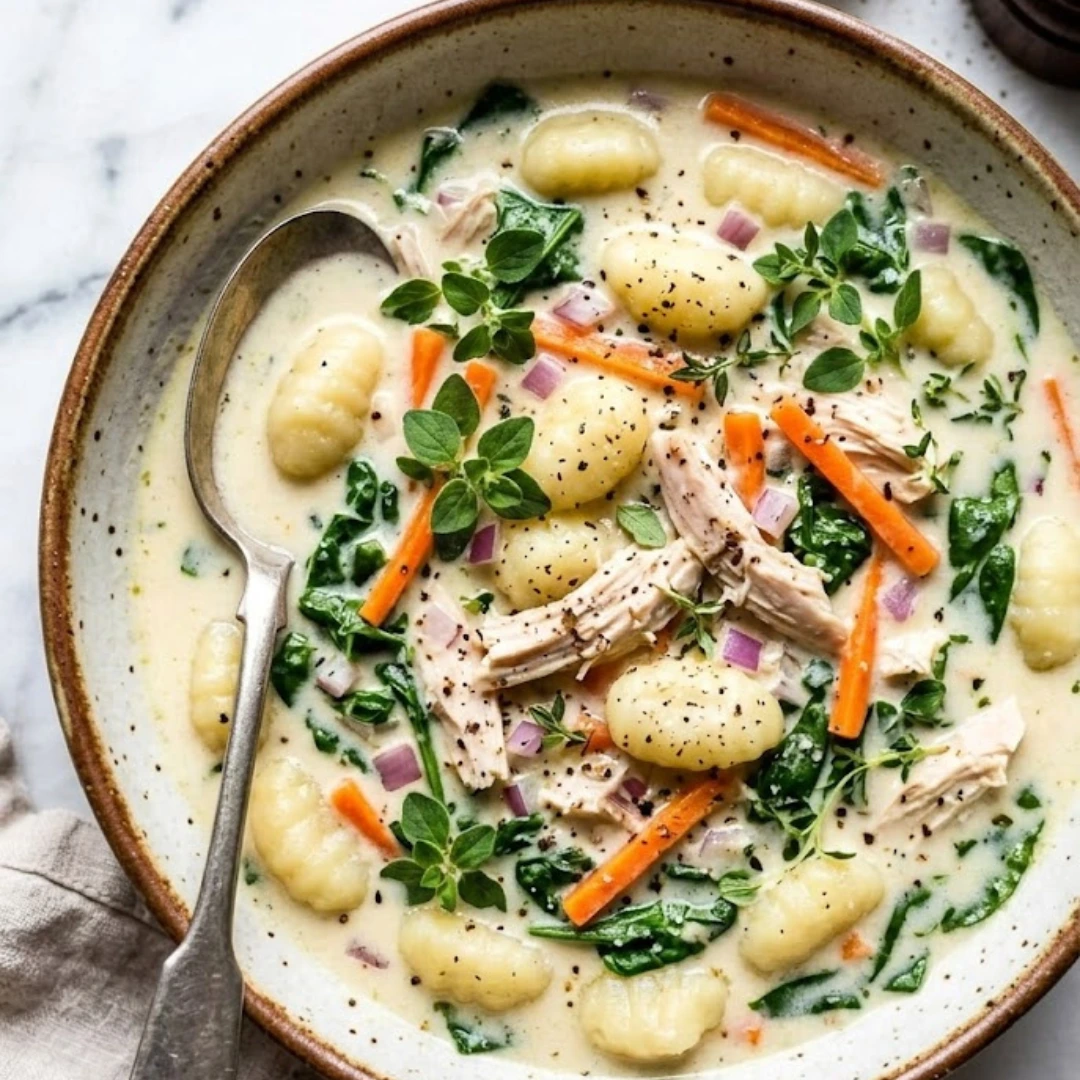
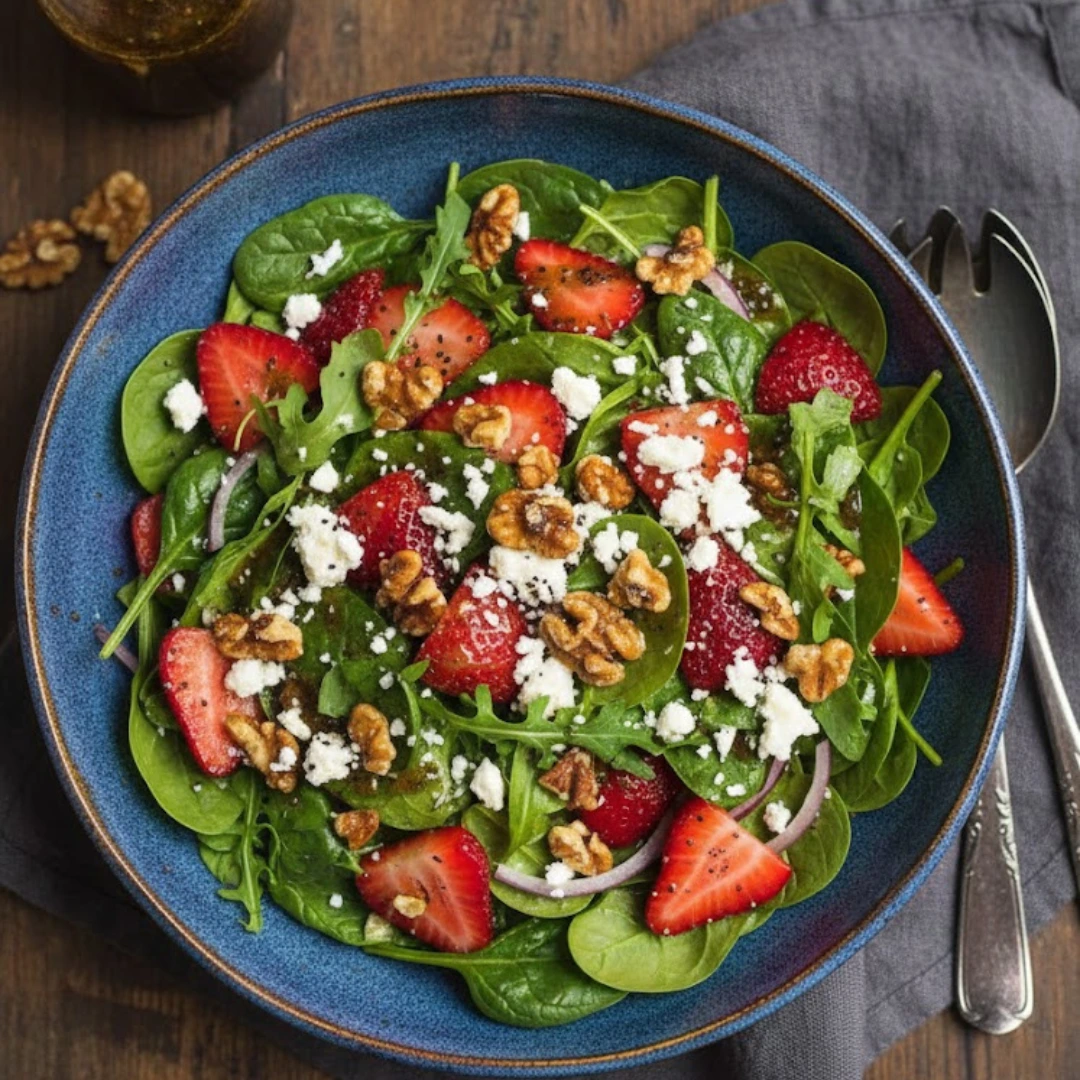
If you’d like to serve it alongside something light, pair it with the fresh, vibrant Green Goddess Salad for a balanced meal or contrast in flavors.
Silky Chocolate Buttercream Frosting (With Real Butter)
A great gluten free chocolate cake deserves frosting that’s just as irresistible smooth, rich, and melt-in-your-mouth creamy. This buttercream is a classic, made with real butter for depth and silkiness that no shortening-based version can match.
After testing several versions, I’ve found the secret lies in two things: perfectly softened butter and the right ratio of cocoa to sugar. The result is a frosting that spreads like a dream and sets beautifully without cracking.

Ingredients
- ¾ cup (1 ½ sticks) unsalted butter, softened
- ½ cup Dutch-process cocoa powder, sifted
- 3–5 cups powdered sugar, sifted (adjust for texture)
- 2–4 tablespoons milk (dairy or non-dairy)
- 2 teaspoons pure vanilla extract
- Pinch of salt to balance the sweetness
Step-by-Step Instructions
1. Cream the Butter
Beat softened butter in a large bowl or stand mixer for about 2 minutes until light and airy. This step is key for achieving that cloud-like texture.
2. Add Cocoa Powder
Sift in cocoa powder and beat again until fully incorporated and smooth. This gives the frosting its signature chocolate depth.
3. Add Powdered Sugar Gradually
Mix in powdered sugar one cup at a time, alternating with small splashes of milk. Start on low speed to avoid a sugar storm, then increase to medium-high as the mixture thickens.
4. Add Vanilla and Salt
Blend in vanilla extract and a pinch of salt for balance. Continue beating for another 2–3 minutes until the frosting is glossy and holds soft peaks.
5. Adjust Consistency
- Too thick? Add milk, one teaspoon at a time.
- Too thin? Beat in more powdered sugar.
The ideal frosting is spreadable but firm enough to hold shape between cake layers.
Variations
- Mocha Buttercream: Replace 2 tablespoons of milk with cooled brewed coffee.
- Peppermint Buttercream: Add ½ teaspoon peppermint extract for a festive twist.
- Dark Chocolate Frosting: Increase cocoa powder by 2 tablespoons and reduce sugar slightly for a richer flavor.
Frosting Tips
- Always frost a completely cooled cake to avoid melting the buttercream.
- For ultra-smooth finishes, apply a thin crumb coat, chill for 20 minutes, then add the final layer.
- Store leftover frosting in the fridge for up to 5 days or freeze for 1 month; re-whip before using.
This frosting is silky, rich, and perfectly complements the moist crumb of your gluten free chocolate cake a combination that turns any gathering into a celebration.
Expert Tips for Baking Success
Gluten free baking can be intimidating at first, but once you understand how the ingredients behave, it becomes second nature. After testing this gluten free chocolate cake multiple times, here are my best pro tips to help you bake it perfectly every time.
1. Measure Precisely — Especially Flour
A few extra tablespoons of flour can drastically change the cake’s texture.
Use a kitchen scale if possible, or spoon the flour lightly into a measuring cup and level it off never pack it down. This prevents a dry or heavy cake.
2. Always Sift Your Dry Ingredients
Sifting breaks up clumps of cocoa and flour, aerates the mixture, and ensures even distribution of baking powder and soda. It’s a small step that makes a big difference in the final crumb.
3. Room Temperature Ingredients Are Essential
Cold eggs or milk can cause butter to seize, making the batter grainy. Let everything especially butter, eggs, and milk come to room temperature before mixing.
This helps the ingredients emulsify smoothly, creating a uniform, tender batter.
4. Don’t Overmix the Batter
Once the dry ingredients are incorporated, stop mixing. Overbeating adds too much air, which can make your cake rise quickly and collapse after baking. A gentle whisk or silicone spatula works best for the final stir.
5. Bake on the Center Rack
For even heating, place your pans in the center of the oven not too close to the top or bottom. This ensures consistent rise and prevents overbrowning.
Cakes that bake too close to the heat source can develop domed or cracked tops.

6. Cool Completely Before Frosting
Gluten free cakes hold heat longer than wheat-based ones. Frosting even slightly warm layers will melt your buttercream. Allow the cake to cool at least 1 hour before decorating.
7. Storing and Moisture Maintenance
To keep the cake fresh, cover it with a cake dome or store in an airtight container. It stays moist for up to 4 days at room temperature or 1 week in the fridge.
You can also freeze the unfrosted layers (tightly wrapped) for up to 3 months perfect for planning ahead.
8. Pair with the Right Dessert or Drin
A rich slice of this gluten free chocolate cake pairs beautifully with creamy desserts like Piñon Ice Cream or with a light, citrusy drink after dinner.
For a complete dessert spread, serve alongside the indulgent Churro Cheesecake both are gluten free and crowd favorites.
When you follow these small but powerful baking details, you’ll get consistently soft, chocolatey results the kind that make gluten free baking feel effortless.
Ingredient Swaps & Variations
One of the joys of baking is making a recipe your own. This gluten free chocolate cake is versatile enough to adapt to different diets, flavor preferences, and occasions without compromising texture or taste. Here are some of my favorite tested variations and substitutions:
1. Dairy-Free Option
Swap the butter for a plant-based butter stick (not spreadable margarine) and use unsweetened almond milk or oat milk instead of dairy.
Vegan butters with higher fat content, like Miyoko’s or Earth Balance baking sticks, yield the best flavor and structure.
Tip: Chill the frosting slightly before spreading if using dairy-free butter to help it firm up.
2. Egg-Free (Vegan Adaptation)
Although eggs are crucial for structure, you can make a vegan version by replacing each egg with 1 tablespoon ground flaxseed + 3 tablespoons warm water (let sit 10 minutes to gel).
This will create a denser, fudgier texture similar to a brownie delicious, though not as fluffy as the original.
3. Sugar Substitutes
Prefer a less sweet dessert? Replace white sugar with coconut sugar and brown sugar with maple sugar for a lightly caramelized flavor.
Keep in mind: natural sweeteners can make the crumb slightly darker and softer, but the taste is still rich and satisfying.
4. Flavor Upgrades
- Add 1 teaspoon espresso powder to intensify chocolate flavor.
- Fold in ½ cup mini chocolate chips for extra richness.
- Add orange zest or almond extract for a gourmet twist.
- Mix in ½ teaspoon cinnamon for warmth (especially lovely in winter).
5. Gluten-Free Flour Alternatives
While Bob’s Red Mill 1:1 Blend is ideal, you can also use a homemade gluten free flour mix made from rice flour, potato starch, and tapioca flour just be sure to include xanthan gum.
If you love gluten free baking, check out my Easy Sourdough Bread Recipe or Sourdough Sandwich Bread Recipe for more flour-based inspiration.
6. Special Occasion Variations
- Layer Cake: Double the frosting and add fresh berries or jam between layers.
- Cupcakes: Bake at 350°F for 18–22 minutes; this recipe yields about 24 cupcakes.
- Bundt Cake: Grease the pan generously and bake for 45–50 minutes; the shape adds elegance for parties.
Each variation keeps the essence of the gluten free chocolate cake moist, chocolatey, and satisfying while giving you the freedom to make it fit your style or dietary needs.
Storage, Freezing & Make-Ahead Tips
A well-made gluten free chocolate cake stays soft and luscious long after it’s baked if stored properly. Gluten free flours tend to absorb moisture differently from wheat-based ones, so a few small steps will keep your cake tasting bakery-fresh for days.

Room Temperature Storage
- Store the fully frosted cake under a cake dome or in an airtight container for up to 3–4 days at room temperature.
- If you live in a warm or humid climate, store in a cool spot away from sunlight to prevent the buttercream from softening too much.
- The butter-based cake and frosting both hold moisture well, so you’ll never end up with a dry crumb.
Refrigeration
- For longer storage, refrigerate the cake (covered) for up to 7 days.
- Bring it to room temperature for 30–45 minutes before serving this restores the buttery texture and rich flavor.
- Refrigeration is especially helpful if you’ve used a dairy-free frosting or filled the cake with fruit.
Freezing the Cake
Freezing works beautifully for make-ahead baking or prepping celebration cakes.
Here’s how:
- Let the cake layers cool completely.
- Wrap each layer tightly in plastic wrap, then in foil or a freezer-safe bag.
- Freeze for up to 3 months.
- To thaw, place in the fridge overnight or on the counter for 2–3 hours before frosting.
Tip: You can even frost the cake while it’s still slightly chilled it’s easier to handle and creates a cleaner finish.
Freezing Frosted Cake Slices
Have leftovers? Slice the frosted cake into individual portions, freeze them on a tray for 1 hour, then wrap each piece individually. This makes it easy to grab a single serving whenever a chocolate craving hits.
Reviving Stored Cake
If the cake feels a bit firm after refrigeration, microwave a slice for 10–12 seconds to soften the crumb. The butter melts slightly, reviving its just-baked texture and flavor.
With these simple techniques, your gluten free chocolate cake will stay as moist and flavorful on day four as it was straight from the oven perfect for birthdays, holidays, or simply enjoying over coffee all week.
Serving Suggestions
A rich gluten free chocolate cake like this one deserves to be served beautifully. Whether it’s a birthday centerpiece or a weekend treat, presentation and pairing can elevate it from delicious to unforgettable.
1. Classic Pairings
- Fresh berries Raspberries, strawberries, or cherries add a juicy contrast to the rich cocoa flavor.
- Whipped cream A dollop of homemade whipped cream balances the dense crumb with airy lightness.
- Ice cream A scoop of Piñon Ice Cream brings a nutty, caramel undertone that pairs perfectly with the buttery chocolate base.
2. Elegant Garnishes
- Lightly dust the top with cocoa powder or powdered sugar for a simple, elegant look.
- Add chocolate curls or shavings for a bakery-style finish.
- Sprinkle sea salt flakes over the frosting for a modern, salted-chocolate twist.
3. Serving Temperatures
This cake is best served slightly cool or at room temperature, when the buttercream softens just enough to melt on the tongue. Avoid serving straight from the fridge cold butter mutes chocolate’s natural richness.
4. Pair With Savory Balance
If you’re serving this cake after a meal, pair it with something light and refreshing to balance its decadence.
Try the crisp, herb-forward Green Goddess Salad before dessert, or a citrusy tea to cleanse the palate between bites.
5. For Special Occasions
- Birthday celebrations: Layer the cake with strawberry jam or ganache, then finish with candles and chocolate sprinkles.
- Holiday dinners: Add a touch of peppermint extract to the frosting for a festive flavor.
- Romantic evenings: Serve with chocolate-dipped strawberries and a drizzle of warm ganache.
Every bite of this gluten free chocolate cake deserves to be savored slowly the buttery richness, the deep cocoa flavor, and that tender crumb combine to create a dessert that feels both comforting and sophisticated.
Final Thoughts – A Cake You’ll Bake Again and Again
After countless rounds of testing and tasting, I can say with full confidence that this gluten free chocolate cake is everything a homemade dessert should be rich, moist, and deeply chocolatey with a tender crumb that rivals any traditional cake.
The secret lies in simplicity: real butter for flavor, high-quality cocoa for depth, and the right gluten free flour blend for structure. Together, they create a cake that’s elegant enough for special occasions yet easy enough to make on a quiet weekend afternoon.
It’s the kind of dessert that earns compliments every time the one you’ll bring to birthdays, holidays, and family gatherings because everyone, gluten free or not, loves it. And as someone who has baked this recipe dozens of times, I can promise it delivers that “wow” moment with every slice.
So preheat your oven, grab a whisk, and experience the joy of baking a gluten free chocolate cake that doesn’t compromise not on flavor, texture, or heart.
Follow us in Pinterest.
Common Questions About Gluten Free Chocolate Cake
1. Can I make this gluten free chocolate cake dairy-free?
Yes! Simply replace the butter with a plant-based baking butter and use almond milk, oat milk, or soy milk instead of dairy. The texture remains moist, and the cocoa flavor still shines through. For the frosting, use vegan butter and a splash of plant-based milk it whips beautifully.
2. Why is my gluten free cake crumbly?
Crumbly texture usually comes from using a flour blend without xanthan gum, which provides structure. Make sure to use a 1:1 gluten free baking blend that includes it. Overbaking can also dry the crumb, so check for doneness early with a toothpick.
3. Can I use coconut sugar or maple syrup instead of regular sugar?
You can but note that these natural sweeteners add moisture and change the texture slightly. Coconut sugar will make the crumb softer and darker, while maple syrup requires reducing the milk by a few tablespoons to prevent a wet batter.
4. How do I make this cake less sweet?
Cut back the white sugar by ¼ cup or use darker cocoa powder to balance sweetness. You can also reduce the powdered sugar in the frosting the butter and cocoa still provide plenty of flavor.
5. Can I freeze this cake before frosting?
Absolutely. Wrap cooled layers tightly in plastic wrap and then foil. Freeze for up to 3 months, and thaw overnight before frosting. This is a great make-ahead strategy for birthdays or holiday gatherings.
6. Does gluten free flour affect flavor?
High-quality gluten free blends, like Bob’s Red Mill 1:1, are virtually flavor-neutral. When combined with cocoa and butter, the cake tastes indistinguishable from a traditional wheat-based one rich, smooth, and indulgent.
The Best Gluten Free Chocolate Cake (Rich, Moist & Made with Butter)
Ingredients
- 1 ¾ cups gluten free 1:1 baking flour (like Bob’s Red Mill)
- ¾ cup unsweetened Dutch-process cocoa powder
- 1 tsp baking soda
- ½ tsp baking powder
- ½ tsp salt
- ¾ cup unsalted butter, softened
- ¾ cup white sugar
- ½ cup light brown sugar
- 3 large eggs
- 1 tsp vanilla extract
- 1 cup whole milk or almond milk
- 1 cup hot brewed coffee (or hot water)
Instructions
- Grease two 8-inch round pans or one 9×13 pan and line the bottoms with parchment paper.
- In a large bowl, beat the softened butter with both sugars until pale and fluffy (2–3 minutes).
- Add eggs one at a time, beating well after each. Then add vanilla and milk, mixing until smooth.
- In a separate bowl, sift flour, cocoa, baking powder, baking soda, and salt. Add to wet mixture in 2 parts.
- Pour in hot brewed coffee and mix until the batter is smooth and slightly thin.
- Pour into pans and bake at 350°F for 32–37 minutes. Cool in pan 10 minutes, then fully on a wire rack.
- Frost with chocolate buttercream or desired topping. Garnish with cocoa, berries, or shaved chocolate.
Notes
Equipment
- mixing bowls
- hand or stand mixer
- whisk
- measuring cups & spoons
- rubber spatula
- 8-inch cake pans (or 9×13 pan)
- parchment paper
- cooling rack