
Indulging in a luxurious dessert does not always require hours in the kitchen or a professional pastry degree. Sometimes, the most sophisticated treats are the simplest ones. These Easy Gold Chocolate Covered Strawberries represent the pinnacle of elegant snacking, combining the tart, juicy snap of a fresh berry with the rich, velvety embrace of premium dark chocolate. Whether you are preparing a romantic gesture for Valentine’s Day, a shimmering platter for a wedding shower, or simply a midweek pick-me-up, this recipe delivers a high-impact aesthetic with minimal effort. By mastering a few basic melting techniques and focusing on ingredient quality, you can transform humble fruit into a gilded masterpiece that rivals any high-end boutique confection.
Table of Contents
Ingredients
- 1 pint fresh strawberries (approximately 1 pound)
- 2 cups dark chocolate chips or chopped dark chocolate (12 ounces)
- 1/2 cup chopped white chocolate (3 ounces), for drizzling (optional)

Instructions
- Begin by preparing your fruit. Rinse 1 pint of fresh strawberries under cool running water, being careful not to bruise the delicate skins. Immediately and gently pat them dry using a clean kitchen towel or paper towels. It is vital that the strawberries are completely dry before you begin dipping; spread them out and allow them to air-dry further if any moisture remains.
- Set up a double-boiler by filling the bottom pan or a medium saucepan with one or two inches of water. Bring this to a simmer over medium-high heat. Place 2 cups of dark chocolate chips or chopped chocolate into the top portion of the double-boiler or a heatproof bowl set over the simmering water.
- Allow the chocolate to melt slowly, stirring occasionally with a spatula, until the mixture is smooth and no lumps remain. Once fully melted, remove the bowl from the heat source.
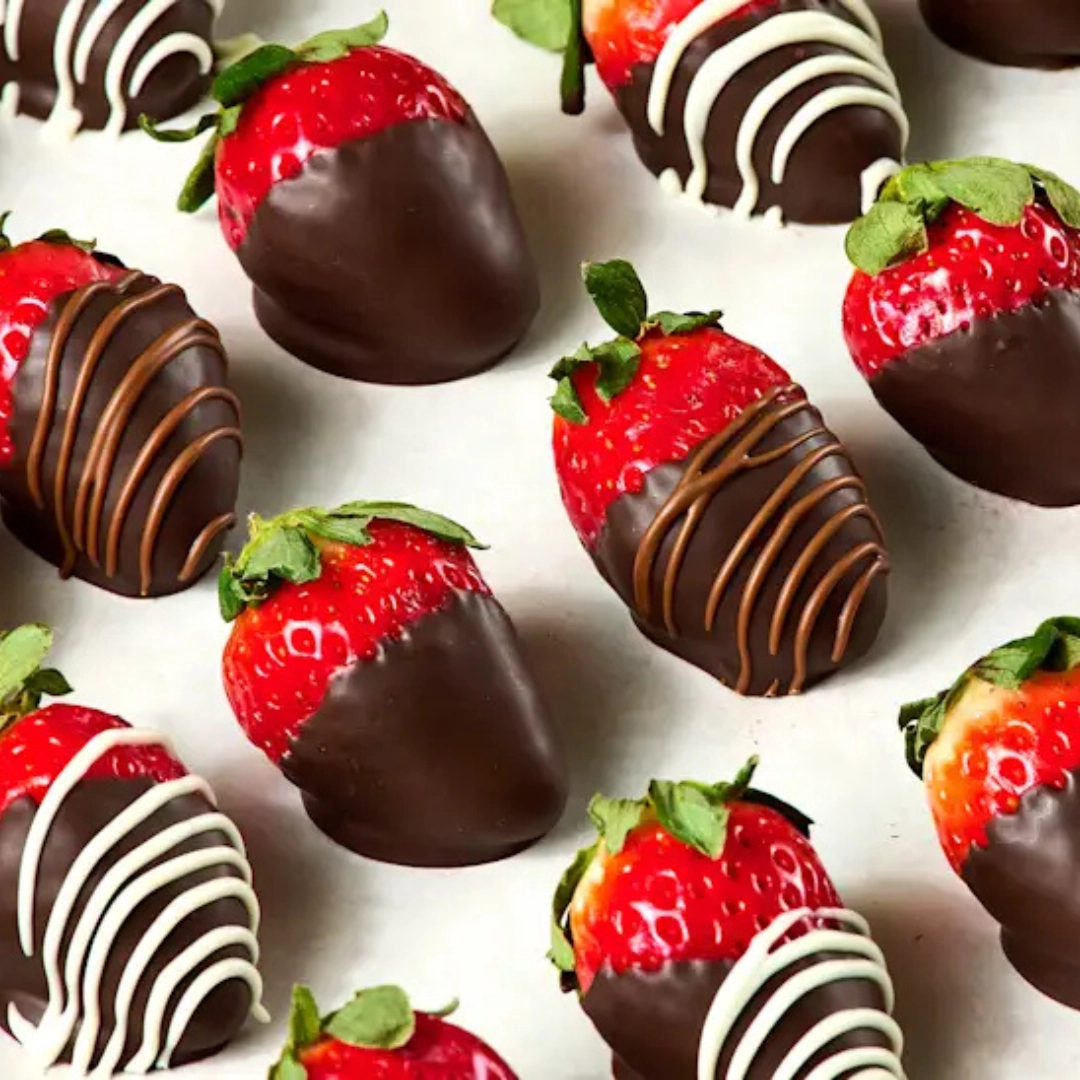
- Working with one strawberry at a time, grasp the fruit by the green top leaves or the stem. Submerge the strawberry into the melted dark chocolate. Rotate or swirl the berry as needed to ensure an even, thick coating of chocolate covers the surface.
- Lift the strawberry out of the bowl and hold it over the chocolate for a moment, shaking it very gently to allow any excess coating to drip back into the bowl.
- Carefully place the dipped strawberry on its side onto a baking sheet lined with parchment paper or a silicone mat. Repeat this process with the remaining strawberries. Allow the berries to sit undisturbed until the chocolate coating is firm and dry to the touch. You may place the baking sheet in the refrigerator to accelerate the setting process.
- Once the dark chocolate has set, melt the 1/2 cup of chopped white chocolate using the same double-boiler method. Alternatively, for this smaller volume, you can use a microwave, heating in 15-second intervals and stirring between each burst until smooth.
- Transfer the melted white chocolate into a small plastic zip-top bag. Squeeze the chocolate toward one corner and snip off a tiny piece of the plastic tip.
- Using quick, sweeping motions across the entire tray of strawberries, drizzle the white chocolate in a decorative pattern. Let the drizzle set completely—either at room temperature or back in the fridge for a few minutes—before serving your creations.

Achieving the Ultimate Creamy Consistency
The secret to a professional-looking chocolate shell lies entirely in how you handle the heat. Chocolate is a temperamental ingredient; if it gets too hot, it loses its shine and becomes “burnt” or grainy. By using a double-boiler, you are ensuring that the chocolate melts via the gentle steam of the water below rather than the direct, harsh heat of a burner. This indirect method keeps the cocoa butter stable, resulting in a glossy finish that snaps when you bite into it.
If you find your chocolate is a bit too thick for dipping, resist the urge to add water. Even a single drop of water can cause the chocolate to “seize,” turning it into a clumpy, unusable mess. If you need to thin it out slightly, a teaspoon of neutral oil or cocoa butter can help, but generally, high-quality dark chocolate with a high cocoa butter content will melt into a perfectly dippable ribbon on its own.
Mastering the Art of the Dip
When you are ready to dip, organization is your best friend. Create an assembly line: your bowl of warm chocolate, your tray of dry strawberries, and a lined baking sheet. When you submerge the berry, don’t just dunk it straight down. Instead, dip it at an angle and rotate. This ensures the chocolate gets up under the leaves without covering them entirely, which provides a beautiful green contrast to the dark coating.
The “shake” is the most underrated part of the process. If you move too fast, you will end up with a large pool of chocolate at the base of your strawberry (often called a “foot”). By gently vibrating the strawberry over the bowl, you encourage the excess to fall away. When you finally lay it on the parchment paper, try to set it down in one fluid motion to keep the lines clean.
Deep-Dive FAQ
How do I prevent the chocolate from sweating once the strawberries are finished?
Sweating usually occurs due to drastic temperature changes. If you move the strawberries from a very cold refrigerator to a warm, humid kitchen, condensation will form on the surface of the chocolate. To minimize this, try to let them set in a cool, dry area of your kitchen if possible. If you must refrigerate them, take them out about fifteen minutes before serving so they can gradually come to temperature.
Why did my chocolate turn gray or streaky after it dried?
This is known as “bloom.” It happens when the fats in the chocolate separate and rise to the surface, usually because the chocolate was heated too quickly or stored in a place with fluctuating temperatures. While bloomed chocolate doesn’t look as pretty, it is still perfectly safe to eat. To avoid this, keep your melting temperature low and slow.
Can I use frozen strawberries for this recipe?
It is highly recommended that you stay away from frozen strawberries for dipping. As frozen fruit thaws, it releases a significant amount of moisture. This moisture will prevent the chocolate from adhering and will turn the inside of your chocolate shell into a watery mess. For the best results, always use fresh, firm berries.
What is the best way to clean up leftover melted chocolate?
Don’t let the chocolate harden in your bowl! The easiest way to clean up is to wipe the bowl with a paper towel while the chocolate is still liquid. If it has already hardened, you can briefly place the bowl over the simmering water again to soften it, then wipe it clean. This prevents you from having to scrub hardened chocolate off your cookware.
The Science of the Perfect Strawberry Selection
Not all strawberries are created equal when it comes to chocolate dipping. When shopping, look for berries that are uniform in size. This ensures that they all set at the same rate and look consistent on a serving platter. The “shoulders” of the strawberry (the area near the green cap) should be bright red. If they are white or green, the berry isn’t fully ripe and will be quite tart.
Furthermore, the leaves should look hydrated and vibrant. Since the leaves act as your “handle” during the dipping process, you want them to be sturdy. If they are shriveled or dry, they may break off into your chocolate, adding unwanted debris to your melting bowl.
Modifications and Substitutions
While dark chocolate is the classic choice for its sophisticated bitterness, you can easily swap it for milk chocolate if you prefer a sweeter profile. For those who want a dairy-free or vegan option, ensure your dark chocolate chips are certified vegan; most high-quality dark chocolates with over seventy percent cocoa are naturally dairy-free.
If you want to add texture, you can roll the strawberries in finely chopped nuts, toasted coconut, or crushed graham crackers immediately after the dark chocolate dip while it is still wet. For a “gold” effect, you can purchase edible gold luster dust or gold leaf. Once the chocolate is fully set, use a small, dry food-safe brush to apply the dust to the surface for a shimmering, high-end look.
Accompaniments and Serving
These strawberries are a centerpiece on their own, but they also play well with others. Serve them alongside a glass of dry sparkling wine or Champagne; the acidity of the bubbles cuts through the richness of the chocolate beautifully. For a dessert board, pair them with shortbread cookies, triangles of brie cheese, and some lightly salted Marcona almonds.
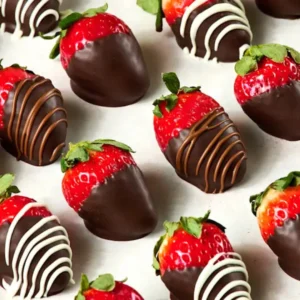
When it comes to presentation, less is more. Arrange them on a white marble slab or a dark slate board to make the colors pop. If you are gifting them, place each strawberry in a small paper cupcake liner. This not only looks professional but also prevents the strawberries from rolling around and scuffing the chocolate finish during transport.
Unique Culinary Insights
One of the most common mistakes in candy making is rushing the drying process. While it is tempting to use the refrigerator to get the job done in five minutes, a room-temperature set often results in a better shine. If your kitchen isn’t too warm, give them thirty to forty-five minutes on the counter. The slow crystallization of the fats in the chocolate leads to a much more stable and attractive coating.
Another tip is to pay attention to the temperature of the berries themselves. If the strawberries are ice-cold from the fridge, the chocolate will seize and harden the moment it touches the skin, making it difficult to get a smooth, even coat. Aim for “cellar temperature”—slightly cool but not cold—to give yourself the maximum amount of work time.
Advanced Storage Techniques
Chocolate-covered strawberries are best enjoyed within twelve hours of being made. However, if you have leftovers, they can be stored in the refrigerator for two to three days. The trick is to line an airtight container with a thick layer of paper towels. The paper towel acts as a dehumidifier, absorbing the moisture that the strawberries naturally release as they sit.
Avoid stacking the strawberries on top of one another. The weight of the top layer can crack the chocolate of the bottom layer, and they may stick together. Keep them in a single layer with a little bit of breathing room between each berry. If you notice any “weeping” (sugar syrup leaking from the top), it is best to eat those berries immediately.
Sensory Experience of the Gold Berry
Imagine the first bite: the initial resistance of the dark chocolate shell, followed by a sharp, satisfying snap. Then, the flood of cool, sweet strawberry juice hits your palate, balancing the deep, earthy notes of the cacao. The white chocolate drizzle adds a final hit of creamy vanilla sweetness that lingers after the berry is gone. It is a multi-textured experience that engages the senses of sight, touch, and taste simultaneously.
This recipe proves that luxury is often found in the details. By taking the time to dry your fruit properly and melt your chocolate gently, you create a treat that feels expensive and rare. It is the ultimate “low effort, high reward” kitchen project that never fails to impress a crowd.
A Final Note on This Sweet Indulgence
Creating these Easy Gold Chocolate Covered Strawberries is a reminder that the best things in life are often the simplest. By using just a few high-quality ingredients and a little bit of patience, you can produce a dessert that carries the weight of a professional confectionary. Whether you are sharing them with a loved one or treating yourself after a long day, these berries offer a moment of pure, unadulterated joy. The contrast of the dark, snapping chocolate against the vibrant, succulent fruit is a timeless combination that will never go out of style.
Nutritional Table
| Serving Size: 1 Strawberry | Amount Per Serving |
| Calories | 85 |
| Total Fat | 5 grams |
| Saturated Fat | 3 grams |
| Cholesterol | 0 milligrams |
| Sodium | 5 milligrams |
| Total Carbohydrates | 10 grams |
| Dietary Fiber | 2 grams |
| Sugars | 7 grams |
| Protein | 1 gram |
Disclaimer
The nutritional information provided is an estimate based on standard ingredient measurements. Actual nutritional content may vary depending on the specific brand of chocolate used and the size of the strawberries. For those with specific dietary restrictions or allergies, please consult with a healthcare professional. This recipe contains chocolate, which may contain soy lecithin or trace amounts of milk and nuts depending on the manufacturing process.
Easy Gold Chocolate Covered Strawberries
Ingredients
- 1 pint fresh strawberries (about 1 pound)
- 2 cups dark chocolate chips or chopped chocolate (12 ounces)
- 0.5 cup chopped white chocolate (3 ounces), for drizzling (optional)
Instructions
- Rinse the strawberries under cool water and gently pat dry. Spread them out on a clean towel to ensure they are completely dry before dipping.
- Fill the bottom of a double-boiler or saucepan with an inch or two of water and bring to a simmer. Place dark chocolate in the top bowl over the water.
- Melt the chocolate, stirring occasionally, until smooth and no lumps remain. Remove from the heat source.
- Holding a strawberry by the leaves, dip it into the chocolate and swirl to coat. Shake gently to remove excess chocolate.
- Lay the strawberries on a baking sheet lined with parchment paper. Let them sit until the coating is firm and set.
- Melt the white chocolate in the microwave in 15-second bursts or using the double-boiler method until liquid.
- Transfer white chocolate to a small zip-lock bag, snip the corner, and drizzle quickly over the set strawberries.
- Allow the drizzle to set completely at room temperature or in the refrigerator before serving.
Notes
Equipment
- Double boiler or heatproof bowl
- baking sheet
- Parchment paper or silicone mat
- Small zip-lock bag For drizzling
- Kitchen towel


