
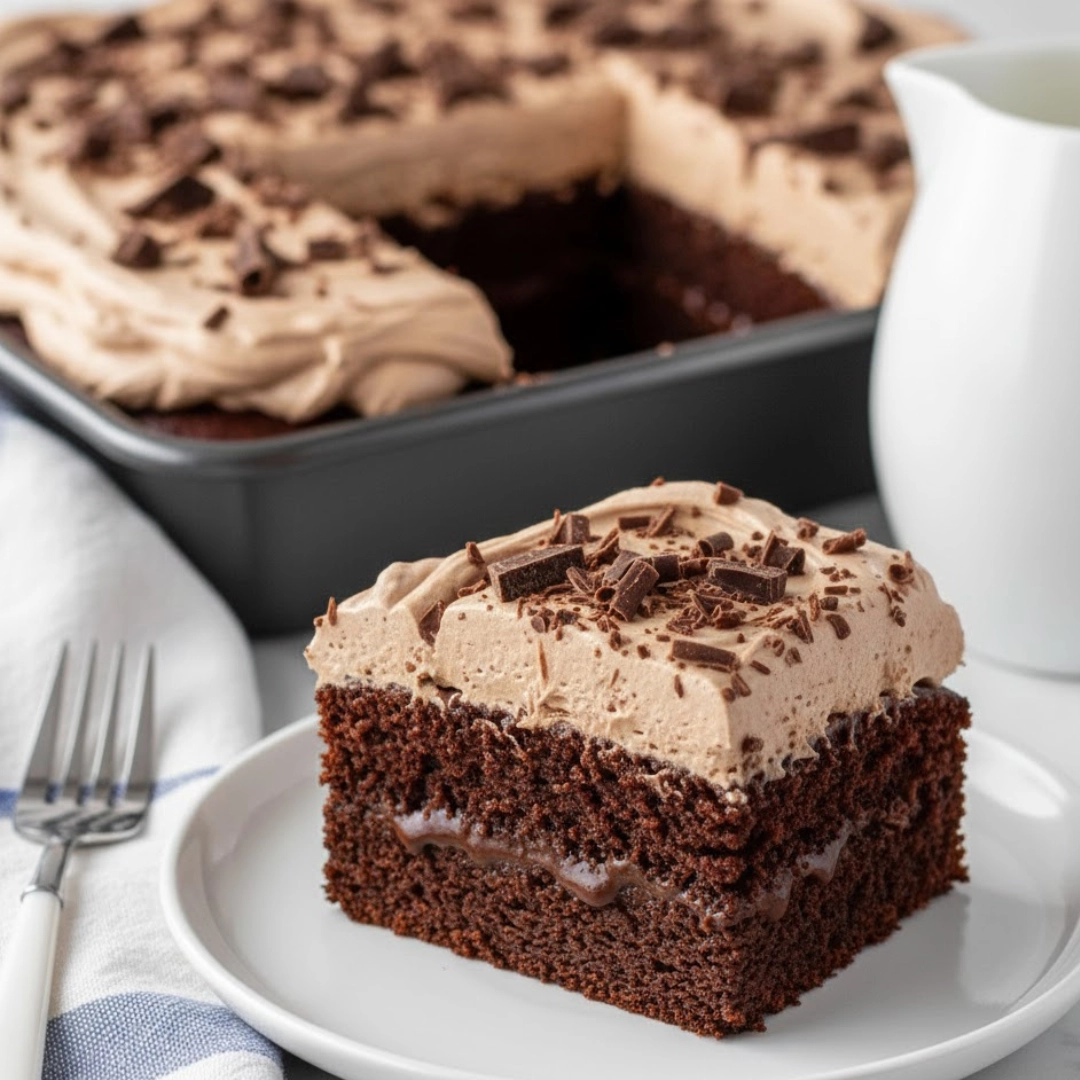
The phrase “Death by Chocolate” is often hyperbole, but in the case of a good Death by Chocolate Poke Cake, it’s a loving promise. This cake is the ultimate dark chocolate indulgence, built on a foundation of moist devil’s food cake that has been lovingly infused with a rich chocolate pudding mixture, crowned with a fluffy whipped topping, and showered with chocolate shavings and candy pieces. It’s a spectacular dessert that manages to be both impressive and incredibly straightforward to prepare, making it a perfect centerpiece for parties, holidays, or any occasion that calls for a serious, over-the-top chocolate fix. The beauty of the poke cake method is in the way it guarantees a moist, deeply flavored slice every time, thanks to the layers of pudding seeping into the tender crumb.
This dessert is designed for the true chocoholic—the one who believes there’s no such thing as too much cocoa. It delivers varying textures, from the dense, saturated cake to the creamy pudding and the light, airy frosting. Best served slightly chilled, it provides a cooling, comforting sweetness that is ideal for capping off a hearty meal or satisfying a late-afternoon craving.
Table of Contents
The Essential Components for Your Chocolate Indulgence
The key to this recipe is the layering of flavors and textures, with each component playing a vital role. We are relying on high-quality cocoa powder and chocolate for the deepest flavor profile.
For the Cake Base
- One (1) box (15.25 ounces / 432 grams) devil’s food cake mix
- Three (3) large eggs
- One half (1/2) cup vegetable oil
- One and one fourth (1 1/4) cups water
For the Chocolate Infusion
- Two (2) packages (3.9 ounces / 110 grams each) instant chocolate pudding mix
- Three (3) cups cold milk (whole or two percent recommended)
For the Creamy Topping and Garnish
- One (1) large container (12 ounces / 340 grams) frozen whipped topping, thawed
- One half (1/2) cup chocolate chips (mini or standard)
- One half (1/2) cup chocolate shavings or crumbled chocolate candy bars

An Overview of the Preparation Process
Achieving this chocolate masterpiece is a three-step process: bake, infuse, and frost. The majority of the time is hands-off, allowing the cake to cool and the pudding to set.
- Prepare and Bake the Cake: Following the instructions on the cake mix box, combine the cake mix, eggs, oil, and water. Pour the batter into a greased and floured nine by thirteen inch baking dish and bake until a wooden pick inserted near the center comes out clean.
- Infuse and Chill: Immediately after removing the cake from the oven, use the handle of a wooden spoon or a dowel to poke holes across the entire surface. Prepare the instant chocolate pudding, and while it is still liquid, pour it slowly and evenly over the warm, poked cake. Place the cake in the refrigerator for at least two hours to chill completely.
- Frost and Finish: Once the cake is fully chilled and the pudding has set, gently spread the thawed whipped topping over the surface. Sprinkle with the chocolate chips and chocolate shavings for the signature final touch. Slice and serve cold.

Detailed Methods: Building the Layers of Flavor
The success of a poke cake lies in the timing of the infusion and the evenness of the pudding layer. Pay close attention to these steps to ensure a uniformly moist texture.
Crafting the Devil’s Food Foundation
Before mixing, ensure your eggs are at room temperature. This simple step helps them emulsify better with the oil, leading to a lighter, more voluminous cake crumb. Combine the dry mix, eggs, oil, and water in a large bowl. Mix on medium speed for about two minutes, scraping down the sides to ensure no dry pockets remain. The batter should be smooth, thick, and a deep, rich brown color.
Pour the batter into your prepared nine by thirteen inch pan. The oven should be preheated to three hundred fifty Fahrenheit. Bake for twenty-eight to thirty-two minutes. Doneness check: The top of the cake should spring back lightly when touched, and the edges should just begin to pull away from the sides of the pan. The wooden pick test is the most reliable: look for a pick that comes out with moist crumbs, but no wet batter.
The Critical Infusion Stage
This is the key step that transforms a simple cake into a Death by Chocolate Poke Cake. As soon as the cake is out of the oven, start poking. Use a clean wooden spoon handle, which creates holes approximately one inch in diameter—perfect for soaking up the pudding. The holes should be spaced about one inch apart across the entire surface. Poke all the way down to the bottom of the pan.
Next, prepare the pudding. Whisk the two packages of instant pudding mix with the three cups of cold milk for about two minutes, until it begins to thicken slightly but is still pourable. Work quickly. Slowly pour the liquid pudding over the warm cake, paying special attention to pouring directly into the holes. The warmth of the cake helps the liquid absorb more readily. Do not spread or mix it. Once poured, cover the cake loosely with plastic wrap and transfer it to the refrigerator. It needs a minimum of two hours, but four hours or even overnight is better, to allow the pudding to fully set and bond with the cake.
The Finishing Flourish
Once the cake is firm and cold, remove the plastic wrap. The final layer is the fluffy, non-dairy whipped topping. It provides a creamy, contrasting texture to the dense cake. Gently scoop the thawed whipped topping onto the center of the cake and use an offset spatula to spread it evenly to the edges. Avoid pressing down too hard, as you don’t want to mix the topping with the chocolate layer beneath.
Finally, garnish generously. The combination of miniature chocolate chips and delicate chocolate shavings provides visual interest and a subtle textural crunch. You can create easy chocolate shavings by running a vegetable peeler along the side of a cold block of bittersweet chocolate.
Expert Tips for Supreme Cake Results
Achieving the ultimate dense, moist texture requires a few tricks that elevate the standard box mix result.
- Pudding Temperature: Ensure the milk for the pudding is ice-cold. This helps the instant pudding set faster and guarantees a thicker, richer filling that won’t simply run out of the holes.
- The Power of Warmth: Poke the cake and pour the pudding while the cake is still warm from the oven. The internal heat slightly melts the cake crumb, creating capillary action that pulls the liquid pudding deeper into the structure, ensuring better saturation.
- Substitute Milk for Water: For an even richer, moister cake base, substitute the water called for in the box mix with an equal amount of whole milk. This adds richness and fat, improving the cake’s texture.
- Prevent a Cracking Surface: If you see the cake top beginning to form a thin crust during baking, loosely tent the pan with aluminum foil for the remaining bake time. This traps moisture and ensures a softer surface that accepts the poked holes without tearing.
- Use High-Quality Garnish: The garnish is a critical part of the presentation and the overall “death by chocolate” experience. Skip the pre-bagged chocolate curls and grate a high-quality bittersweet or dark chocolate bar over the top just before serving for the best flavor and melt-in-your-mouth texture.
- Pre-Slicing Trick: To get clean slices of the finished cake, run a thin, sharp knife under hot water, wipe it dry, and make your cuts. Repeat this process for every slice. The warmth helps the knife pass through the layers of frosting, pudding, and cake without dragging.
Flavor Variations and Adjustments
While the classic recipe is sublime, a few simple adjustments can cater to different preferences or themes.
- Mocha Infusion: Replace half of the milk in the pudding mixture with strongly brewed, cooled coffee. This deepens the chocolate flavor and adds a subtle coffee note that complements the cocoa beautifully.
- Salted Caramel Drizzle: Before adding the whipped topping, drizzle one half cup of quality store-bought or homemade salted caramel sauce over the set chocolate pudding layer. The salty-sweet counterpoint adds another layer of complexity.
- Peppermint Twist: This variation is perfect for the holidays. Use instant chocolate mint pudding instead of plain chocolate. Garnish the finished cake with crushed peppermint candy canes alongside the chocolate chips.
- Nutty Crunch Layer: Mix one half cup of finely chopped pecans or walnuts into the whipped topping before spreading. This adds a welcome layer of crunch to the predominantly soft textures of the cake.
- Use Dark Chocolate Pudding: For a truly intense, bittersweet experience, use dark chocolate or triple chocolate instant pudding mixes. This pulls back on the sweetness and pushes the cocoa notes to the forefront.

Thoughtful Serving Recommendations
This cake is rich and decadent, so pairing it with something light or a contrasting flavor ensures balance.
- Fresh Raspberries and Cream: Serve a slice alongside a small scoop of fresh, bright raspberries. The tartness of the berry cuts through the chocolate’s richness perfectly. A dollop of plain crème fraîche or fresh whipped cream (not the stabilized topping used on the cake) also provides a light, fresh contrast.
- Espresso or Dark Coffee: The bitterness and heat of a freshly brewed espresso or a strong cup of black coffee are the ideal palate cleansers and flavor amplifiers for an intense chocolate dessert.
- Vanilla Bean Ice Cream: A small scoop of high-quality vanilla bean ice cream or gelato served alongside the cake provides a cool, creamy buffer, especially if the cake is served at room temperature or slightly chilled.
- Liqueur Syrup Drizzle: For adult occasions, a tablespoon of raspberry, cherry, or orange liqueur lightly drizzled over the plate just before serving adds an elegant, aromatic finishing touch.
Common Inquiries About the Poke Cake
- Can I use homemade pudding instead of instant?
- Yes, absolutely. If using homemade pudding, make sure it is cooked, cooled slightly, but still liquid when you pour it over the cake. It must still be pourable so it can seep into the holes before it fully sets up.
- How long will this cake keep fresh?
- Because of the moist pudding filling and the dairy topping, the cake must be kept refrigerated. It is best enjoyed within three to four days. After that, the cake starts to become overly saturated and can lose its texture.
- Can I freeze this dessert?
- We do not recommend freezing the fully finished cake. While the cake base freezes well, the whipped topping and the pudding filling will change texture when thawed, becoming watery or grainy. If you must freeze, freeze only the plain, poked cake base before adding the pudding or topping.
- What if my pudding runs out of the pan?
- This usually means the holes were too close to the edges of the pan, or the cake didn’t cool for long enough before the pudding was poured. Ensure you leave a one-inch border around the edges where no holes are poked. If a small amount leaks, it will set into a fudgy crust and is generally not an issue.
- Can I use a different size pan?
- The nine by thirteen inch pan is the standard for this recipe, allowing for the correct cake height and pudding ratio. If you use a smaller pan, the cake will be too thick, and a larger pan will result in a thin, dry cake. Stick to the specified size for the best result.
Calculated Nutritional Summary
This estimated nutritional breakdown is for one serving of the Death by Chocolate Poke Cake, based on twelve equal slices.
| Nutrient | Amount per Serving |
| Calories | 425 kcal |
| Protein | 6 g |
| Carbs | 58 g |
| Fat | 19 g |
| Fiber | 2 g |
| Sugar | 40 g |
| Sodium | 430 mg |
Estimated Values Disclaimer
Nutrition information is an estimate and may vary based on preparation and ingredients used.
Death by Chocolate Poke Cake: A Decadent Celebration of Cocoa
Ingredients
- 1 box devil’s food cake mix (15.25 ounces)
- 3 large eggs
- 0.5 cup vegetable oil
- 1.25 cups water or whole milk for richer cake
- 2 packages instant chocolate pudding mix (3.9 ounces each)
- 3 cups cold milk whole or two percent recommended
- 1 container frozen whipped topping, thawed (12 ounces)
- 0.5 cup chocolate chips mini or standard
- 0.5 cup chocolate shavings or crumbled chocolate candy bars
Instructions
- Preheat oven to three hundred fifty Fahrenheit. Combine the cake mix, eggs, oil, and water in a large bowl. Mix on medium speed for about two minutes. Pour the batter into a greased and floured nine by thirteen inch baking dish and bake for twenty-eight to thirty-two minutes, until a wooden pick inserted near the center comes out clean.
- Immediately after removing the cake from the oven, use the handle of a wooden spoon or a dowel to poke holes about one inch apart across the entire surface, going all the way to the bottom. Whisk the two packages of instant chocolate pudding mix with the three cups of cold milk for about two minutes, until it begins to thicken slightly but is still pourable.
- Slowly pour the liquid pudding evenly over the warm, poked cake, paying special attention to pouring directly into the holes. Cover the cake loosely with plastic wrap and place it in the refrigerator for at least two hours (four hours is better) to chill completely and allow the pudding to set.
- Once the cake is fully chilled and the pudding has set, gently spread the thawed whipped topping over the surface. Sprinkle with the chocolate chips and chocolate shavings for the signature final touch. Slice and serve cold.
Notes
Equipment
- Nine by thirteen inch baking dish
- large mixing bowl
- Whisk or electric mixer
- Wooden spoon or dowel for poking holes


