
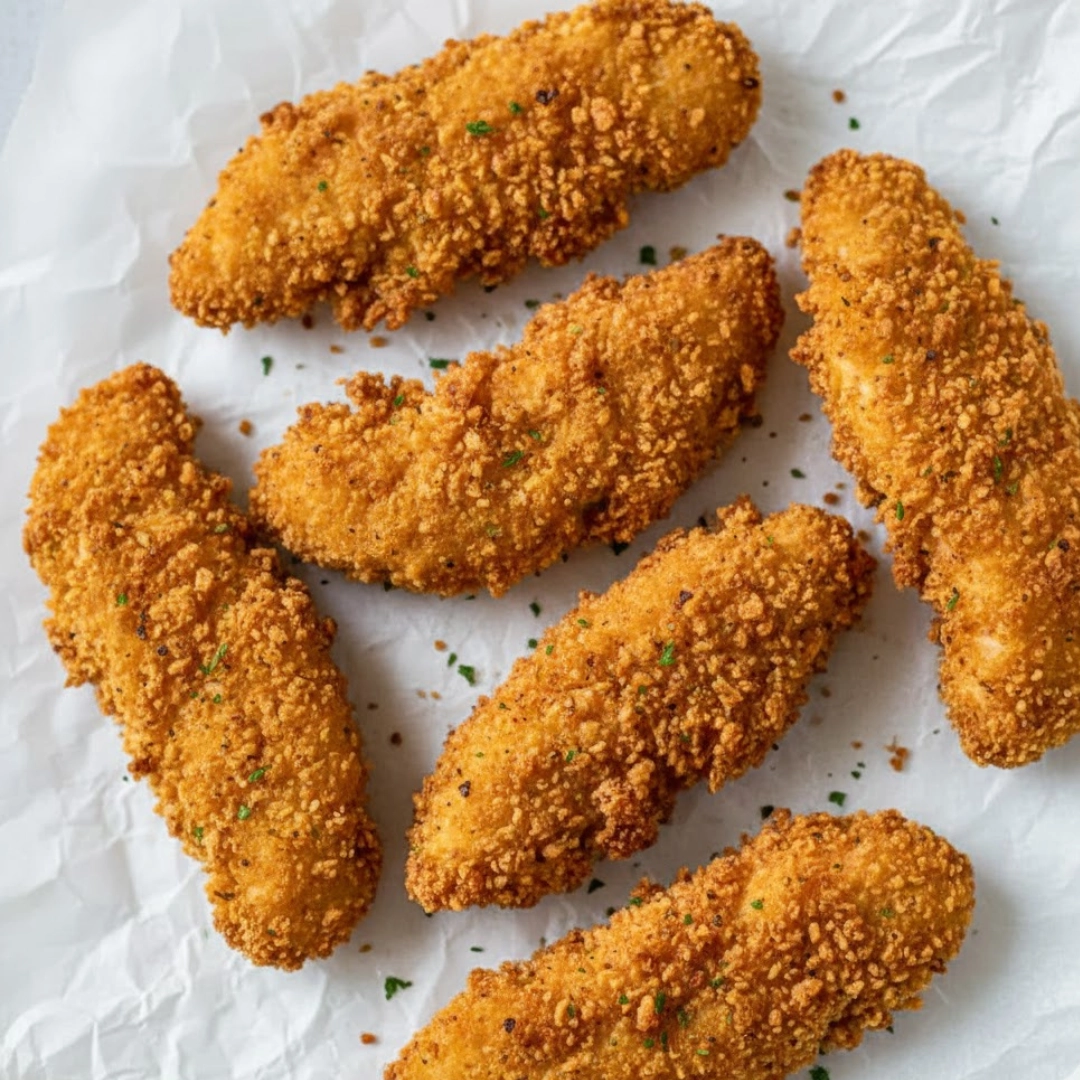
The chicken tender, or chicken strip, holds a sacred place in the hierarchy of comfort foods. It is often the dish we turn to when seeking simple, satisfying pleasure—a nostalgic, crunchy bite that pairs perfectly with almost any dipping sauce imaginable. Yet, achieving that truly golden, aggressively crunchy exterior without plunging the meat into a vat of hot oil has long been the great culinary puzzle. The air fryer solves this, offering a path to guilt-free texture. This comprehensive guide will walk you through the precise technique required to generate truly flawless Crispy Air Fryer Chicken Tenders, yielding meat that is tender and juicy on the inside, encased in a shatteringly crisp, well-seasoned crust. It’s an exercise in maximizing texture contrast with minimal effort.
Table of Contents
Foundational Components: Building Your Base
This recipe assumes the use of standard US measuring cups and spoons. Gram weights are provided as a secondary reference for precision.
For the Chicken:
- One and one half pounds (680 grams) chicken tenderloins, trimmed of silver skin, or boneless, skinless chicken breast sliced into one-inch strips.
- One teaspoon kosher salt
- One half teaspoon black pepper
For the Breading Station:
- Station 1 (Flour Dredge):
- One half cup (60 grams) all-purpose flour
- One teaspoon smoked paprika
- One half teaspoon garlic powder
- One quarter teaspoon onion powder
- Station 2 (Liquid Wash):
- Two large eggs
- Two tablespoons milk (any kind)
- Station 3 (Crisping Agent):
- Two cups (120 grams) Panko breadcrumbs
- One tablespoon olive oil or melted unsalted butter
For Cooking:
- Non-aerosol cooking spray (such as canola or avocado oil)

The Quick Reference Cook’s Guide
This is an overview of the fundamental process. Refer to the next section for critical execution details.
- Prepare the Chicken: Pat the chicken tenders completely dry using paper towels and season them evenly with salt and pepper.
- Set Up the Breading Stations: Arrange three shallow dishes or trays side-by-side: one for the flour mix, one for the egg wash, and one for the Panko mix.
- Combine Station Components: Whisk the ingredients for each station, ensuring the oil is thoroughly mixed into the Panko breadcrumbs.
- Execute the Triple Dredge: Working in batches, coat each tender first in flour, shaking off the excess, then dunk completely in the egg wash, allowing the extra to drip off, and finally, firmly press into the Panko mixture to coat fully.
- Preheat and Load: Preheat your air fryer to three hundred eighty-five Fahrenheit. Lightly mist the basket with cooking spray. Place the breaded tenders in the basket in a single layer, ensuring they do not touch.
- Initial Cook and Flip: Cook for five minutes, then open the basket, flip each tender, and lightly mist the top side with cooking spray.
- Complete the Cook: Continue cooking for another five to seven minutes, or until the internal temperature reaches one hundred sixty-five Fahrenheit and the crust is deeply golden brown.
- Rest and Serve: Remove the tenders and let them rest on a wire rack for three minutes before serving.

Deep Dive into Coating and Cooking Technique
The difference between a tender that is simply dry and warm and one that is explosively crunchy lies entirely in the details of the coating application and the air fryer environment.
Securing the Shell: The Importance of the Triple Dredge
The triple dredge system—flour, liquid, crumb—is non-negotiable for superior texture. The flour acts as a primer, creating a dry, starchy surface that helps the wet egg wash adhere uniformly. If the chicken is damp, the flour will clump, resulting in a patchy and uneven crust. Take the time to pat the chicken completely dry before seasoning.
When moving to the egg wash, let the excess liquid drip away for a moment. Too much liquid will turn the flour into a paste and prevent the final layer from sticking correctly.
The Panko step is where most home cooks fail. Panko breadcrumbs, due to their flaky structure, are inherently more crisp than standard fine breadcrumbs, but they require a binder to achieve true integrity. By mixing a small amount of olive oil or melted butter directly into the Panko, you are pre-coating the crumbs. This fat is essential because it is what allows the crumbs to “fry” and brown effectively in the air fryer’s convection current. When pressing the tender into the Panko, use firm pressure on all sides—you should feel the crumbs compacting around the meat, creating a resilient shell that won’t fall off during cooking.
Calibrating the Air Fryer Environment
The air fryer is fundamentally a high-powered convection oven operating in a small space. For maximal crispness, we must treat it as such.
The Preheat: Always preheat the air fryer to three hundred eighty-five Fahrenheit. A cold start leads to a slower crust development, which means the chicken interior is cooking for too long while the breading struggles to crisp. Preheating ensures the moment the tenders hit the basket, the exterior begins to rapidly dehydrate and brown.
The Spatial Arrangement: Overcrowding is the enemy of all things crispy. The air needs to circulate completely around each piece of chicken. If the tenders are touching, they steam rather than fry. Cook them in batches. If your air fryer basket is small, a batch might only be three to four pieces. This is a small sacrifice of time that yields a tremendous gain in quality.
The Mid-Cook Flip and Mist: After the initial five minutes, the bottom side of the tender, which was resting against the basket, needs two things: to be exposed to direct air circulation (the flip) and a fresh application of surface fat (the mist). Use non-aerosol cooking oil spray. The tiny droplets of oil accelerate browning and promote that deep golden color we are looking for. Avoid cheap aerosol sprays as their propellants can damage the non-stick coating on air fryer baskets over time.
Doneness Cues: Color is a great indicator, but internal temperature is the only guarantee of safety and optimal texture. At the ten to twelve minute mark, depending on the thickness, use an instant-read thermometer. Insert it into the thickest part of the largest tender. The ideal finished temperature is one hundred sixty-five Fahrenheit. Remove them promptly. Even one extra minute in the residual heat can begin to dry them out.
Achieving Maximum Crunch: Expert Wisdom
These are the specialized techniques honed through years of culinary practice, designed to push the crunch factor to its absolute limit while maintaining juicy integrity inside.
- The Double Panko Tactic: For a genuinely aggressive crunch, after the first Panko coating, lightly dunk the tender again into the egg wash (just a quick dip) and then back into the Panko. This creates a fortified, double-layered shell that dramatically increases surface area for crisping.
- Breadcrumb Toasting: If you are using standard fine breadcrumbs instead of Panko, toast them lightly in a dry skillet for three minutes before mixing in the oil. This gives them a head start on color and deepens the overall flavor profile of the crust.
- The Chilling Period: After coating all the tenders, place them on a wire rack over a sheet pan and refrigerate them for at least fifteen minutes. This chilling period allows the breading to “set” firmly against the chicken, reducing the chance of the coating sloughing off during the high-powered cooking process.
- Acidulated Brine (Optional but Recommended): To ensure maximum juiciness, soak the raw tenders in a solution of one half cup of buttermilk or a quarter cup of milk mixed with one tablespoon of white vinegar for thirty minutes before drying and seasoning. The mild acid gently tenderizes the meat structure.
- Use of Potato Starch in Dredge: For an even lighter, crispier crust, replace one quarter of the all-purpose flour in Station 1 with potato starch or cornstarch. These starches inhibit gluten development and produce a thinner, more delicate, and ultimately crisper exterior finish.
- Tender Size Uniformity: If you are cutting chicken breasts into strips, strive for pieces of roughly the same thickness. This ensures that every tender is cooked through at precisely the same time, preventing a few dry pieces from an otherwise perfect batch.
- Post-Cook Rest on a Rack: Never place the finished tenders on a flat plate lined with paper towels. The residual steam trapped underneath will soften the bottom crust almost instantly. Always use a wire cooling rack so air can circulate completely, preserving that pristine crunch.

Beyond the Basics: Flavor Pathways and Substitutions
Once you master the basic technique for Crispy Air Fryer Chicken Tenders, the real fun begins by experimenting with the flavor profile of the crust.
- Japanese Katsu Style: Replace the smoked paprika with one half teaspoon of finely ground ginger powder in the flour mix. Use Japanese-style Panko (which is larger and lighter). Serve with tonkatsu sauce and a side of shredded cabbage.
- Spicy Nashville Hot Inspired: Add one tablespoon of cayenne pepper to the flour dredge. After the tenders are finished cooking, brush them lightly with a mixture of two tablespoons of hot honey and one half teaspoon of additional cayenne dissolved in one tablespoon of melted butter.
- Herbed Parmesan Crust: Add one half cup of finely grated, dry Parmesan cheese and one tablespoon of dried Italian herbs (oregano, thyme, basil) to the Panko mix. Reduce the salt in the initial seasoning, as the Parmesan is already salty. This creates a savory, herbaceous crust.
- Gluten-Free Option: Substitute the all-purpose flour with a gluten-free all-purpose blend. Crucially, replace the Panko with crushed gluten-free corn flakes or a brand of certified gluten-free Panko. The principle of the triple dredge remains the same.
- Vegan Option (Tofu or Seitan): Use extra-firm tofu, pressed for at least one hour and sliced into strips, or use pre-made seitan strips. Replace the egg wash with a slurry of three tablespoons of chickpea flour mixed with four tablespoons of water. All other steps are identical.
Contextualizing the Meal: Serving Suggestions
These tenders are incredibly versatile and can anchor a variety of meals, moving beyond the simple “chicken fingers and fries” presentation.
- Gourmet Salad Topper: Slice the tenders thinly and place them atop a crisp Romaine salad tossed with a robust dressing like a homemade ranch, Caesar, or a bright lemon vinaigrette. The warmth and crunch offer a beautiful textural contrast to the cool, crisp greens.
- Deconstructed Chicken Sandwich: Serve two to three tenders piled high on a toasted brioche bun with a smear of spicy mayonnaise, some crisp pickles, and a thin slice of Swiss cheese. This bypasses the typical issue of soggy sandwich bread by concentrating the crunch.
- Chicken Tender Street Tacos: Shred the cooked tenders and use them as the protein base for soft corn tortillas. Top with a simple slaw made of red cabbage and lime juice, a sprinkle of cotija cheese, and a drizzle of chipotle crema.
- Classic Dinner Plate: Pair them with sophisticated sides like garlic-parmesan mashed potatoes and a simple sauté of asparagus or green beans. The richness of the sides balances the lean protein.
Culinary Inquiries: Clarifying Common Questions
Addressing common issues helps ensure every attempt at making Crispy Air Fryer Chicken Tenders is successful.
Why is my breading falling off during cooking?
The main culprit is usually moisture. Ensure the raw chicken is thoroughly patted dry before applying the flour. Additionally, you must use firm pressure when pressing the Panko onto the chicken, and chilling the coated tenders for fifteen minutes helps the crust set before it hits the hot air.
Can I use frozen tenders for this recipe?
This recipe is optimized for fresh or thawed chicken. If you must use frozen, they should be pre-cooked tenders, which can be reheated according to package directions, but you will not achieve the same quality of crust. If you attempt to bread raw, frozen tenders, the moisture released during thawing will ruin the breading.
What is the best way to reheat leftovers to keep them crunchy?
Do not use the microwave. The best method is to reheat them in the air fryer at three hundred fifty Fahrenheit for three to five minutes. Alternatively, a conventional oven set to three hundred seventy-five Fahrenheit for about seven minutes will also restore the texture perfectly.
Can I prepare the tenders ahead of time?
You can fully bread the tenders and store them raw in the refrigerator for up to twenty-four hours. Lay them in a single layer on a parchment-lined tray, cover loosely with plastic wrap, and cook them directly from the chilled state. This is an excellent way to prep meals in advance.
My air fryer smokes when I cook breaded items. What causes this?
Smoking is typically caused by oil drippings collecting in the bottom of the air fryer, which then burn. To prevent this, line the bottom of the air fryer pan (not the basket itself) with a small square of parchment paper or aluminum foil to catch excess crumbs and oil.
Nutritional Snapshot
| Nutrient | Amount per Serving |
| Calories | 315 kcal |
| Protein | 35 g |
| Carbs | 18 g |
| Fat | 11 g |
| Fiber | 2 g |
| Sugar | 1 g |
| Sodium | 550 mg |
Disclaimer on Estimates
Nutrition information is an estimate and may vary based on preparation and ingredients used.

Crispy Air Fryer Chicken Tenders
Ingredients
- 1.5 lbs chicken tenderloins (or boneless chicken breast cut into strips)
- 1 tsp kosher salt
- 0.5 tsp black pepper
- 0.5 cup all-purpose flour
- 1 tsp smoked paprika
- 0.5 tsp garlic powder
- 0.25 tsp onion powder
- 2 large eggs
- 2 tbsp milk (any kind)
- 2 cups Panko breadcrumbs
- 1 tbsp olive oil or melted unsalted butter
- as needed non-aerosol cooking spray
Instructions
- Pat chicken tenders dry with paper towels and season both sides with kosher salt and black pepper.
- Set up three stations: (1) flour mixed with paprika, garlic powder, and onion powder; (2) whisked eggs and milk; (3) Panko mixed with olive oil or butter.
- Dredge each tender in flour, shaking off excess. Dip in egg wash, letting excess drip off. Then press into Panko mix until fully coated.
- Preheat air fryer to 385°F. Lightly mist the basket with cooking spray. Arrange tenders in a single layer, not touching.
- Cook for 5 minutes. Flip tenders, spray tops with cooking spray, and cook an additional 5–7 minutes until golden and internal temp hits 165°F.
- Remove from air fryer and let rest on a wire rack for 3 minutes before serving.
Notes
Equipment
- air fryer
- Three shallow bowls or trays for dredging stations
- tongs
- wire cooling rack
- Instant-read thermometer
- paper towels


