

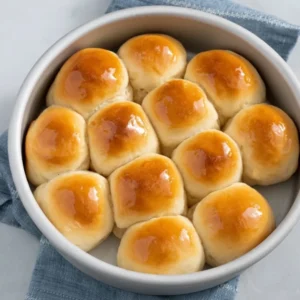
There is a certain comfort inherent in a perfectly baked roll—the way the crust yields to a gentle pressure, revealing an interior that is fluffy, tender, and slightly elastic. These Classic Dinner Rolls are the standard by which all others should be measured. They carry a whisper of sweetness to balance the richness of the butter, making them equally suited for mopping up gravy at a formal holiday gathering or accompanying a simple weeknight stew. Achieving this ideal texture is less about complicated technique and more about respecting the yeast and understanding the dough. This recipe delivers a reliably soft, golden-brown result, turning a necessary side dish into the undeniable star of the table.
Table of Contents
The Essential Components: What You Need
For the Dough:
- 4 cups (480 grams) All-Purpose Flour, plus more for dusting
- two thirds cup (160 milliliters) Whole Milk
- one quarter cup (60 milliliters) Water
- 1 packet (2 and one quarter teaspoons) Active Dry Yeast
- one third cup (70 grams) Granulated Sugar
- 1 teaspoon Fine Sea Salt
- one quarter cup (56 grams) Unsalted Butter, melted and cooled
- 1 large Egg, room temperature
For the Finish:
- 2 tablespoons Unsalted Butter, melted (for brushing)

The Method: Quick Guide to Rolling Success
- Activate the Yeast: Combine the milk, water, and a pinch of sugar in a saucepan and warm until lukewarm (about 105 to 115 Fahrenheit). Pour into a large bowl and whisk in the yeast. Let it stand until foamy, which should take five to ten minutes.
- Mix and Develop the Dough: In a separate bowl, whisk together the flour, remaining sugar, and salt. Add the melted butter and egg to the yeast mixture, followed by the dry ingredients. Mix until a shaggy mass forms.
- Knead: Turn the dough out onto a lightly floured surface and knead vigorously for eight to ten minutes until smooth, elastic, and slightly tacky. Place the dough ball in a lightly oiled bowl, turning to coat.
- First Rise (Bulk Fermentation): Cover the bowl and allow the dough to rise in a warm, draft-free place until it has doubled in size. This process usually requires sixty to ninety minutes, depending on the environment.
- Shape and Proof: Gently punch down the dough to release the air. Divide it into sixteen equal pieces and shape each piece into a tight, smooth ball. Arrange the rolls in a greased nine-by-thirteen-inch baking pan. Cover and let them undergo the second rise (proof) until they look puffy and nearly doubled, approximately thirty to forty-five minutes.
- Bake: Preheat your oven to three hundred seventy-five Fahrenheit. Bake the rolls for fifteen to eighteen minutes, or until the tops are deeply golden brown.
- Finish: Immediately brush the hot rolls with the melted butter for the finish and serve warm.

Achieving Excellence: Detailed Bread Making Notes
The Essential Milk and Water Temperature
The single most common error in yeast baking is using liquid that is too hot. When you warm the milk and water mixture—the yeast’s starter fluid—it must be warm enough to wake the yeast, but not so hot that it kills the culture. The ideal range is between one hundred five and one hundred fifteen Fahrenheit. If you don’t have an instant-read thermometer, aim for a temperature that feels slightly warmer than body temperature but is not uncomfortable to hold your finger in. If the mixture is too cold, the yeast will be sluggish; if it is too hot, the dough will never rise. After mixing the liquids and yeast, you should see a foamy layer, or “bloom,” form on the surface after a few minutes—this is your visual confirmation that the yeast is active and ready to work.
Mastering the Knead
The kneading process is critical because it develops the gluten structure, which gives the rolls their signature chewiness and helps them hold the air generated during proofing. When kneading, the dough will start as a sticky, rough mass. You must persist, pushing down and away, then folding it back toward you. Pay attention to the sensory cues: the dough transitions from shaggy to smoother, and finally becomes elastic and resilient. When pressed lightly with a finger, well-kneaded dough should spring back slowly. A slightly tacky surface is acceptable, but if it remains sticky, incorporate flour one tablespoon at a time until it cleans the counter. Avoid over-flouring, as this leads to dense, dry rolls.
The First Rise: A Lesson in Patience
The bulk fermentation (first rise) is where the true flavor development occurs. The yeast consumes the sugars and produces the carbon dioxide that makes the bread light. Place your oiled bowl in a consistently warm environment, such as a proofing drawer, inside a slightly warmed (and then turned off) oven, or near a radiator in the colder months. Do not rush this step. The goal isn’t just to see the volume double; it’s to develop complexity. When ready, the dough should pass the “poke test”: gently poke it with a floured finger; if the indentation remains, it’s done. If it springs back immediately, it needs more time.
Shaping for Uniformity
The secret to a beautiful, uniform pan of rolls is proper shaping. After punching down the dough to release the gas, divide the dough using a kitchen scale for precision—sixteen equal pieces should weigh roughly forty-five grams each. To shape a seamless roll, take one piece and flatten it slightly. Then, pinch the edges of the dough together and fold them underneath to create tension on the top surface. Roll the ball of dough briefly on a clean, unfloured counter using a cupped hand. This circular motion stretches the outer “skin” of the dough, ensuring a smooth, tight top that rises evenly and prevents blowouts during the bake.
The Visual Cue for Doneness
The baking stage is surprisingly quick, so constant monitoring is necessary. When you open the oven door at the fifteen-minute mark, the rolls should already possess a rich, medium-golden color across the tops. If they are still pale, bake for another two to three minutes. The final internal temperature should register around two hundred five Fahrenheit for a fully cooked roll with a tender crumb. However, the visual cue of deep golden-brown is often sufficient. The aroma—intensely sweet and bready—will also fill your kitchen just before they finish, signaling their readiness. Brushing with melted butter immediately out of the oven ensures a glossy, soft crust that practically melts in your mouth.
Troubleshooting the Dough: Tips for Bread Nirvana
- Use Bread Flour for Extra Structure: While all-purpose flour works perfectly for a soft roll, substituting fifty percent of the volume with bread flour will increase the protein content. This results in slightly more structured rolls with a more significant chew, which some diners prefer. Adjust the liquid slightly, as bread flour absorbs more moisture.
- Overnight Cold Proofing: For unparalleled flavor depth and convenience, transfer the shaped rolls (after the second rise, Step 5) into the refrigerator immediately. The cold temperature slows the yeast activity, allowing for a much longer, slow fermentation that develops complex, nutty flavors. Bake them straight from the refrigerator the next day, adding about five minutes to the total baking time.
- Steam for a Softer Crust: If your oven tends to dry out the rolls, place a shallow pan of hot water on the bottom rack during the last five minutes of preheating. The steam introduced at the start of the bake keeps the surface of the dough moist, delaying crust formation and promoting a higher, softer rise.
- The High-Altitude Adjustment: In high-altitude kitchens (above three thousand feet), dough tends to rise faster due to lower air pressure. Reduce the amount of yeast by ten percent and slightly increase the liquid (milk/water) content. Keep a close watch on the rise times, as both fermentation stages may be shortened significantly.
- Achieve a Shiny Finish: Instead of a post-bake butter brush, whisk one egg yolk with two teaspoons of milk and brush this mixture onto the rolls just before they go into the oven. This egg wash provides a deep, shiny, professional-looking golden-brown hue that is visually stunning.
- Avoid Drafts at All Costs: Yeast dough is highly sensitive to temperature fluctuations. A sudden blast of cold air, such as from an open window or A/C unit, can shock the yeast and cause the rise to fail or collapse prematurely. Always ensure both rises occur in a consistent, warm, and sealed environment.
Adapting the Recipe: Flavor Twists and Swaps
- Herbed Savory Rolls: Transform these sweet Classic Dinner Rolls into a savory counterpart by omitting the granulated sugar entirely. Incorporate three tablespoons of finely chopped fresh herbs like rosemary, thyme, or chives into the dough during the final stages of kneading. Brush with garlic-infused butter after baking.
- Dairy-Free Adaptation: Easily convert this recipe for those avoiding dairy. Swap the whole milk for an equal amount of full-fat oat milk or soy milk. Replace the unsalted butter with a high-quality vegan butter stick or refined coconut oil. The texture remains remarkably similar, though the flavor will carry a slightly nuttier note depending on the milk substitute used.
- Whole Grain Addition: For a denser, more fibrous roll, substitute up to one cup (one hundred twenty grams) of the all-purpose flour with white whole wheat flour. This requires a small adjustment to the hydration; expect to add an extra one to two tablespoons of liquid (water) to compensate for the whole wheat flour’s higher absorption rate. The rolls will be heartier and darker in color.
- Honey-Glazed: Replace the granulated sugar in the dough with one third cup of liquid honey. Honey adds a unique moisture and flavor that promotes tenderness. Be mindful that honey is sweeter than sugar, and the dough may brown faster, so monitor the oven closely during the bake.

Pairing Your Rolls: Presentation and Placement
A batch of warm, soft dinner rolls elevates any meal. They transition seamlessly from a casual weeknight side to the centerpiece of a holiday spread.
- Holiday Bread Basket: Serve immediately after the final butter brush in a warm cloth-lined basket alongside a compound butter. Consider whipping softened butter with a pinch of sea salt and honey, or folding in chopped sage and brown butter for a savory pairing ideal for Thanksgiving or Christmas.
- Simple Sandwich Sliders: Slice chilled rolls horizontally to create the perfect miniature bun for sliders. Fill them with shredded barbecue pork, slow-cooked beef, or even small patties of caramelized onions and goat cheese for a delightful appetizer or lunch offering.
- The Bread Pudding Foundation: Should you find yourself with day-old leftovers (an unlikely scenario!), these rolls transform beautifully into a rich, custard-soaked bread pudding base. Their slightly sweet profile is perfect for absorbing vanilla and cinnamon flavors.
Your Baking Questions Answered
Why did my rolls turn out dense and heavy, like biscuits?
A dense texture is almost always due to insufficient gluten development or a lack of rising time. Ensure you kneaded the dough for the full eight to ten minutes to build strength, and verify that your yeast is fresh. If using a stand mixer, ensure the dough wraps around the hook and pulls cleanly from the sides for the necessary development.
Can I make the dough entirely by hand without a stand mixer?
Yes, absolutely. Kneading by hand is a perfectly viable and traditional method. The time commitment will be similar, but you should knead until the dough is smooth and uniform, resisting the urge to add too much flour. The final texture should be firm but still pliable, not stiff or dry.
How do I store the leftovers to keep them soft?
Once completely cooled, store the rolls in an airtight container or a large resealable plastic bag at room temperature. They will retain their freshness and soft texture for up to three days. For longer storage, freeze them, wrapped tightly, for up to three months and reheat them in a low oven for optimal results.
My rolls came out pale instead of golden. What went wrong?
Pale rolls typically indicate insufficient oven heat or a rise that was too short. Double-check your oven temperature with a thermometer to ensure accuracy, as many home ovens run cool. Also, consider adding a quick egg wash before baking to promote superior browning and a richer color.
Can I freeze the shaped dough before baking?
You can certainly freeze the shaped rolls before the final proofing stage. Arrange the shaped balls on a sheet pan and freeze until solid. Transfer the frozen rolls to a freezer bag. When ready to bake, thaw them on a greased pan in the refrigerator overnight, then bring to room temperature and proof until doubled before baking as usual.
Nutritional Snapshot
| Nutrient | Amount per Serving |
| Calories | 175 kcal |
| Protein | 5 g |
| Carbs | 30 g |
| Fat | 4 g |
| Fiber | 1 g |
| Sugar | 5 g |
| Sodium | 180 mg |
Disclaimer
Nutrition information is an estimate and may vary based on preparation and ingredients used.
Crafting the Perfect Batch of Classic Dinner Rolls
Ingredients
- 4 cups All-Purpose Flour
- 2/3 cup Whole Milk
- 1/4 cup Water
- 1 packet Active Dry Yeast (2 1/4 teaspoons)
- 1/3 cup Granulated Sugar
- 1 tsp Fine Sea Salt
- 1/4 cup Unsalted Butter, melted and cooled
- 1 large Egg, room temperature
- 2 tbsp Unsalted Butter, melted (for brushing)
Instructions
- Combine the milk, water, and a pinch of sugar in a saucepan and warm until lukewarm (about 105 to 115 Fahrenheit). Pour into a large bowl and whisk in the yeast. Let it stand until foamy, which should take five to ten minutes.
- In a separate bowl, whisk together the flour, remaining sugar, and salt. Add the melted butter and egg to the yeast mixture, followed by the dry ingredients. Mix until a shaggy mass forms.
- Turn the dough out onto a lightly floured surface and knead vigorously for eight to ten minutes until smooth, elastic, and slightly tacky. Place the dough ball in a lightly oiled bowl, turning to coat.
- Cover the bowl and allow the dough to rise in a warm, draft-free place until it has doubled in size. This process usually requires sixty to ninety minutes, depending on the environment.
- Gently punch down the dough to release the air. Divide it into sixteen equal pieces and shape each piece into a tight, smooth ball. Arrange the rolls in a greased nine-by-thirteen-inch baking pan. Cover and let them undergo the second rise (proof) until they look puffy and nearly doubled, approximately thirty to forty-five minutes.
- Preheat your oven to three hundred seventy-five Fahrenheit. Bake the rolls for fifteen to eighteen minutes, or until the tops are deeply golden brown. Immediately brush the hot rolls with the melted butter for the finish and serve warm.
Notes
Equipment
- Large mixing bowls
- 9×13-inch baking pan Greased
- saucepan For warming milk mixture
- kitchen scale Optional, for precise roll size
- Whisk or electric mixer


