
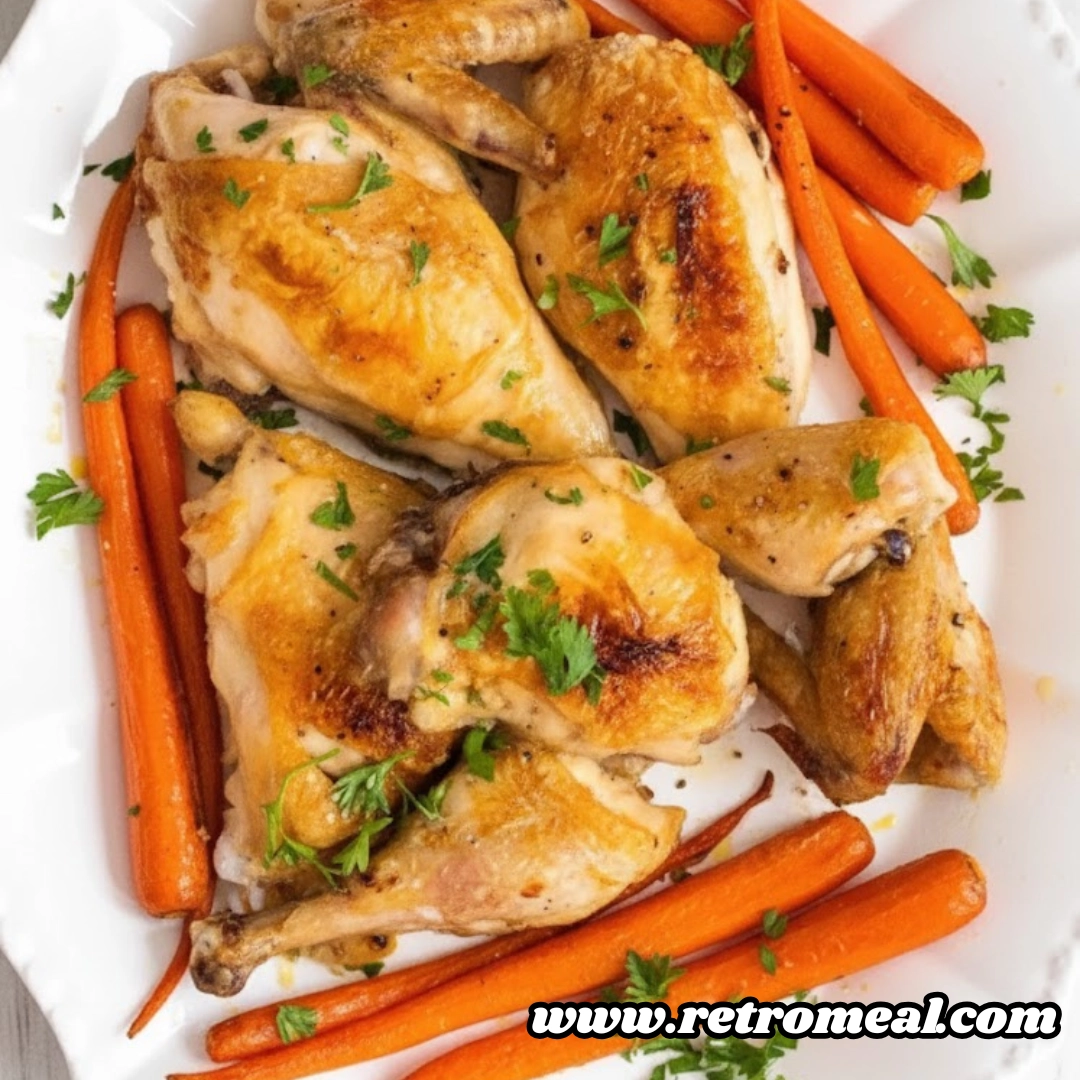
There is something deeply comforting about the aroma of a roasting chicken wafting through a home. It is a scent that signals warmth, hospitality, and a nourishing meal ahead. While many modern recipes lean on complex marinades or trendy gadgets, the true hallmark of a master home cook is the ability to produce a flawless Classic Baked Chicken using nothing more than high-quality poultry, good oil, and basic seasonings. This recipe is the gold standard for simplicity, focusing on technique rather than a long list of ingredients. By understanding how heat interacts with the meat and skin, you can transform a simple bird into a five-star masterpiece that remains juicy on the inside with a beautiful, salt-kissed exterior.
Whether you are preparing a Sunday feast for the family or looking for a reliable weeknight staple that requires minimal active prep time, this method is your ultimate solution. It is adaptable, forgiving, and consistently delivers a result that far surpasses store-bought rotisserie options. In the following sections, we will explore the nuances of selecting your cuts, the science of the initial high-heat sear, and the secrets to a rich, savory gravy made from the pan drippings.
Table of Contents
Essential Ingredients for Success
To create this timeless dish, you do not need an overflowing pantry. The beauty lies in the quality of these few components. Ensure your spices are fresh and your oil is of a high grade to allow the natural flavors of the poultry to shine through.
- 1 whole chicken, weighing between 3 to 4 pounds, professionally cut into 8 distinct parts: 2 breasts, 2 thighs, 2 legs, and 2 wings (ensure the back is excluded from the roasting pan but saved for your stock).
- Extra virgin olive oil, enough to generously coat the bird and the roasting vessel.
- Kosher salt, used liberally for both moisture retention and seasoning.
- Freshly ground black pepper, to provide a sharp, aromatic bite.
- 1/2 cup of low sodium chicken stock or a dry white wine, which is optional but highly recommended for deglazing the pan to create a luxurious gravy.

Masterful Roasting Instructions
- Preparation and Tempering: Begin by trimming any excess fat from your chicken pieces. Use a heavy-duty paper towel to pat every piece thoroughly dry; moisture is the enemy of a golden-brown crust. Sprinkle all sides of the chicken generously with kosher salt. Allow the meat to rest at room temperature for 15 to 20 minutes. This “takes the chill off” and ensures more even cooking throughout the bird.
- Setting the Stage: Position your oven rack in the center and preheat the oven to 400 degrees Fahrenheit (205 degrees Celsius).
- Seasoning and Arranging: Once again, pat the chicken pieces dry with a paper towel to remove any moisture drawn out by the salt. Rub extra virgin olive oil over every inch of the chicken and apply a light coating to the bottom of your roasting pan. Dust the pieces with freshly ground black pepper and an additional light sprinkle of salt. Place the chicken in the pan skin-side up. Arrange the largest pieces—the breasts—in the center where the heat is most consistent, ensuring there is plenty of space between each piece for air circulation.
- The Initial Roast: Slide the pan into the oven and bake uncovered for 30 minutes at 400 degrees Fahrenheit (205 degrees Celsius). This high-heat phase is critical for rendering the fat and beginning the browning process.
- The Gentle Finish: Lower the oven temperature to 350 degrees Fahrenheit (175 degrees Celsius). Continue baking for another 10 to 30 minutes. You are looking for the juices to run clear when the meat is pierced with a knife. For precision, use a meat thermometer: the breasts should reach an internal temperature of 165 degrees Fahrenheit (74 degrees Celsius), while the darker meat of the thighs should reach 170 degrees Fahrenheit (77 degrees Celsius). If the skin isn’t as brown as you’d like, you may toggle the broiler on for the final 5 minutes.
- The Rest Period: Transfer the roasted chicken to a warm serving platter. Tent it loosely with aluminum foil and let it rest for 5 to 10 minutes. This allows the juices to redistribute, ensuring every bite is moist.
- Crafting the Gravy: Place your roasting pan directly on the stovetop over medium heat. Use a metal spatula to scrape up the browned bits (fond) from the bottom. Pour in your white wine or chicken stock. Once the liquid has loosened the drippings, transfer the mixture to a small saucepan. Simmer on medium-high until it reduces to your preferred consistency. For a thicker gravy, whisk in a slurry made of 1 teaspoon of cornstarch or flour mixed with 1/4 cup of water.

Achieving the Ultimate Golden Skin and Juicy Texture
The secret to why this recipe is consistently rated five stars lies in the dual-temperature cooking method. By starting the oven at 400 degrees Fahrenheit, we mimic the effects of a sear. This high temperature immediately begins to render the subcutaneous fat under the chicken skin. As that fat melts, it essentially fries the skin from the inside out, creating that coveted parchment-like crispness. If you were to cook the chicken at a lower temperature the entire time, the skin would often end up rubbery or tough.
Furthermore, keeping the skin on is non-negotiable for quality. Even if you are calorie-conscious and prefer not to eat the skin, it serves as a natural protective barrier during the roasting process. It self-bastes the meat, locking in the natural juices and preventing the white meat of the breast from becoming stringy or dry. Think of the skin as a biological “cooking bag” that holds all the flavor and moisture exactly where it belongs.
A Deep Dive into Culinary Science and Prep
When we discuss “taking the chill off” the meat, we are referring to the process of tempering. If you take a piece of chicken directly from a 38-degree Fahrenheit refrigerator and drop it into a 400-degree Fahrenheit oven, the exterior will overcook and dry out before the center ever reaches a safe temperature. By letting it sit for 20 minutes, you narrow that temperature gap, resulting in a much more uniform cook.
Another technical detail often overlooked is the “crowding” of the roasting pan. When chicken pieces are packed too tightly together, they begin to steam rather than roast. The moisture escaping from one piece gets trapped against the neighboring piece, leading to pale, soggy skin. By ensuring at least an inch of space between each leg, thigh, and breast, you allow the hot air to move freely, which is essential for the Maillard reaction—the chemical reaction between amino acids and reducing sugars that gives browned food its distinctive flavor.
Creative Customizations and Flavor Profiles
While salt and pepper are the foundation of this dish, this recipe serves as a blank canvas for your culinary creativity. If you want to lean into an herb-forward profile, you can create a compound oil. Mix your olive oil with a quarter cup of finely chopped fresh herbs such as rosemary, thyme, and tarragon. Rubbing this mixture under the skin as well as on top will infuse the meat with deep, earthy notes.
For those who enjoy a bit of global flair, consider incorporating dry spice blends. A dusting of smoked paprika can add a beautiful mahogany color and a hint of woodsy flavor. Alternatively, using a blend like dukkah or garam masala can transform this American classic into a fragrant, exotic meal. If you prefer aromatics, tucking thin slices of garlic or lemon zest under the skin before the chicken enters the oven will provide a bright, zesty contrast to the rich fat of the poultry.
Ideal Sides and Serving Suggestions
This chicken is incredibly versatile, making it the perfect centerpiece for a wide array of side dishes. For a traditional approach, serve it alongside a heap of fluffy mashed potatoes or steamed white rice, both of which act as a perfect vessel for the homemade gravy. If you want to follow the tradition of the recipe’s heritage, a side of Spanish rice and a dollop of sweet mango chutney provides a vibrant, acidic balance to the savory chicken.
For a lighter, more modern pairing, a crisp garden salad with a sharp vinaigrette helps cut through the richness of the roasted skin. Steamed broccoli or roasted root vegetables—like carrots and parsnips—can be cooked in the oven at the same time, making for an efficient and cohesive meal. If you want to follow the lead of seasoned home cooks, you can even toss potato chunks directly into the roasting pan; they will fry in the rendered chicken fat, becoming incredibly flavorful and crispy.
Making the Most of Your Leftovers
One of the greatest benefits of this recipe is the potential for future meals. Leftover baked chicken can be stored in an airtight container in the refrigerator for 3 to 5 days. It also freezes exceptionally well for up to six months, though for the best texture, aim to consume it within three months.
When it comes to reheating, avoid the microwave if you want to maintain the integrity of the skin. Instead, place the chicken on a wire rack over a baking sheet and heat it in a 400-degree Fahrenheit oven for about 15 minutes. This allows the air to circulate and re-crisp the exterior. If you are in a rush, an air fryer at 320 degrees Fahrenheit for 10 minutes will also do a fantastic job. Of course, if you are using the chicken for a cold preparation like a chicken salad or a sandwich, simply shred the meat while it is cold and discard the skin.
Expert Solutions for Common Roasting Questions
Can I use this method for boneless chicken pieces?
While you certainly can, you will need to significantly reduce the cooking time. Boneless, skinless breasts cook much faster and are prone to drying out. For the best results with this specific high-to-low heat method, bone-in, skin-on pieces are highly recommended as they provide the structural integrity needed to withstand the roasting process.
What should I do if my gravy is too salty?
If your pan drippings are overly salty, avoid adding more salt to your stock or wine. You can balance the saltiness by adding a splash of heavy cream or a teaspoon of unsalted butter at the end of the reduction process. Another trick is to add a squeeze of lemon juice; the acidity helps mask the perception of excess salt.
Is it safe to roast different parts of the chicken together?
Yes, but you must monitor them. Because breasts are leaner, they often cook faster than thighs and legs. This is why we place the breasts in the center of the pan where they are slightly more insulated and use a meat thermometer to pull pieces out as they reach their respective safe temperatures if necessary.
Nutrient Profile and Dietary Information
This classic preparation is naturally low in carbohydrates and high in bioavailable protein, making it an excellent choice for a variety of nutritional plans.
| Nutrient | Amount Per Serving |
| Calories | 436 |
| Total Fat | 27 grams |
| Saturated Fat | 7 grams |
| Cholesterol | 152 milligrams |
| Sodium | 767 milligrams |
| Total Carbohydrates | 0 grams |
| Dietary Fiber | 0 grams |
| Protein | 46 grams |
| Potassium | 386 milligrams |
Important Nutritional Disclaimer
The nutritional values provided are estimates based on standard ingredient databases. These figures may vary depending on the specific brand of ingredients used and the exact size of the chicken parts. This information is intended for educational purposes and should not replace professional medical advice.
Why This Will Become Your New Favorite Meal
In a world of complicated recipes and fleeting food trends, the Classic Baked Chicken remains a steadfast favorite for a reason. It relies on the fundamental principles of good cooking: high-quality ingredients, proper temperature control, and patience. By mastering this recipe, you aren’t just making dinner; you are learning the essential skills of moisture management and flavor extraction that apply to all areas of the culinary arts. The result is a dish that feels elegant enough for guests but is simple enough for a tired Tuesday night. Once you taste the difference that proper drying and temperature shifting makes, you will never go back to basic roasting again.

Classic Baked Chicken
Ingredients
- 1 3 to 4 pound chicken, cut into 8 parts (breasts, thighs, legs, wings), back excluded
- 2 tbsp extra virgin olive oil (approximate)
- 1 tsp kosher salt (plus more to taste)
- 0.5 tsp freshly ground black pepper
- 0.5 cup low sodium chicken stock or white wine (for optional gravy)
Instructions
- Trim excess fat from chicken pieces. Pat thoroughly dry with paper towels. Sprinkle all sides with salt and let sit for 15 to 20 minutes to take the chill off.
- Preheat your oven to 400 degrees Fahrenheit (205 degrees Celsius).
- Pat the chicken dry again. Rub olive oil over the chicken and the bottom of the roasting pan. Season with black pepper and a bit more salt.
- Arrange chicken in the pan skin-side up with breasts in the center. Ensure space between pieces for air circulation.
- Bake uncovered at 400 degrees Fahrenheit for 30 minutes to brown the skin.
- Lower heat to 350 degrees Fahrenheit. Bake for 10–30 more minutes until juices run clear and internal temp is 165 for breasts/170 for thighs.
- Transfer chicken to a dish, tent with foil, and let rest for 5 to 10 minutes.
- Deglaze roasting pan with stock or wine over medium heat. Reduce until thickened for a simple gravy.
Notes
Equipment
- roasting pan or large baking dish
- Instant-read meat thermometer
- paper towels
- aluminum foil
- Metal spatula


