

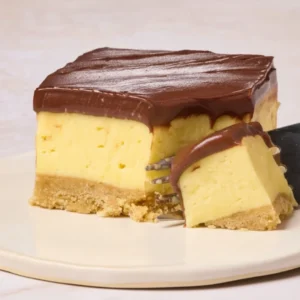
There is something undeniably nostalgic about the flavor profile of a classic Boston Cream Pie. The combination of airy sponge cake, velvety pastry cream, and that signature glossy chocolate glaze is a hallmark of American dessert tradition. However, making a traditional cake from scratch can be a labor-intensive process involving temperamental custards and delicate sponges. Enter the No-Bake Boston Cream Pie Bars. This recipe takes all those sophisticated elements and reimagines them into a portable, sliceable, and remarkably easy format that requires absolutely zero oven time. By utilizing a few clever shortcuts and high-quality dairy, you can achieve a gourmet result that tastes like it came from a high-end bakery, all while keeping your kitchen cool.
Table of Contents
Ingredients for Your No-Bake Masterpiece
To create these decadent layers, you will need a handful of specific ingredients. These items work in harmony to provide the structural integrity needed for a bar dessert while maintaining the creamy mouthfeel of the original cake.
For the Crust and Custard Layers
- Cooking spray (for pan preparation)
- 6 ounces vanilla wafer cookies, such as Nilla Wafer (approximately 50 cookies)
- 2 tablespoons granulated sugar
- 6 tablespoons unsalted butter, melted
- 2 (3.4-ounce) boxes vanilla instant pudding mix
- 2 1/2 cups cold heavy cream
For the Ganache
- 6 ounces chopped semi-sweet chocolate, or 1 cup semi-sweet chocolate chips
- 2/3 cup cold heavy cream

Master Instructions for Assembly
Follow these precise steps to ensure your bars set up perfectly and look as beautiful as they taste.
- Prepare the Foundation: Line an 8×8-inch square baking pan with parchment paper. Ensure you leave an overhang on two opposite sides to create a “sling” for easy removal later. Lightly coat the pan and the parchment with cooking spray.
- Construct the Cookie Crust: Place 6 ounces of vanilla wafer cookies and 2 tablespoons of granulated sugar into a food processor. Process for about 20 seconds until fine crumbs form. Drizzle in 6 tablespoons of melted unsalted butter and pulse about 5 times until the mixture looks like wet sand.
- Press and Freeze: Transfer the crumbs to the prepared pan. Press firmly into an even layer using your hands or the bottom of a flat measuring cup. Place the pan in the freezer for 15 minutes to firm up.
- Whisk the Filling: In a large bowl, combine 2 (3.4-ounce) boxes of vanilla instant pudding mix with 2 1/2 cups of cold heavy cream. Whisk until the mixture is smooth and very thick.
- Layer and Chill: Spread the pudding mixture evenly over the frozen crust. Place the pan in the refrigerator for at least 10 minutes.
- Simmer the Ganache: Place 6 ounces of chopped semi-sweet chocolate in a medium heat-proof bowl. In a small saucepan, bring 2/3 cup of heavy cream to a full simmer over medium heat.
- Melt and Smooth: Pour the hot cream over the chocolate and let it sit undisturbed for 1 minute. Whisk until the chocolate is fully melted and the ganache is glossy.
- Final Topping: Let the ganache cool for 3 minutes for a smooth finish, or 5 minutes if you want to create texture. Pour it over the custard layer.
- Set and Serve: Refrigerate the bars for at least 2 hours. Use the parchment sling to lift the bars out, place on a cutting board, and slice into 12 or 16 pieces.

Achieving the Ultimate Creamy Consistency
The secret to why these No-Bake Boston Cream Pie Bars work so well lies in the manipulation of the pudding layer. Traditional instant pudding recipes call for milk, which results in a soft, spoonable texture. However, by substituting the milk with heavy cream and reducing the total liquid volume, you create a stable, mousse-like custard that can support its own weight when sliced.
When whisking the heavy cream and pudding mix, you will notice it thickens almost instantly. It is vital to continue whisking until no lumps of dry powder remain. Because this layer is so dense, it mimics the mouthfeel of a cooked pastry cream (crème pâtissière) without the risk of curdling eggs on a stove. To ensure the best “snap” in your chocolate topping, make sure your heavy cream for the ganache reaches a true simmer—look for small bubbles breaking the surface around the edges of the pan—before pouring it over your chocolate.
Step-by-Step Culinary Details
The Importance of the Crust Texture
When you are processing your vanilla wafers, aim for a texture that resembles coarse flour. If the crumbs are too large, the crust will crumble when you try to lift the bars out of the pan. The addition of granulated sugar here isn’t just for sweetness; the sugar crystals provide a bit of extra structural “grip” once the melted butter cools and solidifies. Pressing the crust down firmly is the most important part of this step. If you have a flat-bottomed glass or a measuring cup, use it to apply even pressure across the entire surface, especially into the corners.
Managing the Ganache Temperature
The ganache is the crowning glory of this dessert. Working with chocolate can be intimidating, but the 1-minute resting period is your best friend. This allows the heat of the cream to penetrate the center of the chocolate pieces before you start stirring. If you stir too early, you lower the temperature of the cream too quickly, and you may end up with tiny un-melted flecks of chocolate. For those who love a professional aesthetic, wait the full 5 minutes before pouring. This allows the ganache to reach a “ribbon” consistency where it stays where you put it, allowing you to use the back of a spoon to create beautiful, bakery-style “swoops” and swirls.
Unique Culinary Insights
To elevate these bars from a simple home snack to a dinner-party-worthy dessert, consider the quality of your chocolate. Since there are only six ingredients in this recipe, each one has a major impact on the final flavor profile. Using a semi-sweet chocolate with at least 60 percent cocoa solids will provide a sophisticated bitterness that balances the sweetness of the vanilla pudding and the wafer crust.
Another professional tip involves the slicing process. Because the custard is so rich and the ganache is soft, the layers can easily smear. To get those perfectly clean, sharp edges seen in food photography, use a long, thin-bladed knife. Dip the knife in a tall container of very hot water, wipe it completely dry with a clean towel, and then make one firm downward cut. Repeat the dipping and drying process for every single slice. This “hot knife” method melts the chocolate and custard just enough to slide through without dragging the top layer into the bottom layer.
Modifications and Creative Substitutions
While the classic vanilla and chocolate combination is hard to beat, this recipe is a fantastic canvas for experimentation. If you find yourself without vanilla wafers, graham crackers or even shortbread cookies make an excellent substitute for the base. If using graham crackers, you may want to add an extra tablespoon of melted butter, as they tend to be slightly drier than wafer cookies.
For a flavor twist, you can experiment with the type of pudding used. A white chocolate pudding or even a banana cream pudding can provide a fun variation on the theme. If you prefer a darker, more intense topping, substitute the semi-sweet chocolate with bittersweet chocolate. If you are serving this for a special occasion, a tiny pinch of flaky sea salt sprinkled over the ganache before it sets can highlight the richness of the chocolate and cut through the sweetness of the vanilla layers.
Ideal Accompaniments and Serving Suggestions
These bars are incredibly rich, so they pair best with items that offer a bit of acidity or brightness. A side of fresh raspberries or sliced strawberries provides a tart contrast to the heavy cream and chocolate. If you are serving these as part of a larger dessert spread, they look beautiful when placed in individual paper cupcake liners, making them easy for guests to grab at a buffet or backyard BBQ.
Regarding beverages, a strong cup of black coffee or a shot of espresso is the traditional partner for anything “Boston Cream.” The bitterness of the coffee cleanses the palate between bites of the dense custard. For a cold option, a tall glass of cold milk is the ultimate nostalgic pairing. If you’re looking for something more “adult,” a glass of tawny port or a nutty sherry complements the vanilla and butter notes of the crust beautifully.
Deep-Dive Frequently Asked Questions
Why did my ganache turn out grainy or separated?
A grainy ganache usually happens if the cream was too hot (boiling too vigorously) or if it was stirred too aggressively. When cream is too hot, it can “break” the fat in the chocolate. If this happens, you can sometimes fix it by whisking in a teaspoon of room-temperature heavy cream at a time until it smooths out. Always remember to let the cream and chocolate sit for that full minute before you begin the whisking process.
Can I use milk instead of heavy cream for the pudding layer?
In this specific bar recipe, using milk is not recommended. The heavy cream is what provides the structural stability that allows these to be cut into bars. If you use milk, the pudding will be too soft and will likely spill out from the sides when you try to slice it. The fat content in the heavy cream is what allows the “no-bake” aspect to work so effectively as a stand-alone dessert.
How do I prevent the crust from sticking to the parchment paper?
While parchment paper is generally non-stick, the sugar and butter in the crust can sometimes create a bond as they chill. Lightly coating the parchment with cooking spray before pressing the crumbs in acts as a secondary insurance policy. Additionally, making sure the bars are fully chilled (at least two hours) before lifting them out of the pan will ensure the crust has hardened enough to pull away cleanly.
Can I make these bars several days in advance?
Yes, these bars are an excellent make-ahead dessert. You can prepare them up to 48 hours in advance and keep them in the refrigerator. However, for the best texture, it is recommended to add the ganache topping at least 4 hours before serving but no more than 24 hours, as the chocolate can sometimes lose its glossy sheen if it sits in the fridge for too long.
Storage and Shelf Life
To maintain the integrity of the layers, these bars must be kept refrigerated until the moment of serving. Store any leftovers in an airtight container to prevent the pudding from absorbing any odors from the fridge. When stored properly, the bars will remain delicious for up to 3 days. It is not recommended to freeze the finished bars, as the texture of the pudding and ganache can change upon thawing, potentially becoming watery or losing their smooth consistency.
Nutritional Information
| Nutrient | Amount Per Serving (Based on 16 Bars) |
| Calories | 320 |
| Total Fat | 22 grams |
| Saturated Fat | 14 grams |
| Cholesterol | 55 milligrams |
| Sodium | 210 milligrams |
| Total Carbohydrates | 28 grams |
| Dietary Fiber | 1 gram |
| Sugars | 19 grams |
| Protein | 3 grams |
Disclaimer
Nutritional values are estimates based on standard ingredient data. Actual nutritional content may vary depending on the specific brands of cookies, pudding mix, and chocolate used in preparation.
No-Bake Boston Cream Pie Bars
Ingredients
- 6 ounces vanilla wafer cookies (about 50 cookies)
- 2 tbsp granulated sugar
- 6 tbsp unsalted butter, melted
- 2 boxes 3.4-ounce vanilla instant pudding mix
- 2.5 cups cold heavy cream (for custard)
- 6 ounces semi-sweet chocolate, chopped (or 1 cup chips)
- 0.66 cup heavy cream (for ganache)
- Cooking spray for pan
Instructions
- Line an 8×8-inch square baking pan with parchment paper, leaving an overhang on two opposite sides. Lightly coat with cooking spray.
- Process vanilla wafers and sugar in a food processor until fine crumbs form. Pulse in melted butter until evenly moistened.
- Press the crumb mixture firmly into the bottom of the pan. Freeze for 15 minutes to set.
- Whisk instant pudding mix and 2.5 cups cold heavy cream in a large bowl until smooth and very thick. Spread over the crust.
- Refrigerate the pan for at least 10 minutes while you begin preparing the chocolate topping.
- Bring 2/3 cup heavy cream to a simmer. Pour over chopped chocolate in a heat-proof bowl; let sit 1 minute, then whisk until smooth.
- Pour ganache over the custard layer. Smooth with a spoon or create swooping patterns as desired.
- Refrigerate until fully set, at least 2 hours. Lift out using parchment paper and slice into 12 or 16 bars.
Notes
Equipment
- 8×8-inch square baking pan
- food processor
- parchment paper
- mixing bowls
- whisk
- small saucepan


